How to Enable Windows 11 RGB Control
Even if you haven’t built a gaming PC with abundant RGB, chances are that at least one of your peripherals has some degree of RGB implementation. To make full use of all the RGB components in a build, users currently need to mess around with at least one additional piece of software, either from one of the device manufacturers or a dedicated third-party software that can sync all their RGB components. But a Windows 11 experimental feature could soon make these programs obsolete. This tutorial shows you how to test and try this RGB control feature before it even appears in the OS.
How to Add RGB Control Need on Windows
As things stand, many PC users own components and peripherals from multiple manufacturers: motherboards from Gigabyte, RAM from Corsair, GPUs from MSI, mice from Razer, and so on. As a result, they end up installing RGB customization programs from each of these manufacturers. With too many programs to manage, a single software that can do it all sounds much better.
Fortunately, Microsoft has recently added a new experimental feature to one of their Windows preview builds that aims to replace all additional RGB software. The Lighting option was added under “Settings -> Personalization” as part of the Windows Insider Program. To test this lighting feature, you’ll need to enroll in the program and update your Windows version to the latest preview build.
Update Windows 11 to the Latest Insider Build
To enroll in the Windows Insider Program, follow the steps below:
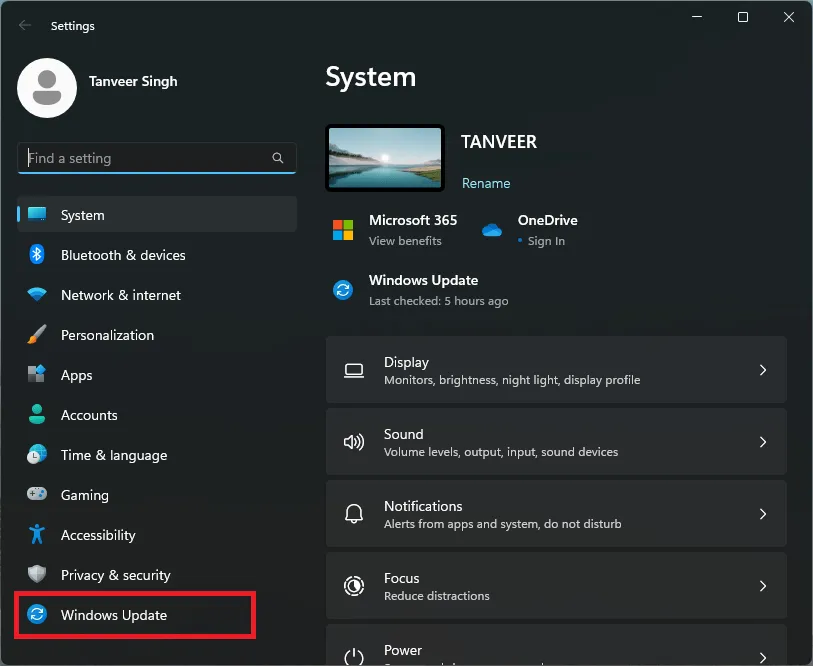
- Press Win +I to open the Settings app and select “Windows Update” from the options on the left.
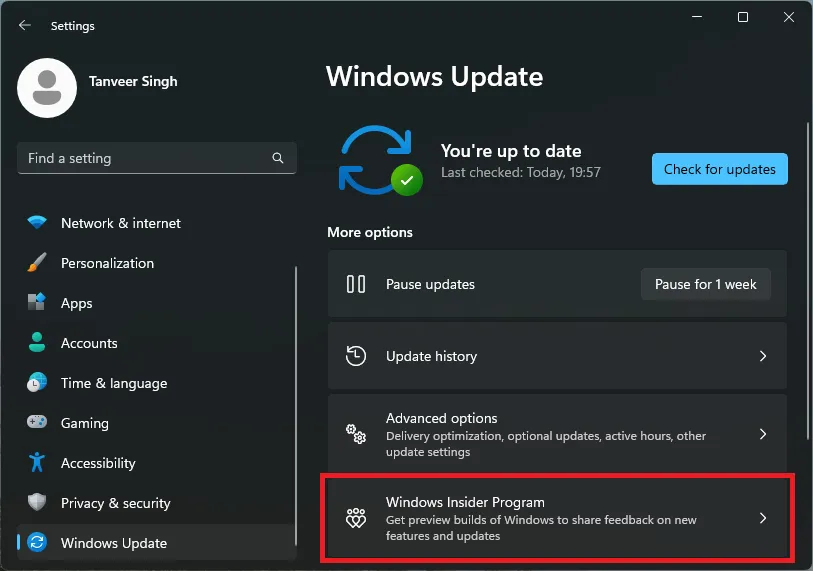
- Click “Windows Insider Program” to initiate the enrolling process. You’ll need to select a Microsoft account to enroll and a channel. Select the “Dev” or “Canary” channel to proceed.
- Once you’ve enrolled in the program, come back to the Windows Update screen to see the latest preview builds shown as available updates. Download and install the latest preview build and restart your computer.
Enable Lighting Control Using ViVeTool
ViVeTool is an open-source tool that allows you to enable experimental features that ship as part of Windows preview builds. It’s available as both a command-line tool and a GUI version. Follow the steps below to download, install, and use ViVeTool to enable the hidden RGB lighting control feature on Windows:
- Download ViVeTool from the GitHub download page.
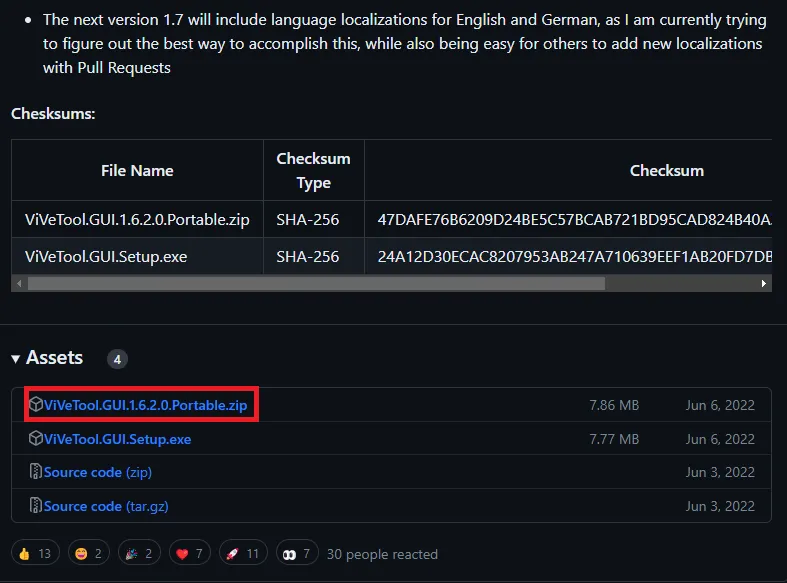
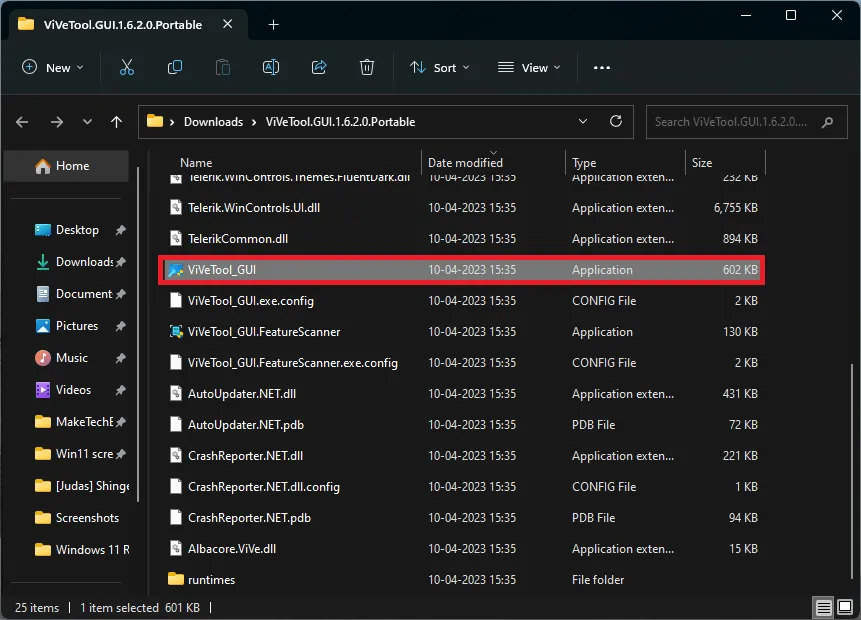
- Extract the files to any location of your choice and run the ViVeTool_GUI application from the extracted files.
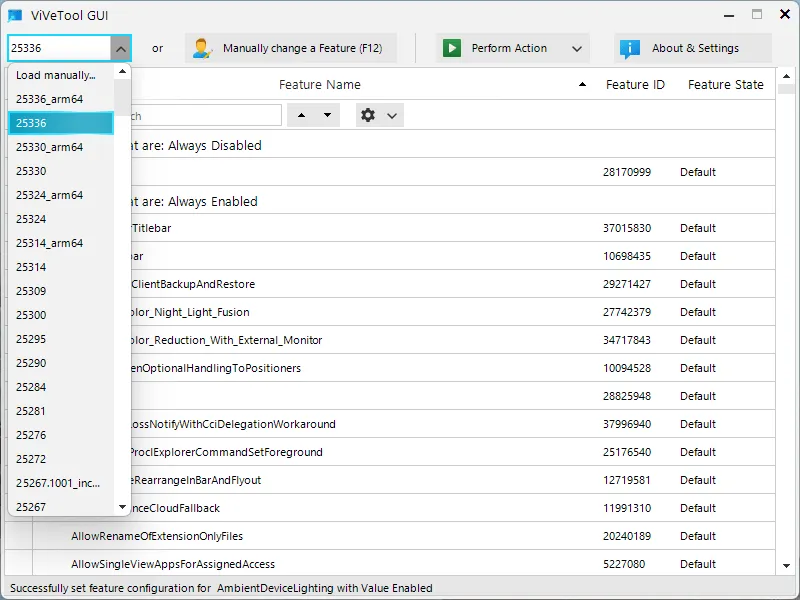
- Select your build number from the drop-down menu on the top left. You can find your build number by accessing “Settings -> System -> About.” The build number will be listed next to “OS build” under “Windows specifications.”
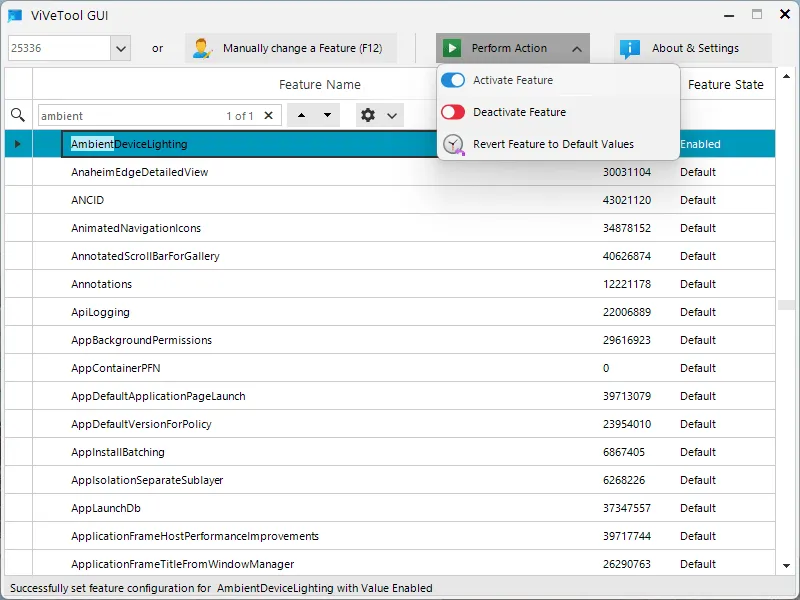
- After selecting your build number in ViVeTool, the window will be populated with all the available features for your build. In the search box, type “ambient” to find the AmbientDeviceLighting feature.
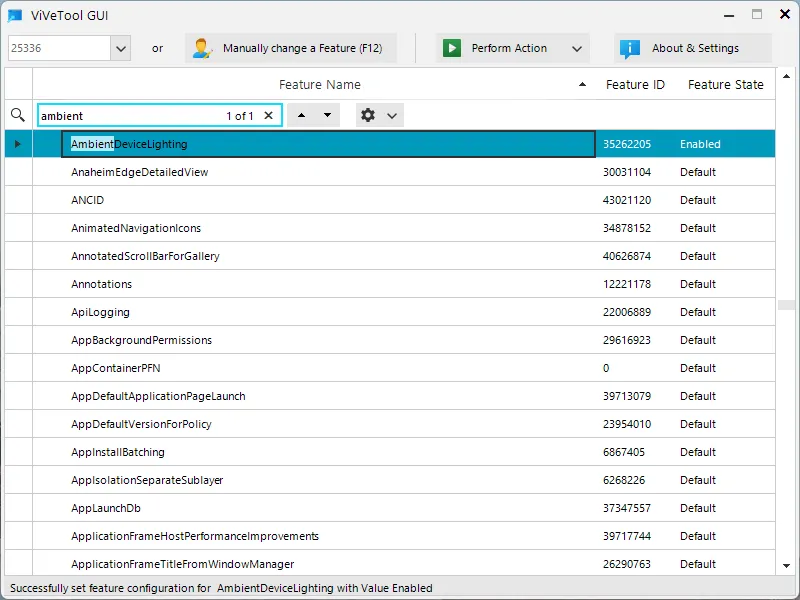
- Select “AmbientDeviceLighting” and click “Perform Action -> Activate Feature” to enable the lighting control feature in the Windows Settings app.
Customize RGB Lighting via Settings
Once you’ve enabled the Lighting setting, you can access it in the Settings app. Follow the steps below to customize your RGB lighting using this feature:
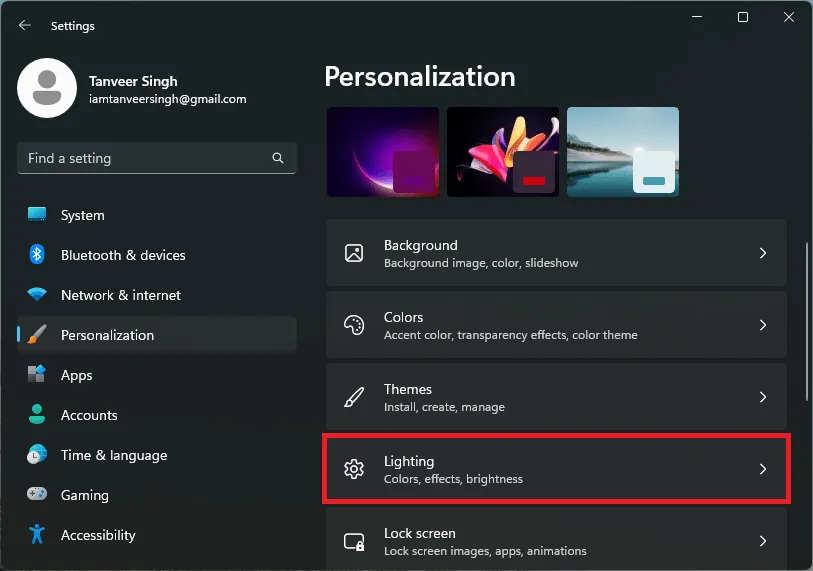
- Press Win + I to open the Settings app. Select “Personalization -> Lighting.”
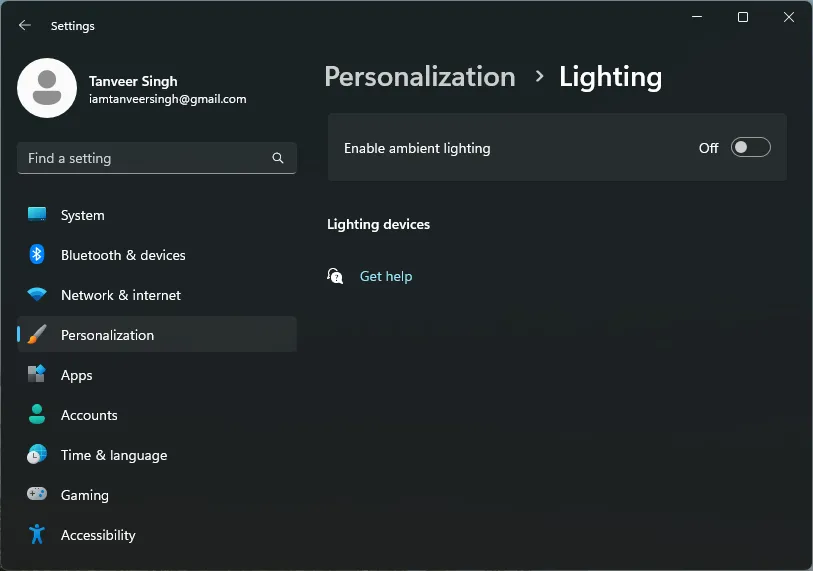
- Toggle “Enable ambient lighting” to turn it on. All of your supported devices will show up, and you can customize lighting effects for each of them. Windows also allows you to sync other RGB lighting to your Windows accent color.
Frequently Asked Questions
What’s the Windows Insider Program?
The Windows Insider Program is Microsoft’s way of offering new and unreleased Windows features to curious users willing to try them before anyone else. As these preview builds are equipped with untested features, stability is often compromised. Users who are willing to accommodate some performance issues can enroll in this program and get access to new features before the general public.
Is ViVeTool safe to use?
How do I know if my motherboard has RGB?
Using RGB lighting on your PC requires the proper RGB or ARG headers on your motherboard. Any mid-range to high-end motherboard released in the past five years is sure to have ARGB headers that allow you to directly connect your addressable RGB components to your motherboard.
Motherboards older than that may or may not have ARG headers, but you’re likely to find at least RGB headers on them. RGB headers limit the customization to only a few predefined colors and effects and do not allow you to implement custom colors and patterns. If you’re shopping for a new motherboard, check out the best 2023 gaming motherboards from Intel.
Image credit: Unsplash. All screenshots by Tanveer Singh.
- Tweet




Leave a Reply