3 Ways to Upload an Image to Midjourney [Step-by-step Guide]
![3 Ways to Upload an Image to Midjourney [Step-by-step Guide]](https://cdn.thewindowsclub.blog/wp-content/uploads/2023/04/how-to-upload-images-to-midjourney-fi-640x375.webp)
Midjourney is an image-generating AI that can be accessed using its dedicated Discord server. Midjourney can generate images based on text prompts and even allows you to upscale generated images so you can download and use them easily. If you’ve recently started using Midjourney, then you might have noticed other users uploading their own images to the server. But why do this, and how can you upload your own images? Let’s find out!
How to upload an image to Midjourney to use with the /imagine command
Use the steps below to help you upload and use images with the /imagine command. You can upload and use your images directly from Discord or use a third-party website to upload your images. Let’s get started.
Method 1: Using Discord
If you wish to upload images to Discord and use them directly, then follow one of the relevant sections below, depending on the device you’re currently using.
On PC
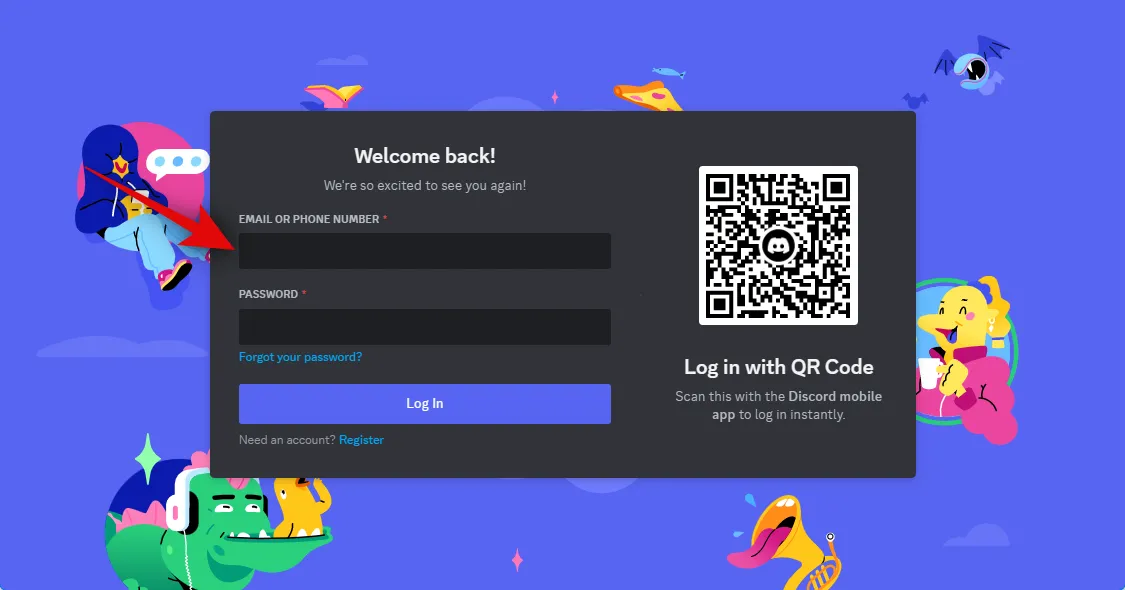
Open Discord on your PC. You can use the dedicated desktop app or the web version of Discord in your browser. Log into your account to access the Midjourney server.
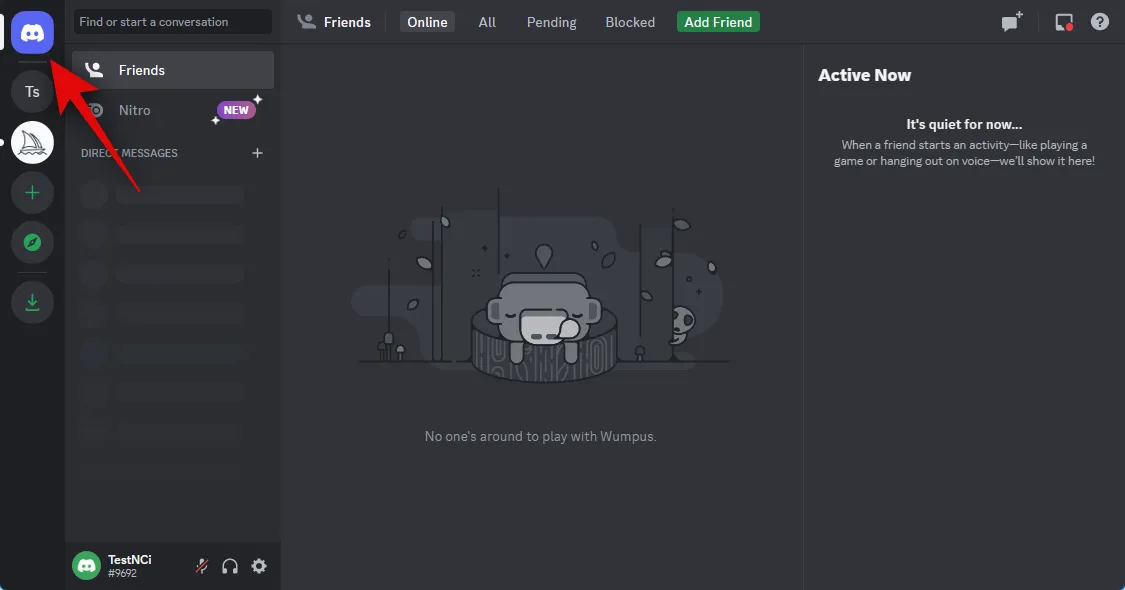
Click the direct message icon in the top left corner.
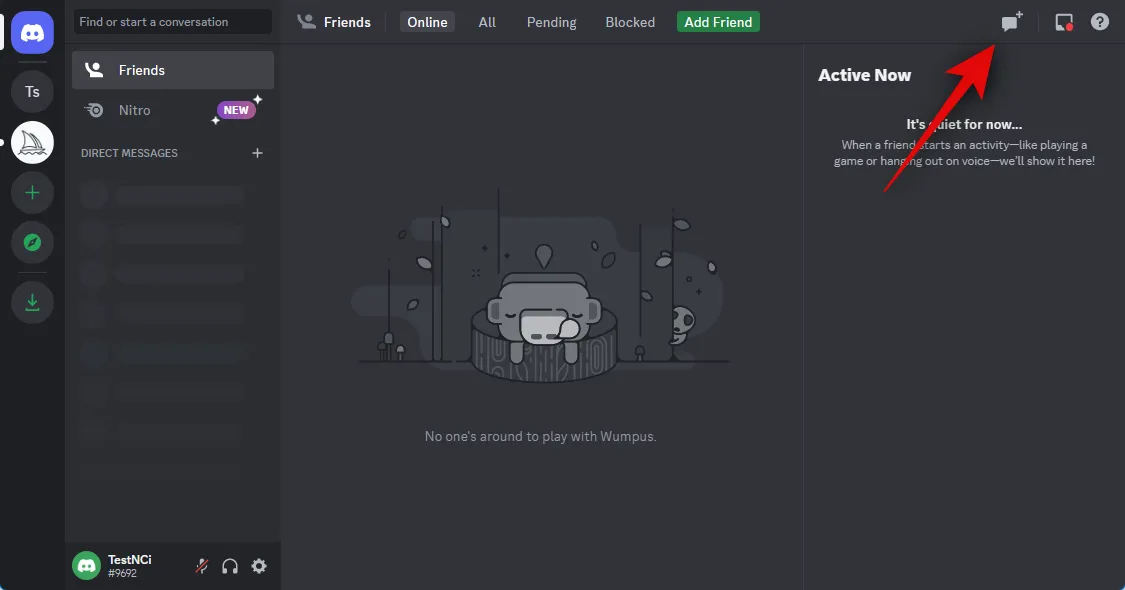
Now click the New Group DM icon in the top right corner.
Select two or more friends currently offline by clicking and checking the box beside them.
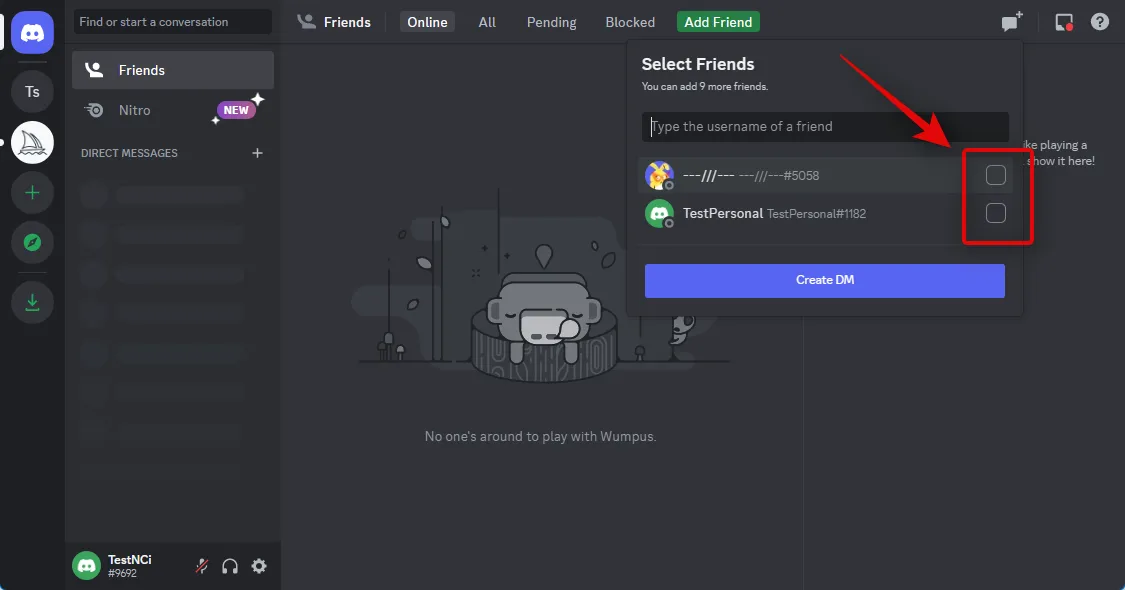
Click Create Group DM.
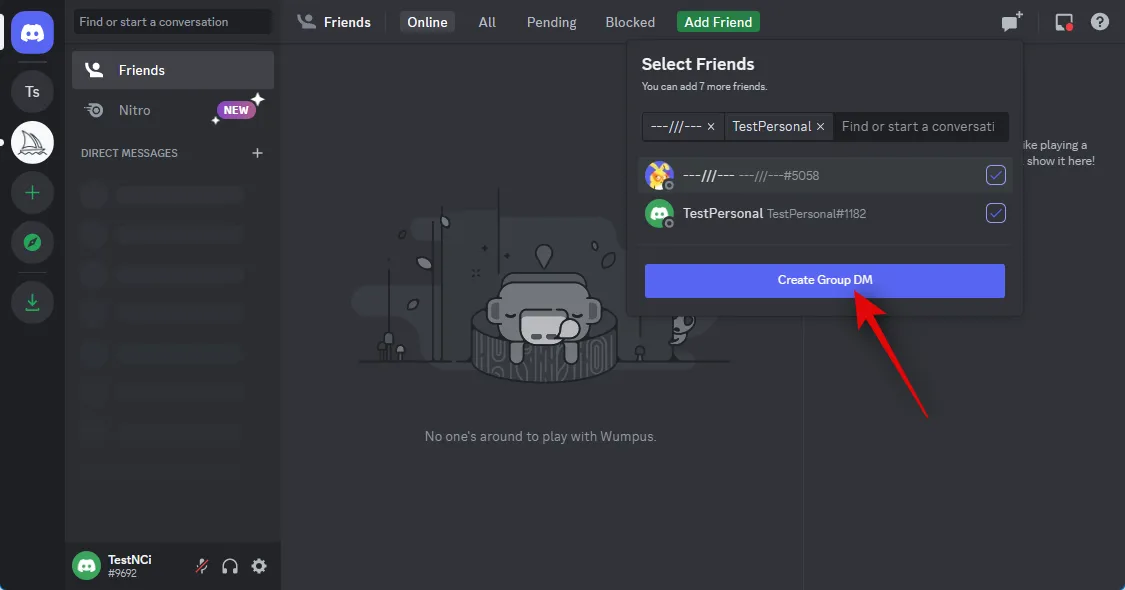
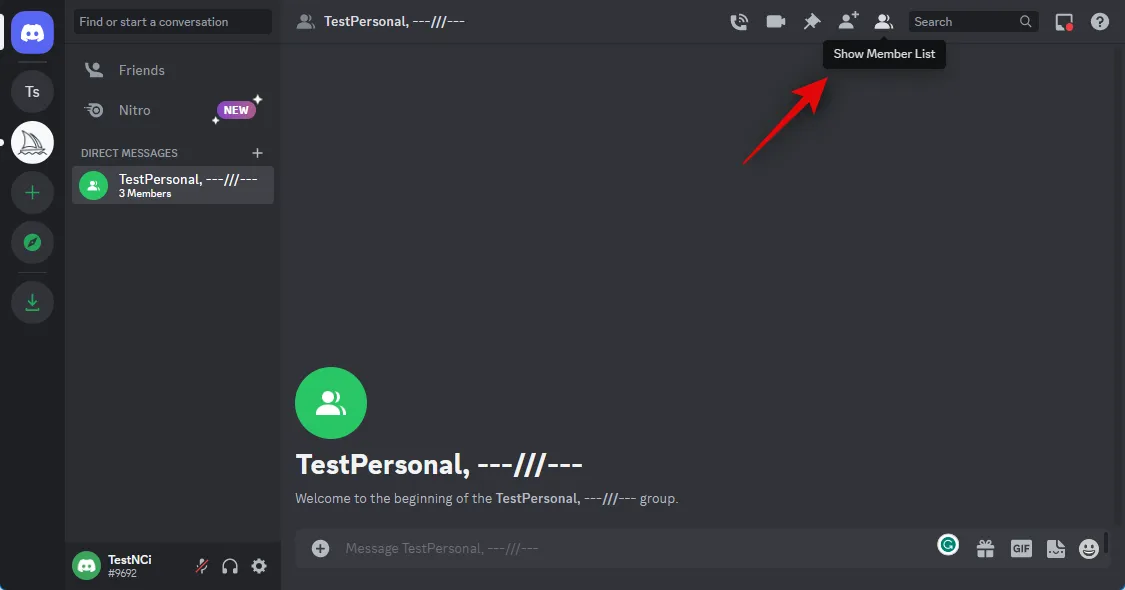
Once the group is created, click the Show Member List icon in the top right corner.
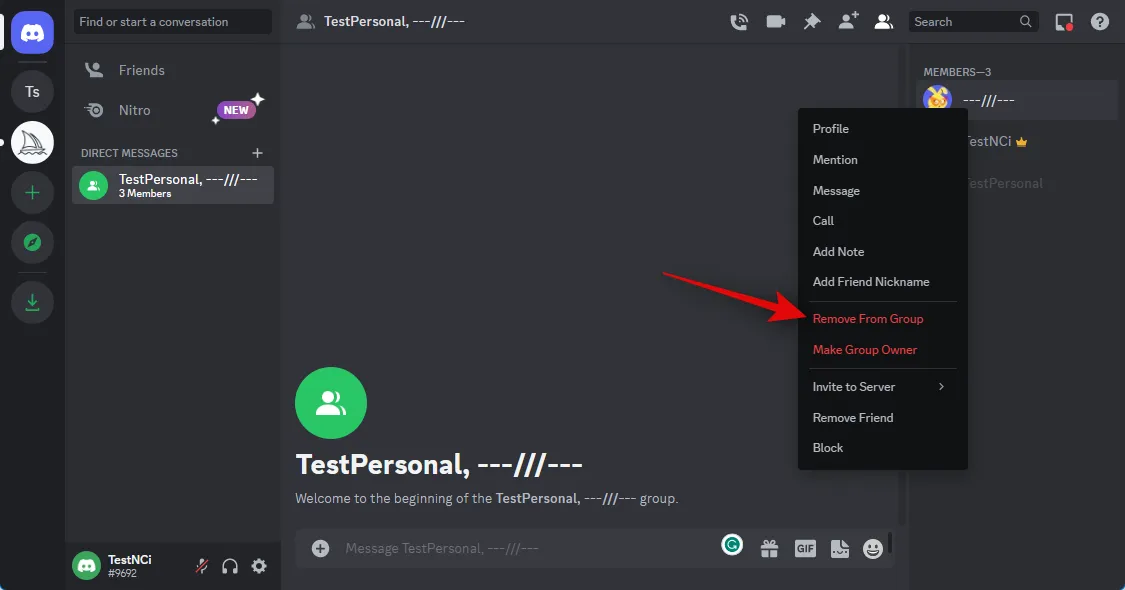
Now right-click a friend we added temporarily and select Remove From Group. Repeat this step to remove all groups.
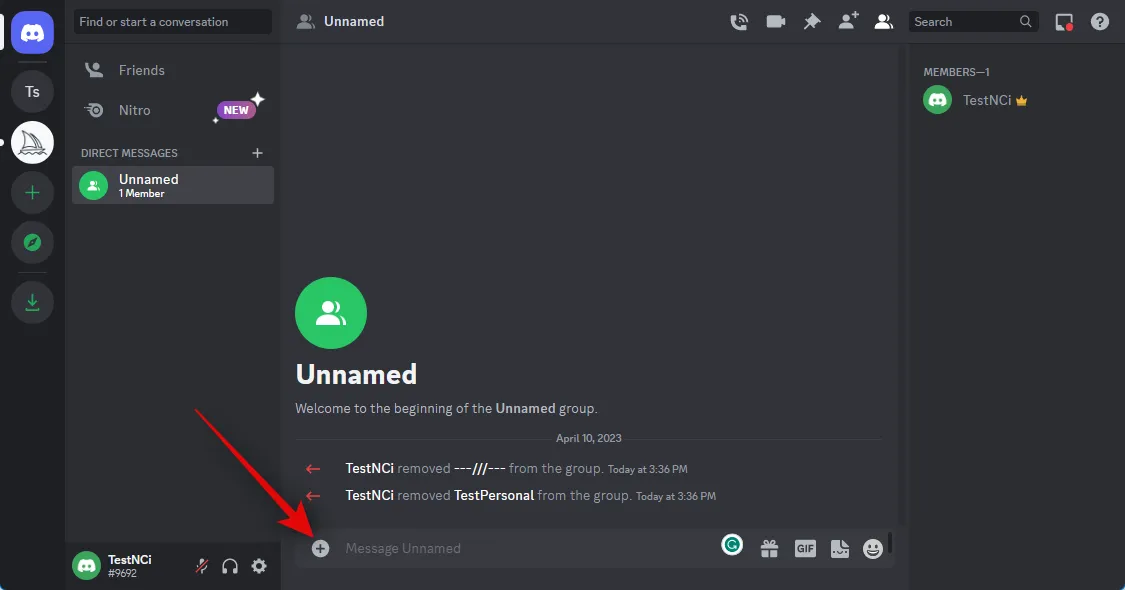
You will now have created a group with only yourself, where you can upload your own images. Double-click the + icon in the textbox at the bottom.
Now click and select the image you wish to upload to Midjourney.
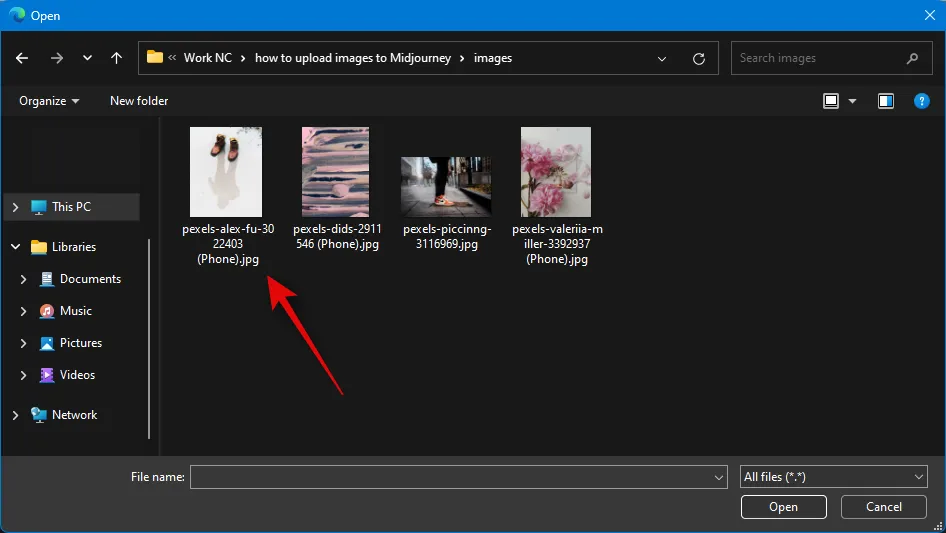
Click Open.
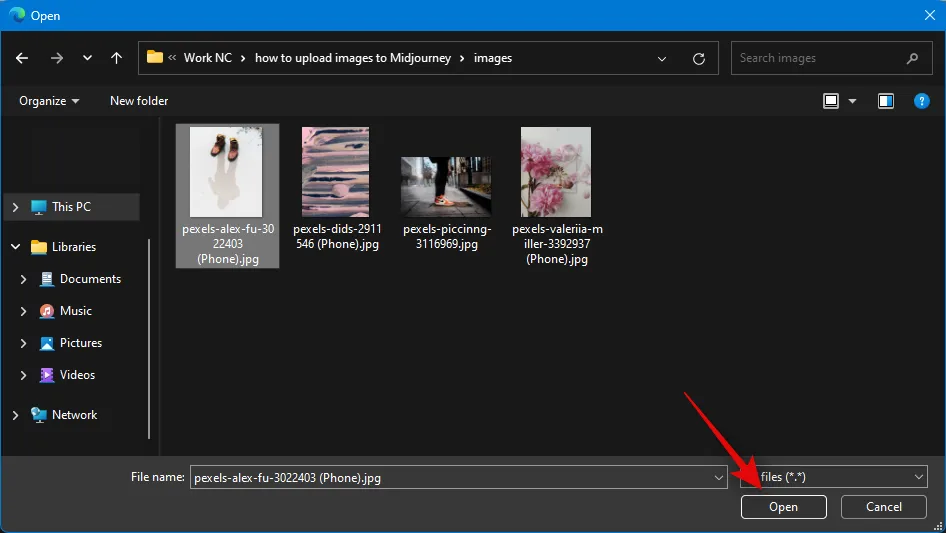
Once the image is added to your message, press Enter on your keyboard.
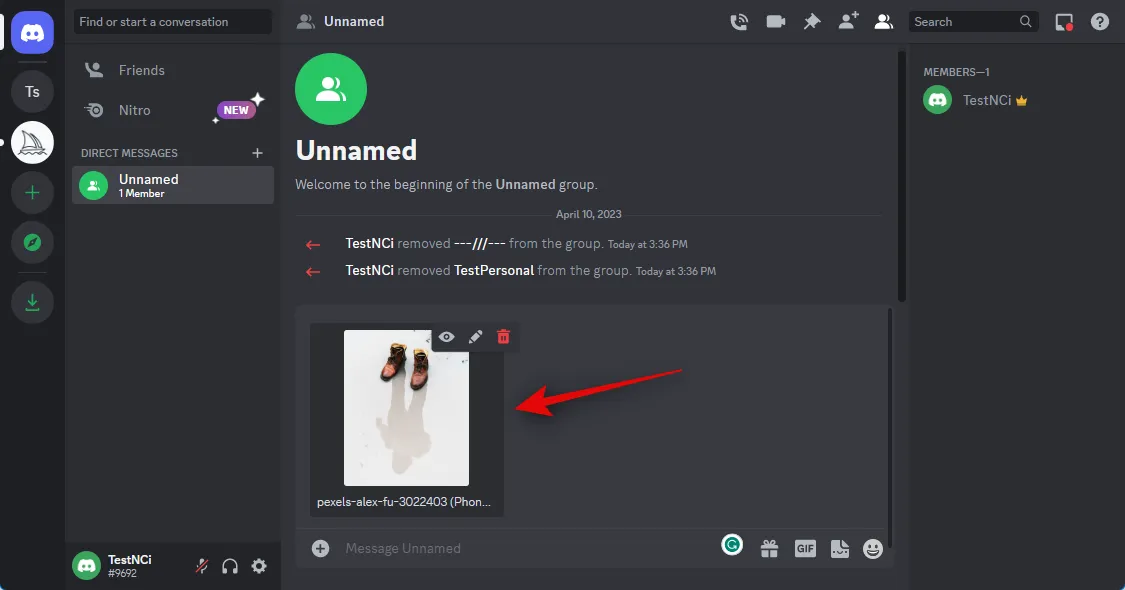
The image will now have been uploaded to Discord. Click on the uploaded image.
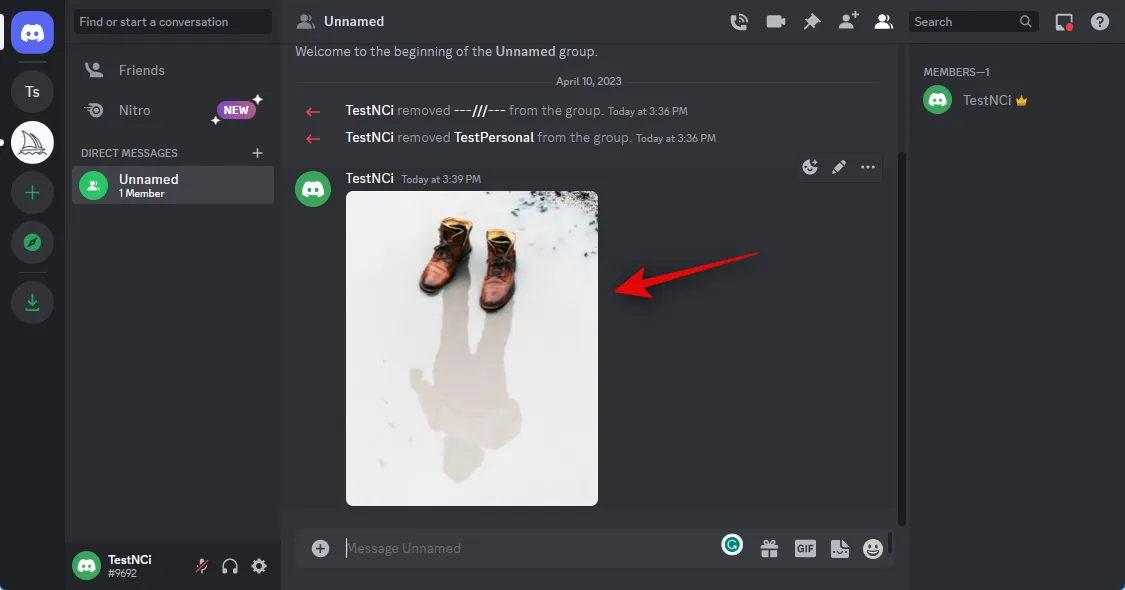
A preview will now open up for the image. Click Open in browser at the bottom.
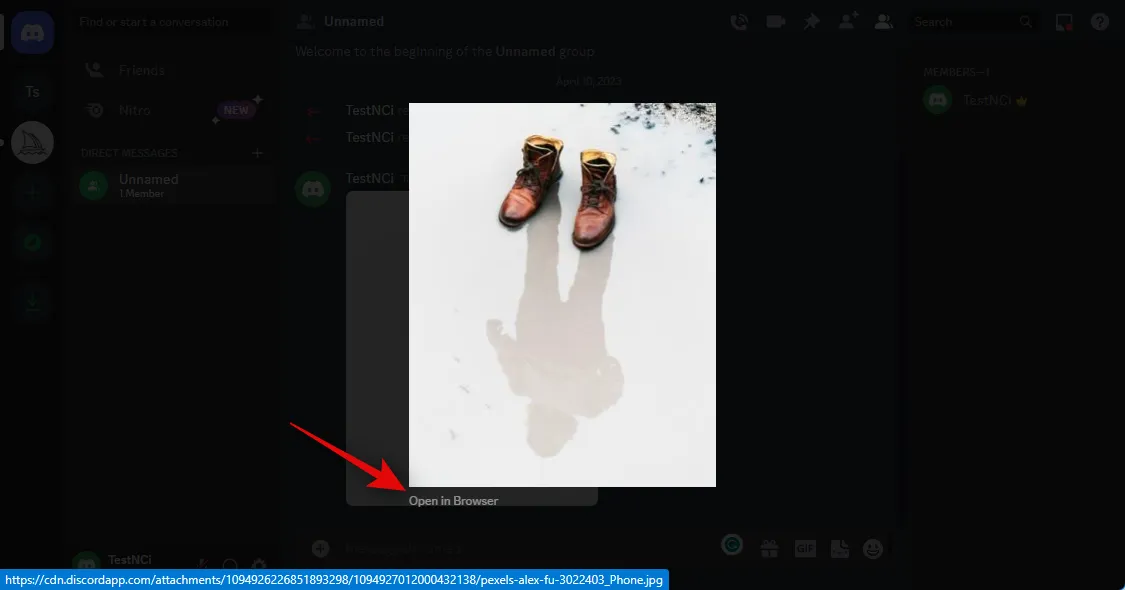
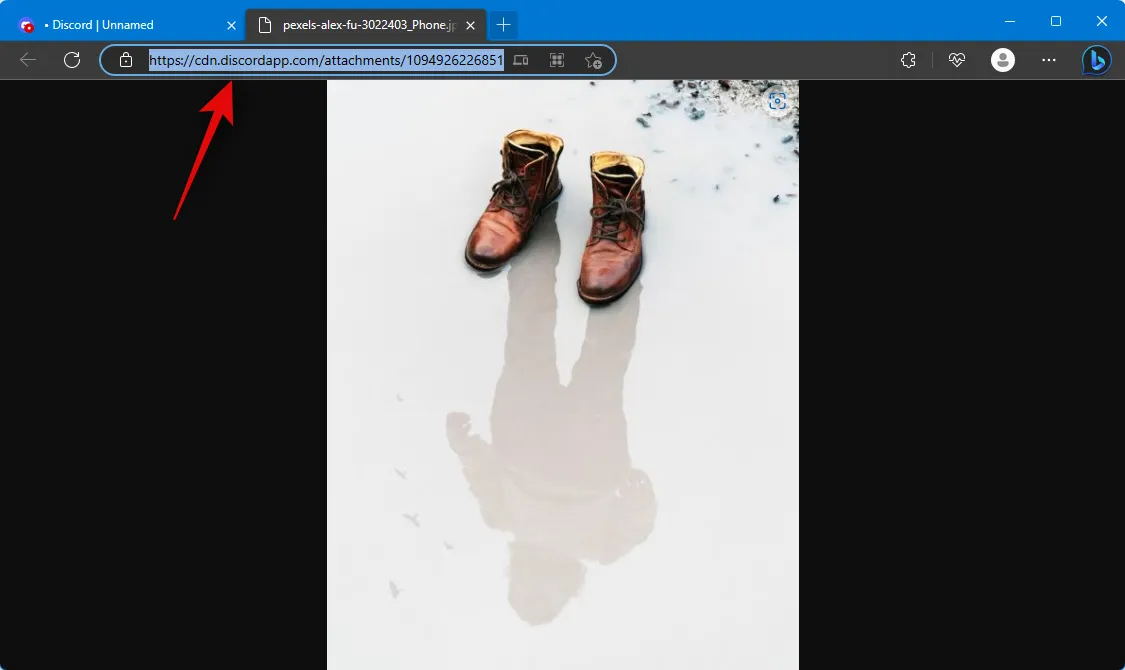
The image will now open in your browser if you are using the desktop app or a new tab if you’re already using the web version of Discord. Copy the URL for the image using the address bar at the top.
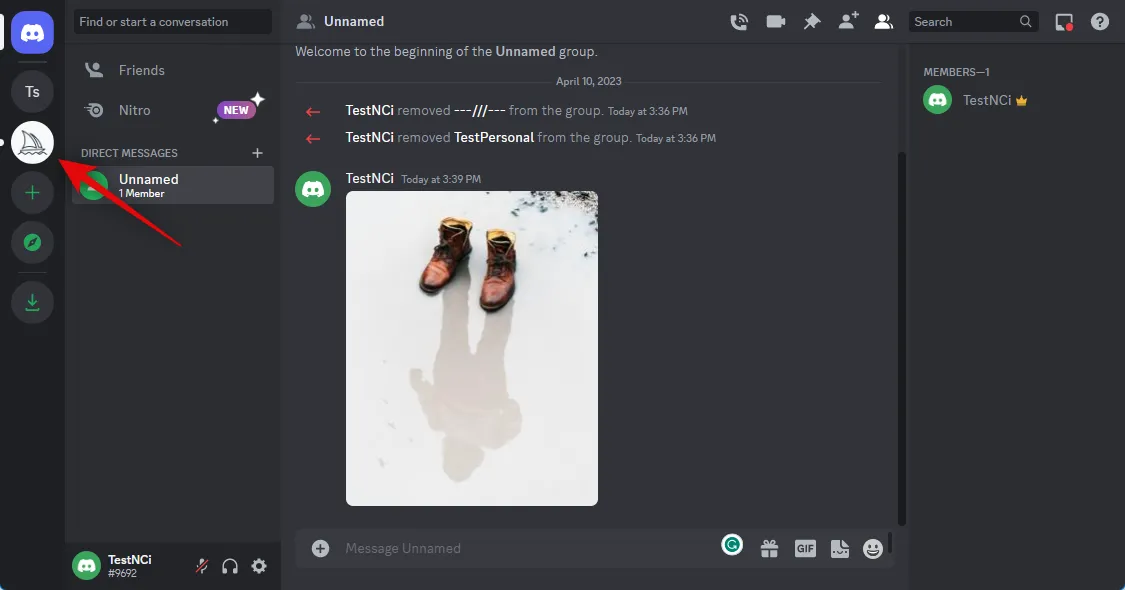
Now click the Midjourney server icon in the left sidebar.
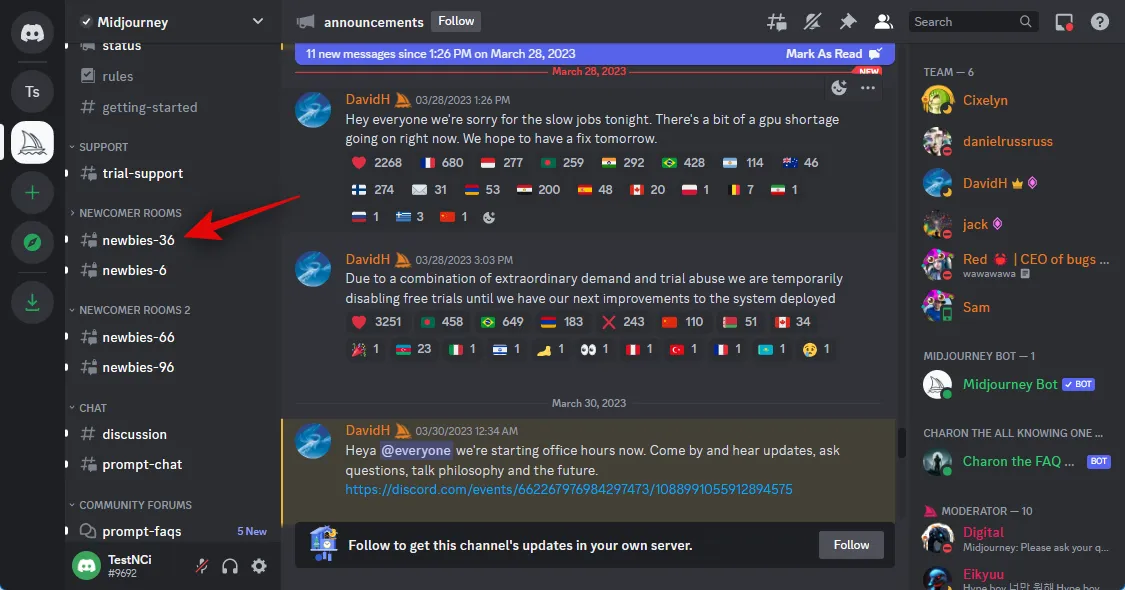
Select a newbie channel where you wish to generate your image.
Type the following and select the command from the context menu once it appears.
/imagine
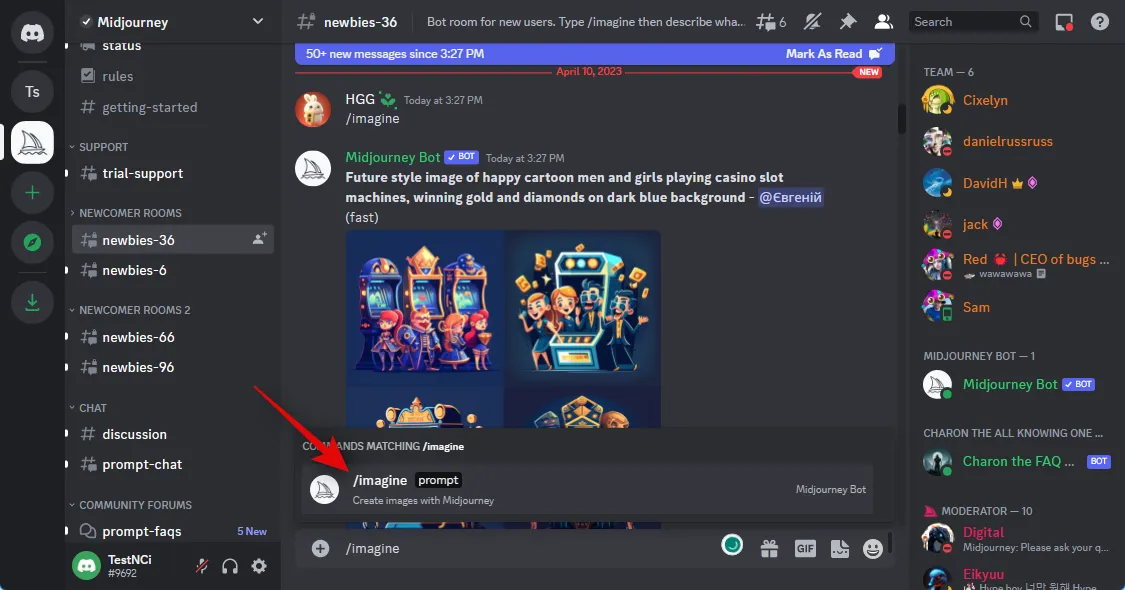
Now paste the link we copied to your clipboard earlier.
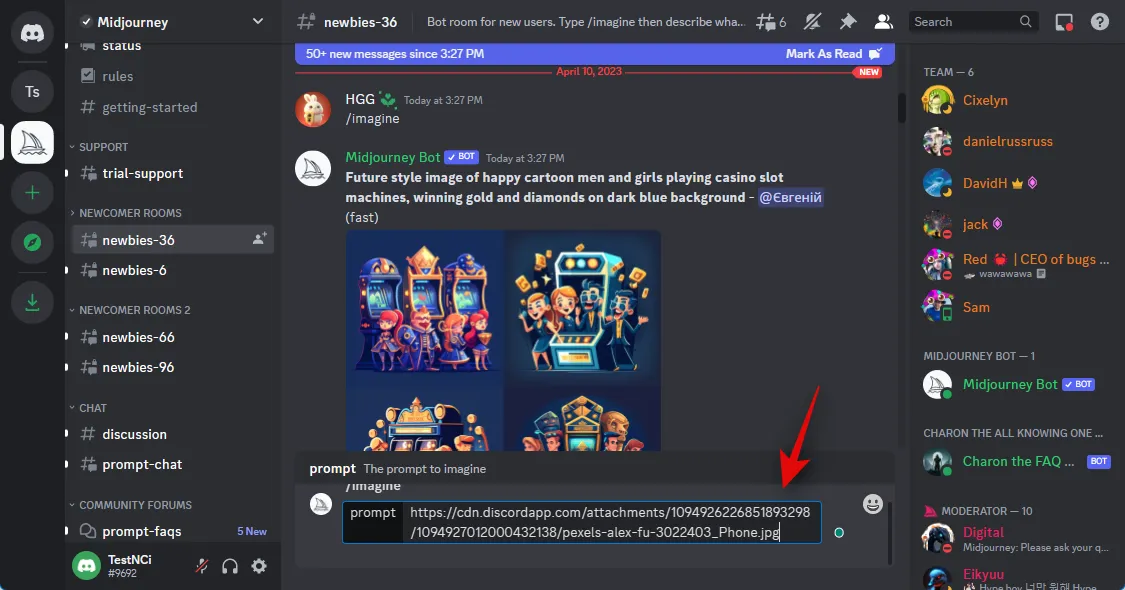
Once pasted, add your text prompt after a single space.
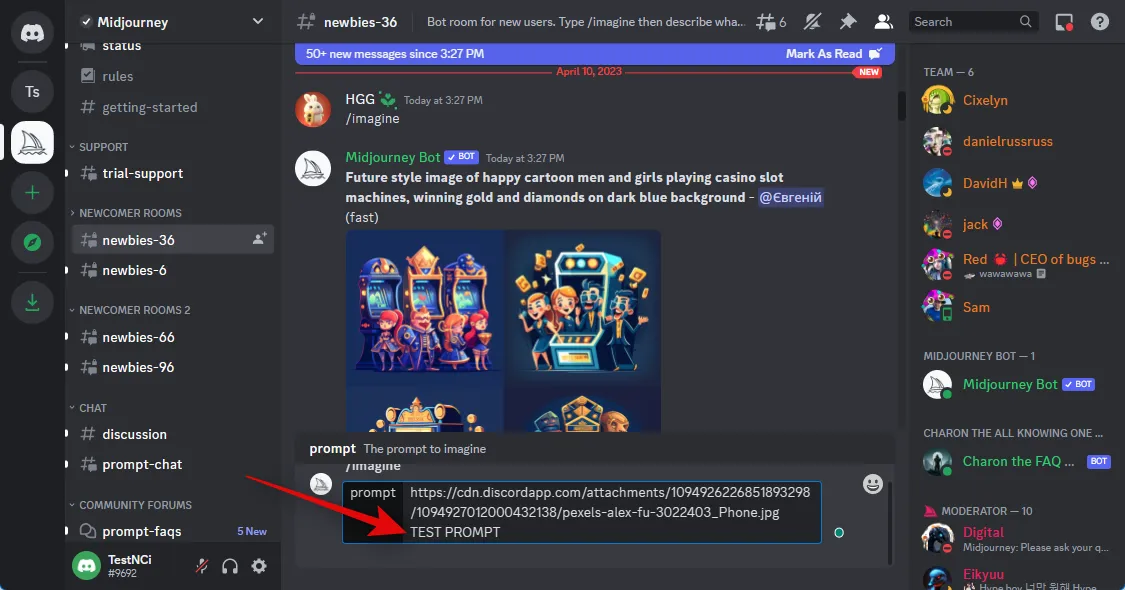
You can now use the following parameter to control how much influence is derived from your uploaded image. Replace (Value) with your preferred image weight value. The image weight value varies depending on the version of Midjourney you’re currently using. Use the information below to help determine the correct value for you.
– iw (Value)
- Midjourney V5: 0.5 to 2.0
- Midjourney V4: N/A
- Midjourney V3: -10,000 to 10,000
Press Enter on your keyboard once you’re done.
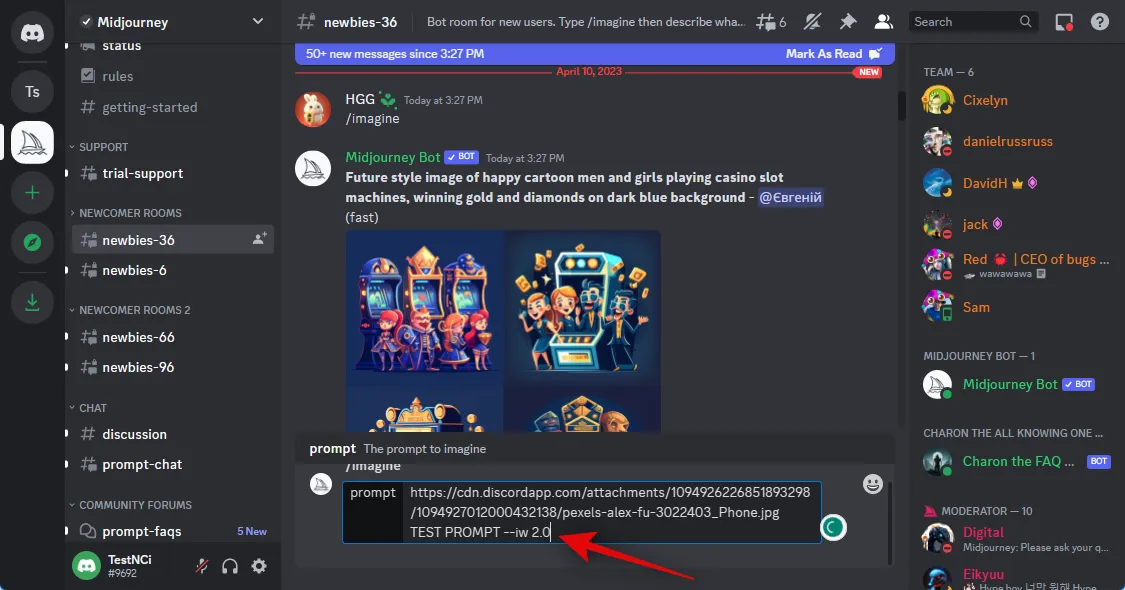
And that’s it! The uploaded image will now be used by Midjourney to generate the new image in conjunction with your text prompt.
On Mobile
If you’re using the Discord mobile app, then here’s how you can upload and use an image with the /imagine command in the Midjourney server. Let’s get started.
Open the Discord app and log into your account if needed.
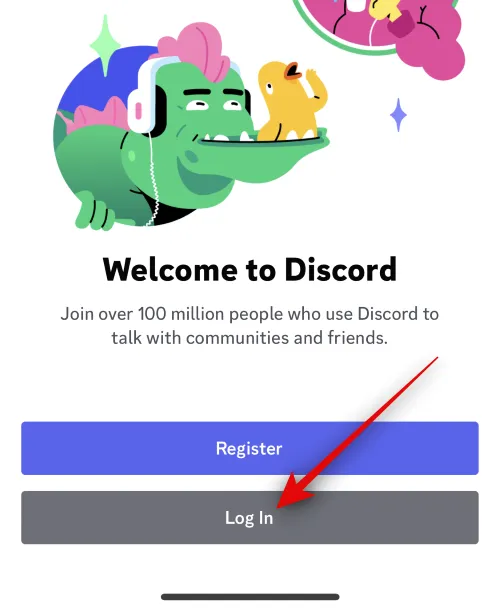
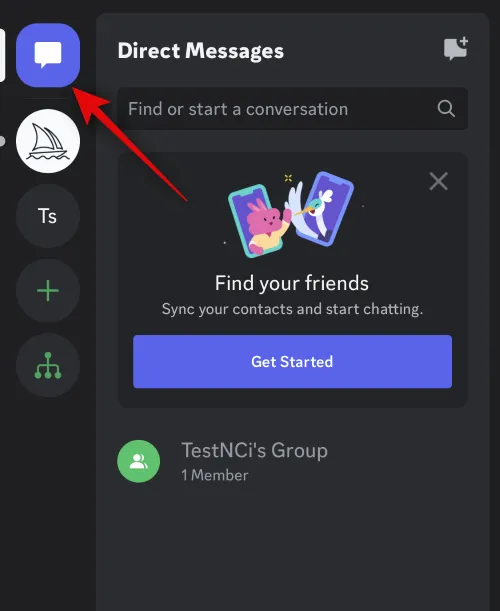
Tap the direct messages icon in the top left corner.
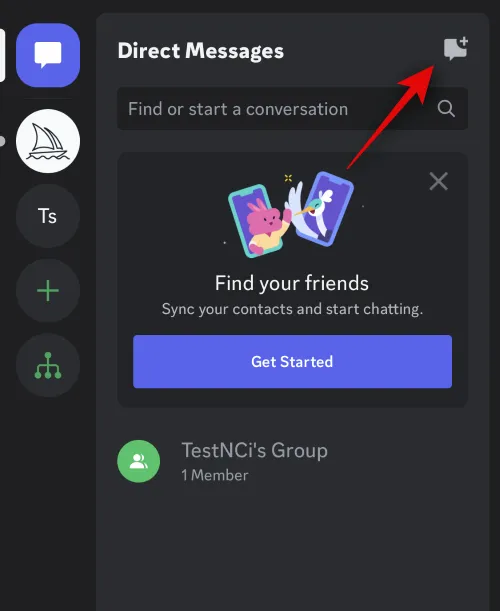
Tap the icon for a new chat in the top right corner.
Check the boxes for two of your friends that are currently offline. We will create a group with them temporarily.
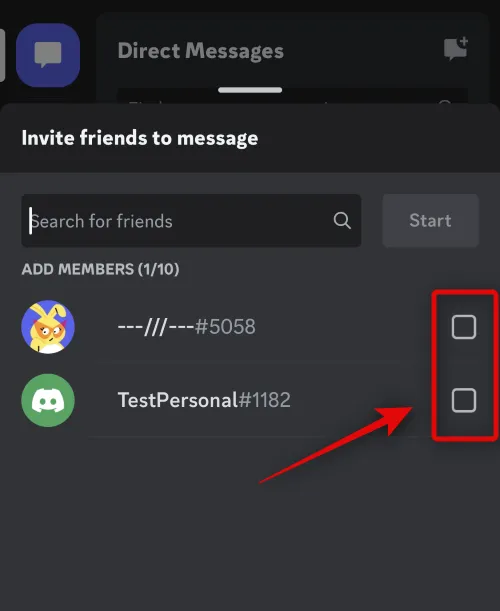
Once selected, tap Start at the top.
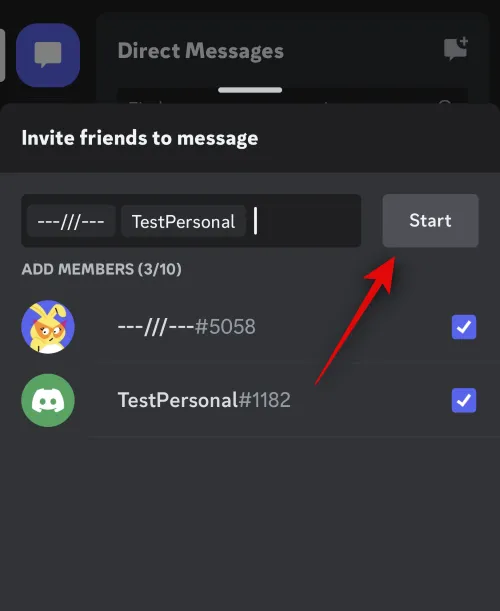
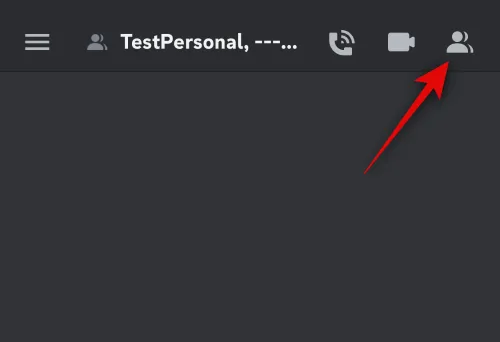
A new group with the selected friends will now be created. Tap the Members icon in the top right corner.
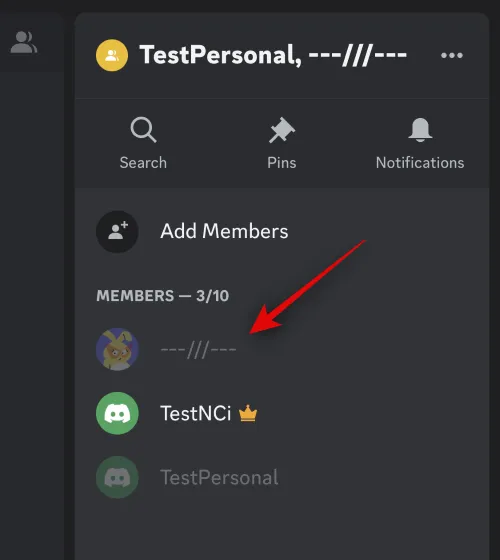
Tap on a friend we added to the group earlier.
Scroll down and tap Remove From Group.
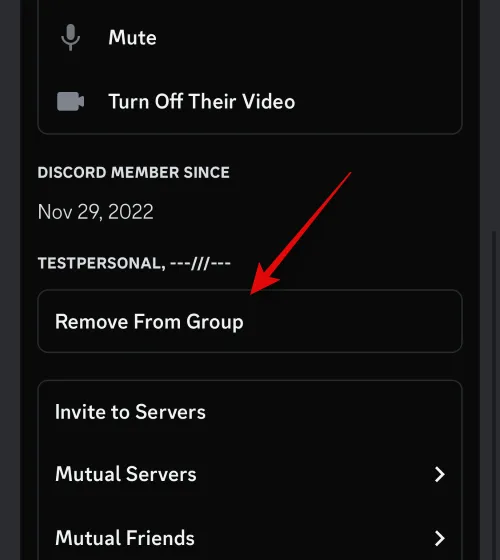
Repeat the steps above to remove your other friend from the group as well.
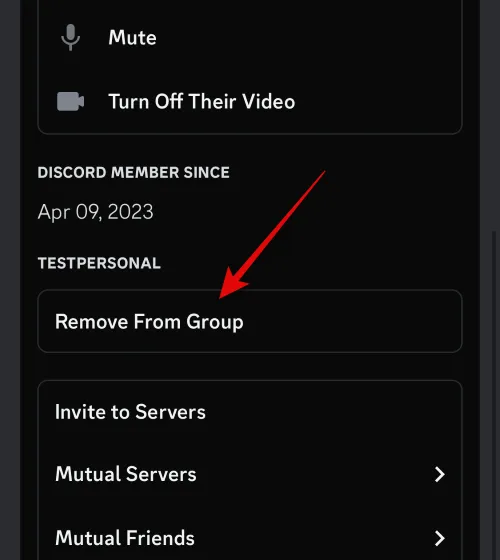
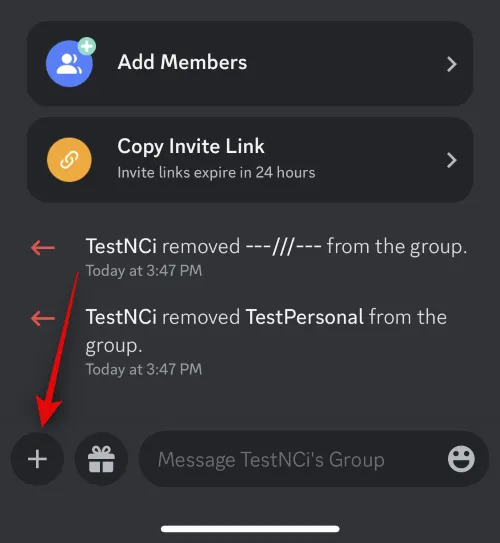
Once removed, we can now use the group to upload your images. Tap the + icon in the bottom left corner.
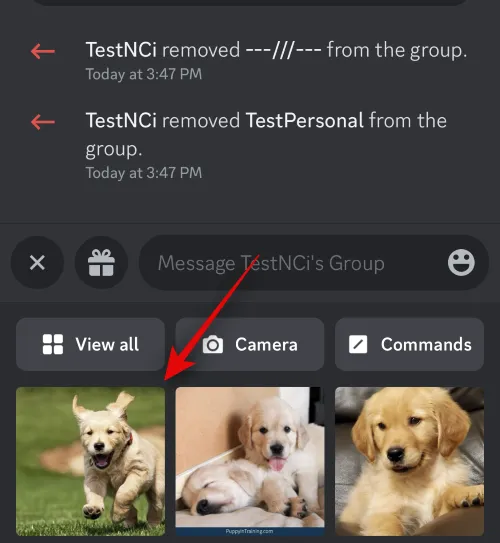
Now tap and select the photo you wish to upload and use with Midjourney.
Tap the Send icon once you’re done.
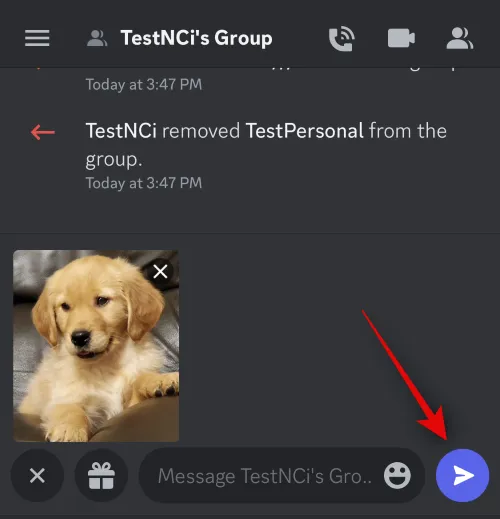
The image will now be uploaded to the group. Once uploaded, tap on the image.
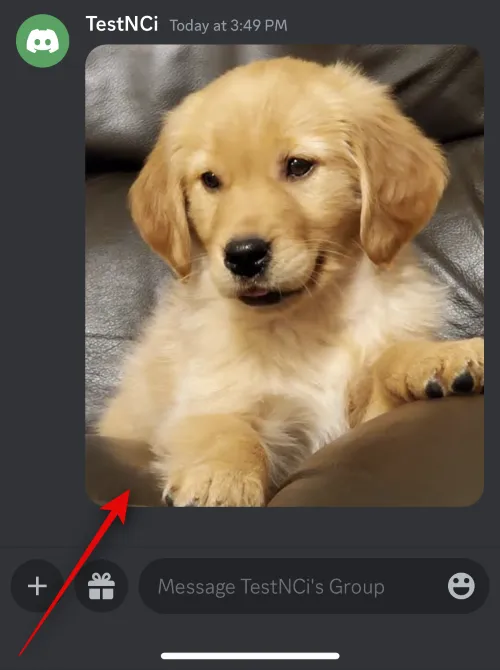
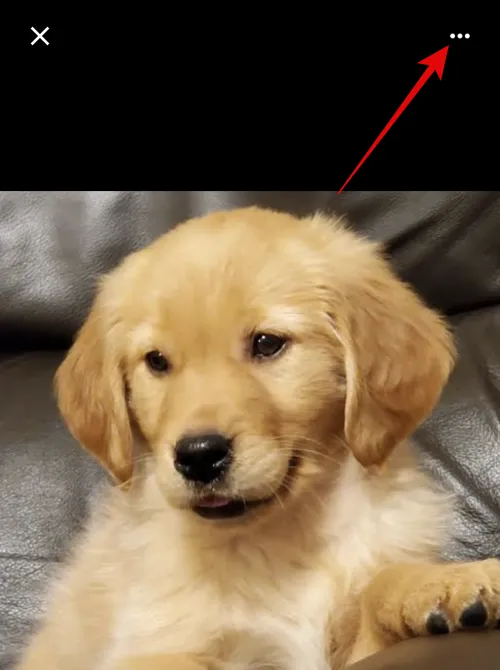
3-dot ()
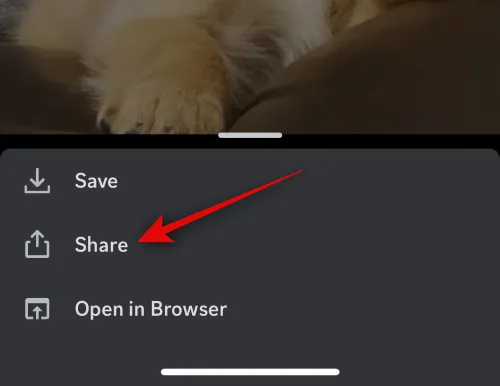
Tap Share.
Now tap Copy.
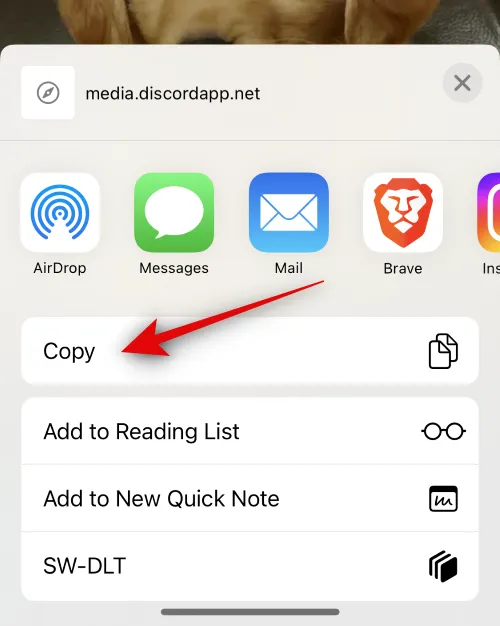
The image’s link will now be copied to your clipboard. Close the share sheet and tap the Hamburger icon in the top left corner.
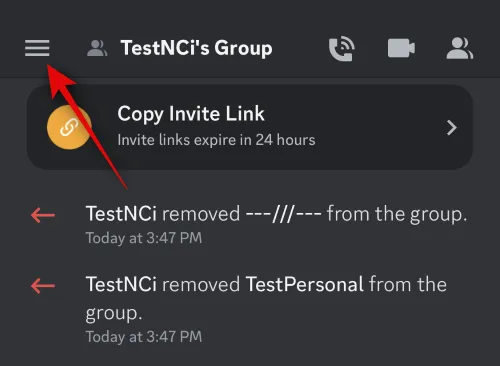
Tap and select the Midjourney server.
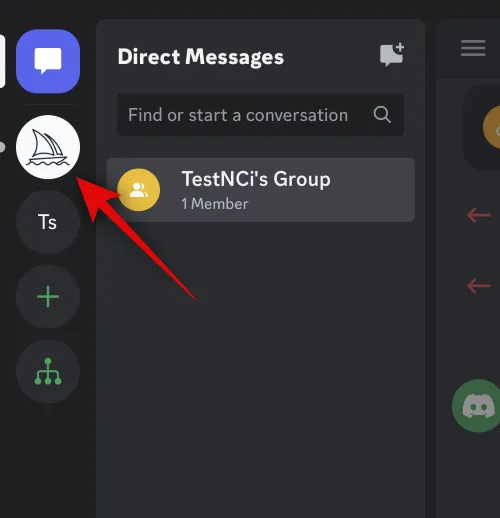
Tap and select a newbie channel where you wish to use the uploaded image in a prompt.
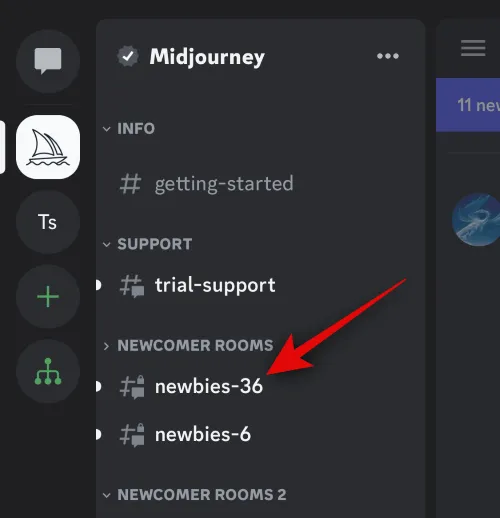
Type the following command in the text box at the bottom and select the same once it shows up in the context menu.
/imagine
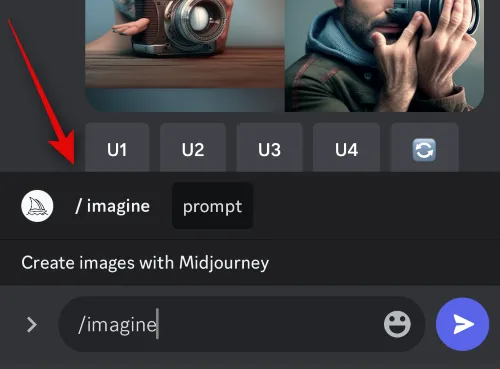
Now add a space and tap and hold on to the textbox. Tap Paste.
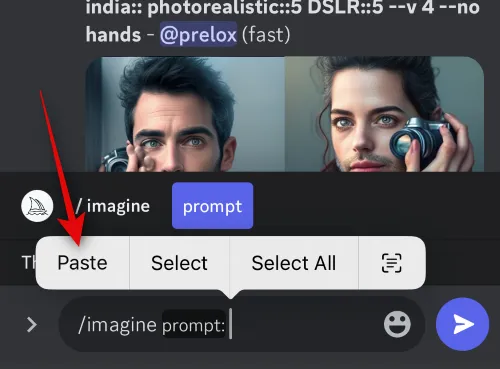
The link will now be pasted in the prompt. Add a space and add any text prompt if needed.
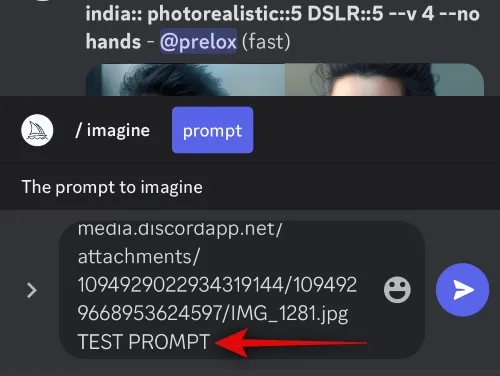
Now use the parameter below to determine the image weight. Image weight dictates how inspired your final images will be from the image you uploaded earlier. Replace (Value) with your preferred image weight value depending on the Midjourney version you’re using.
– iw (Value)
- Midjourney V5: 0.5 to 2.0
- Midjourney V4: N/A
- Midjourney V3: -10,000 to 10,000
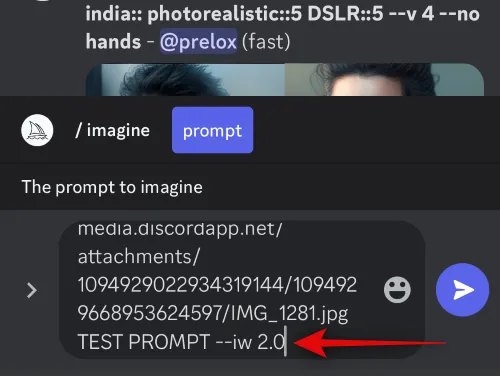
Tap the Send icon once you’re done.
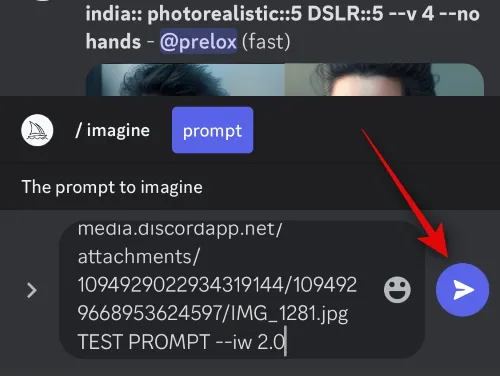
And that’s it! Midjourney will now generate images using the uploaded image as well as your text prompt.
Method 2: Using Imgur
Uploading and using images from Discord can be a bit tedious. In such cases, you might wish to use a third-party website like Imgur. Imgur is a free image hosting platform that allows you to upload and store images easily. We will use the same to use images in Midjourney. Follow the relevant section below depending on the device you’re currently using.
On PC
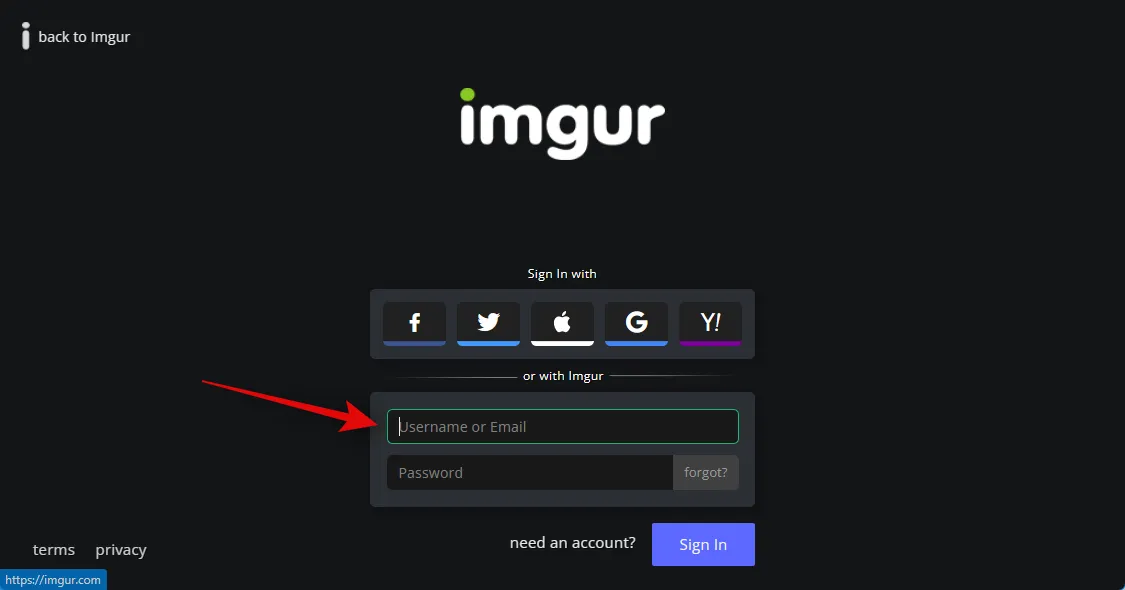
Open Imgur.com in your browser and log into your account if needed.
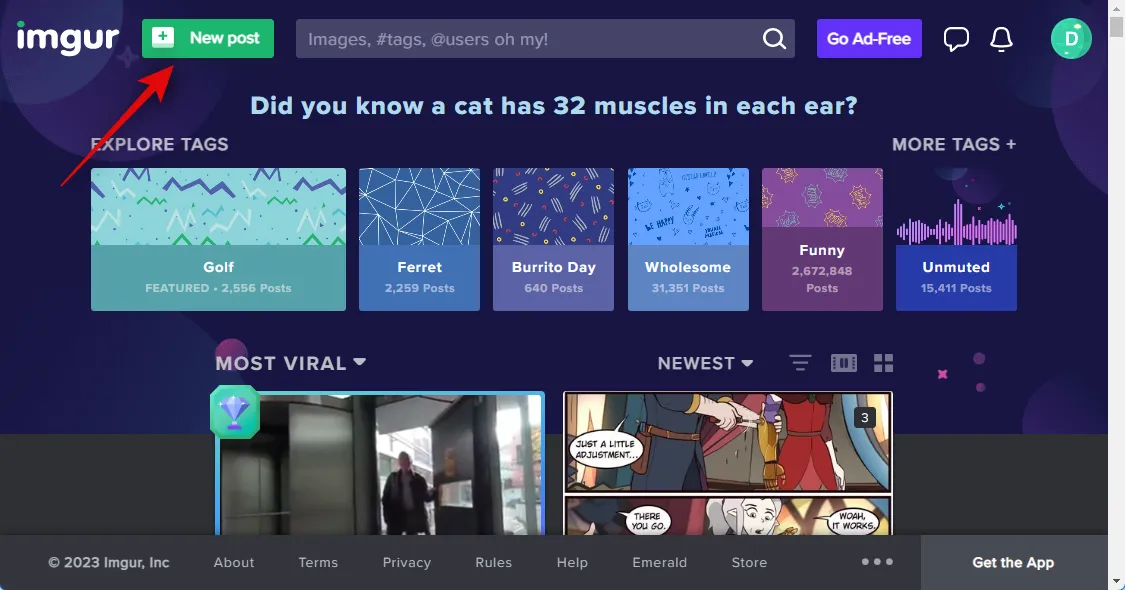
Click + New post in the top left corner once you’re done.
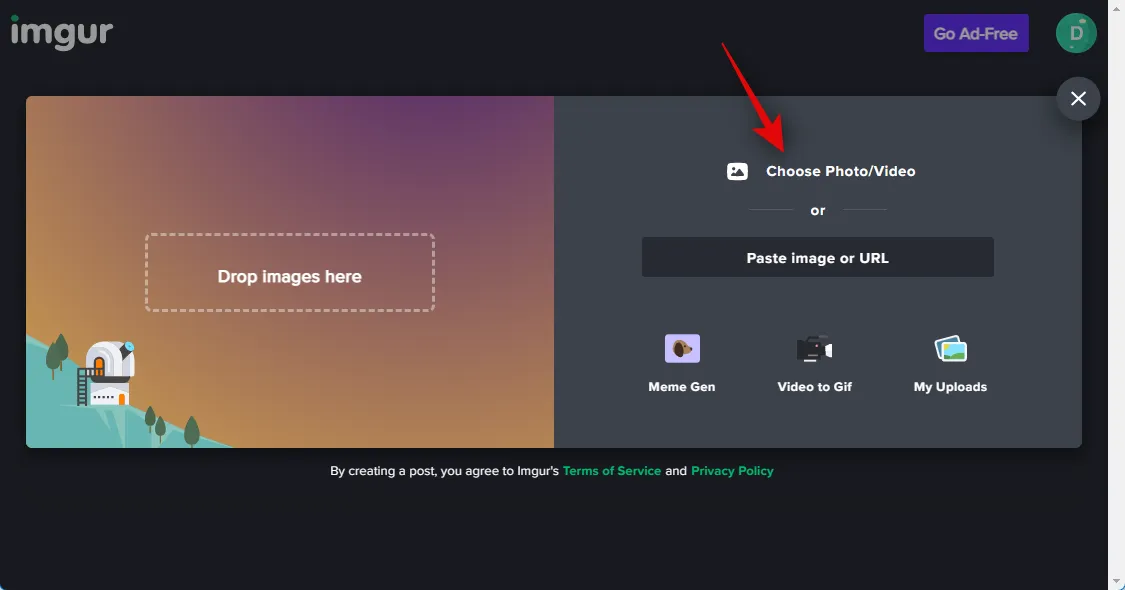
Click Choose Photo/Video.
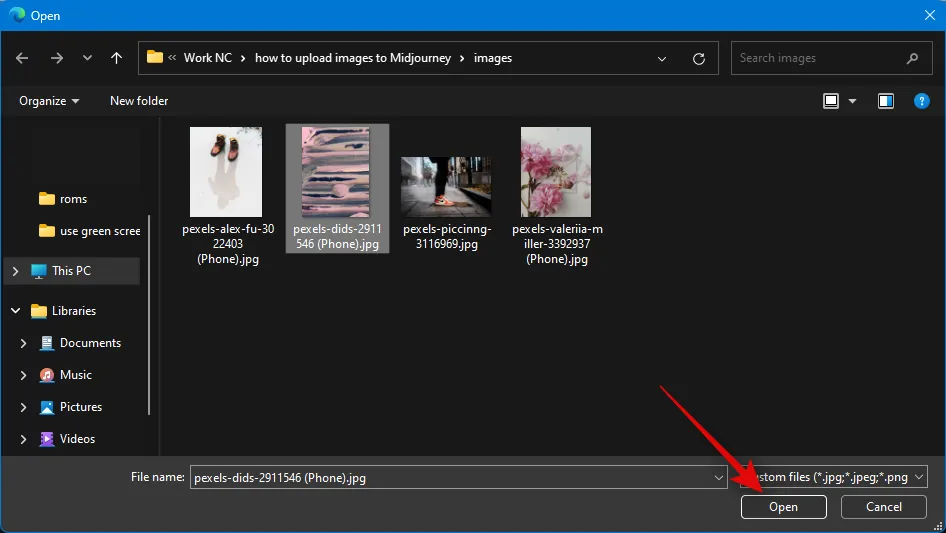
Now select the relevant image you wish to use with Midjourney.
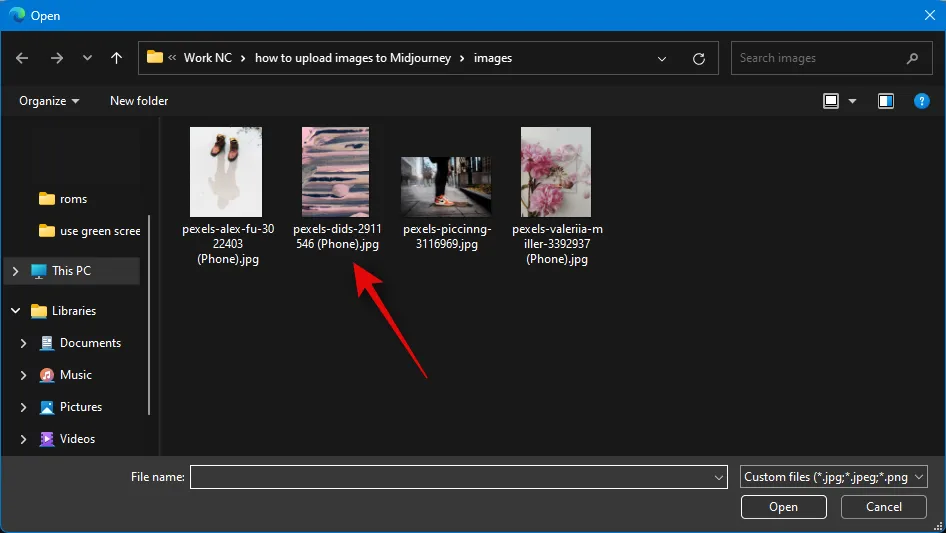
Click Open.
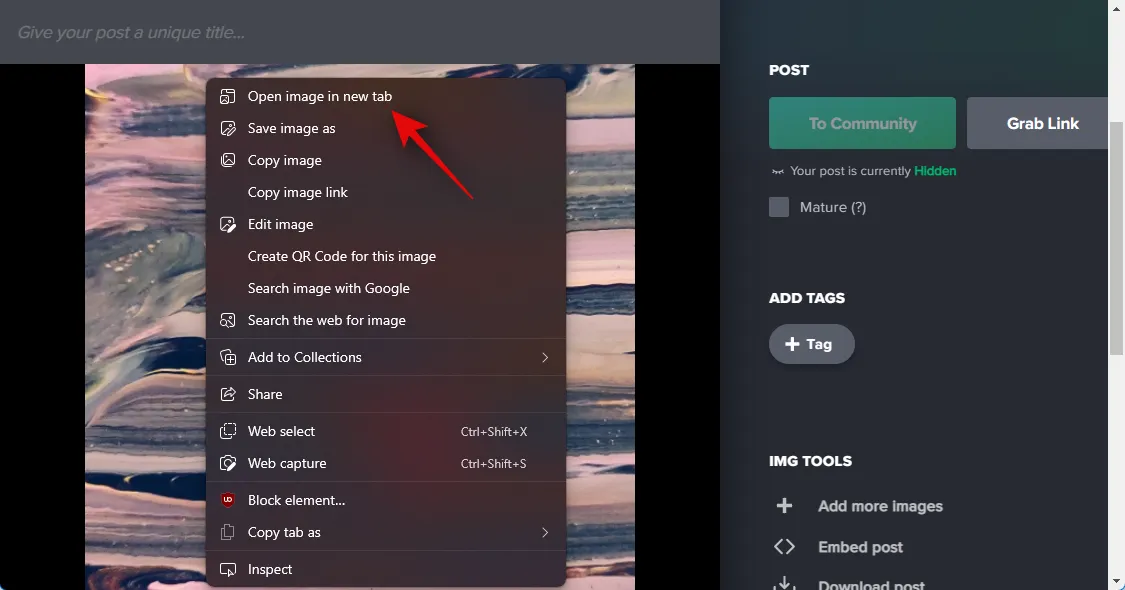
The image will now be uploaded to Imgur. Right-click the image and select Open image in new tab.
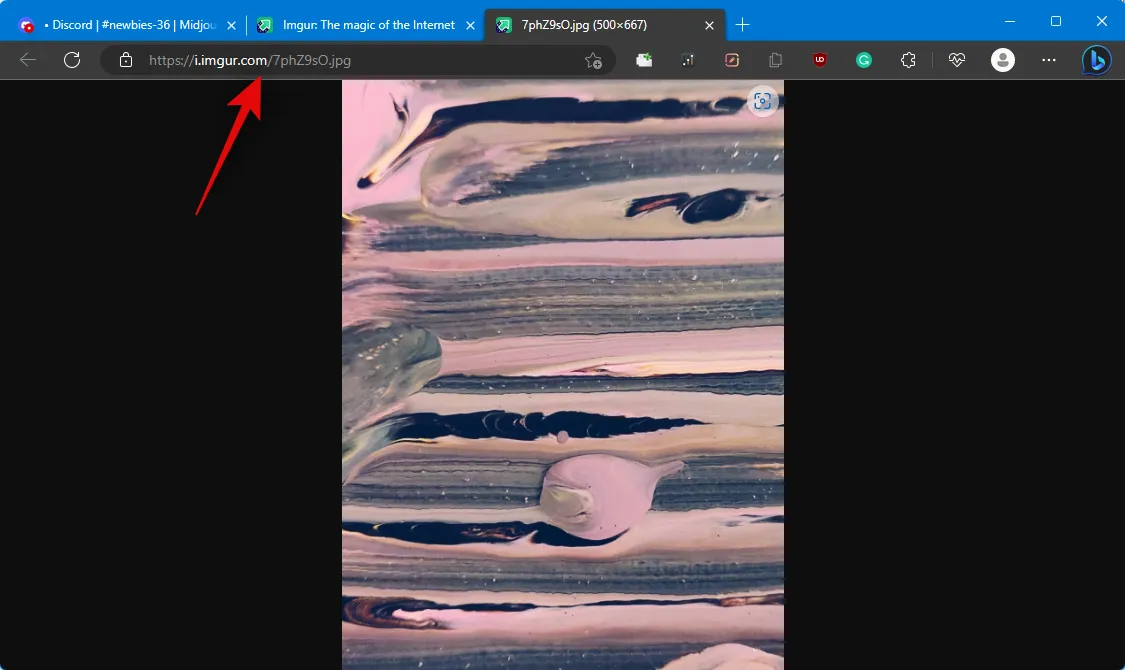
Now click the address bar at the top and copy the image’s URL to your clipboard by pressing Ctrl + C.
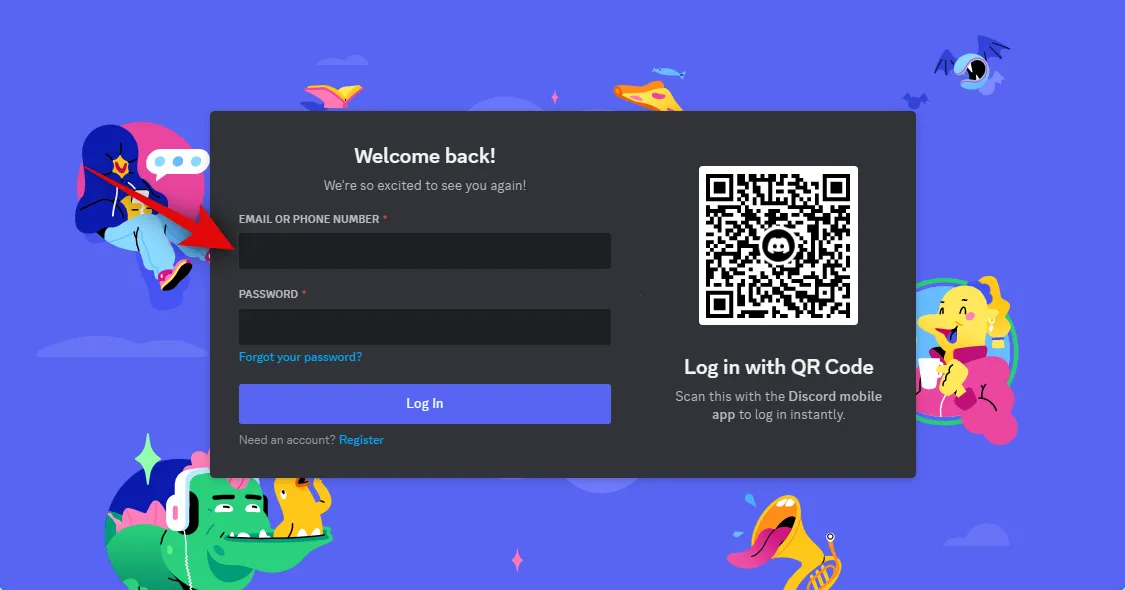
Open Discord on your PC now. You can use the dedicated desktop app or the web version of Discord in your browser. Log into your account if needed.
Now click and select the Midjourney server from the left sidebar.
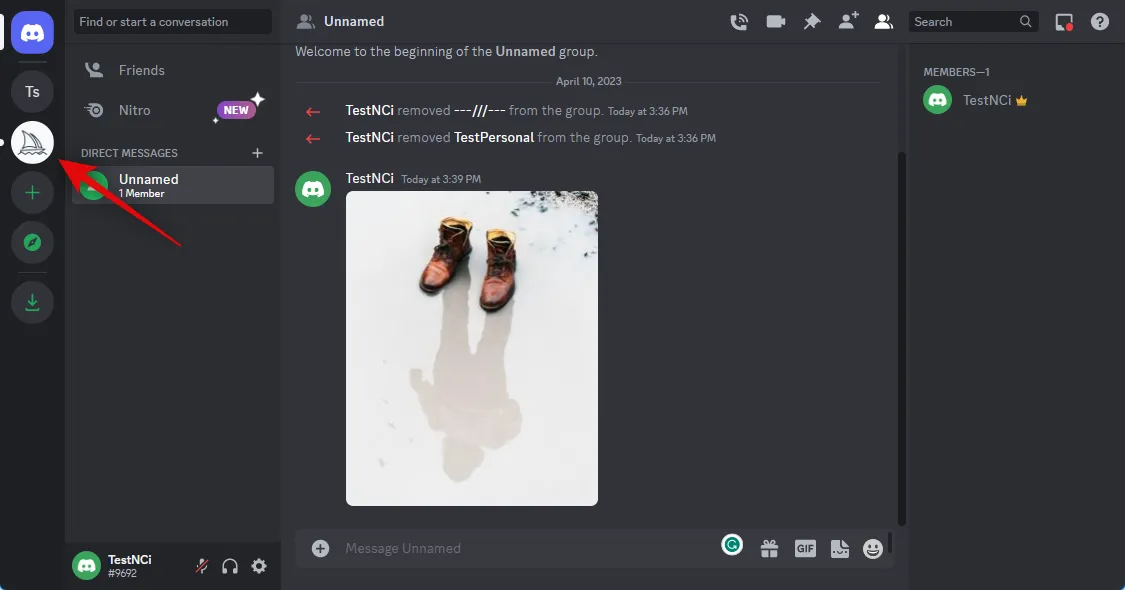
Click and select a newbie channel where you wish to generate your image.
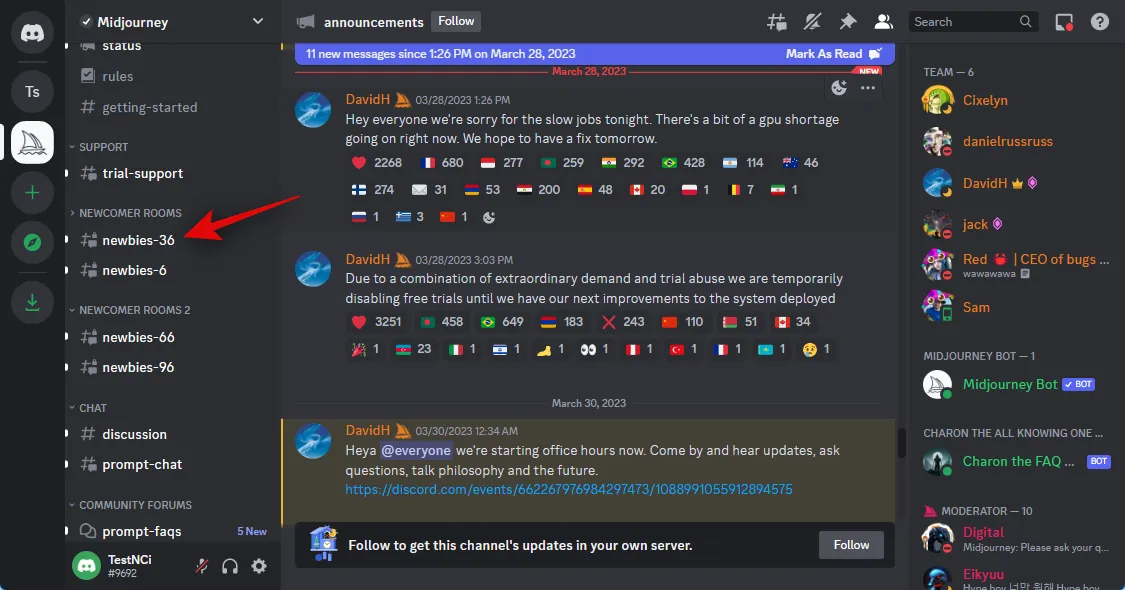
Type in the following and click and select the command once it shows up in the context menu.
/imagine
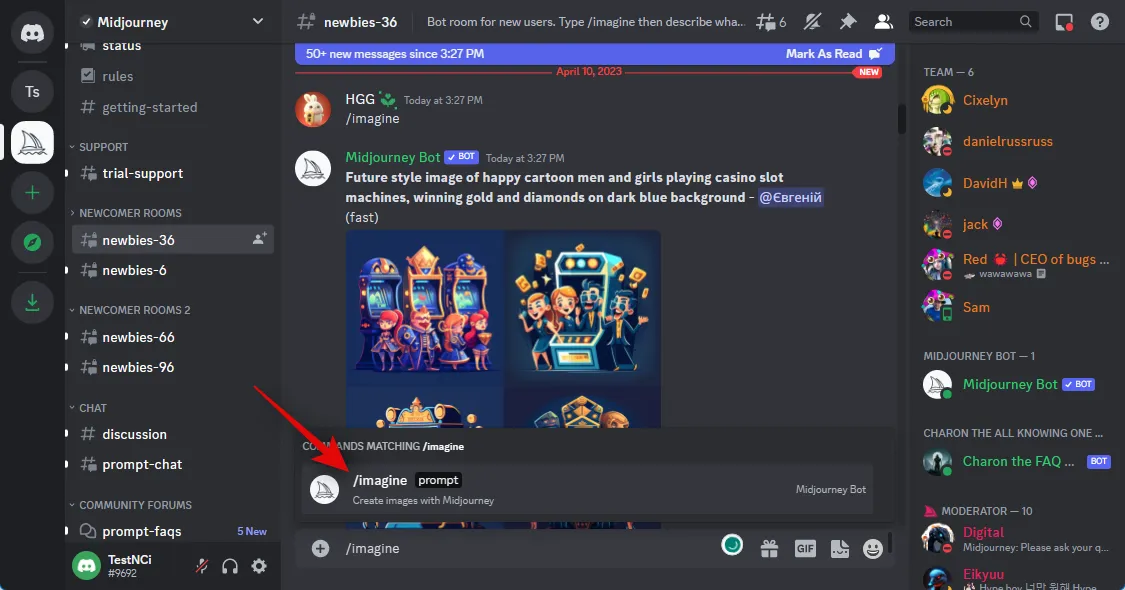
Now add a space and paste the URL for the image we copied earlier.
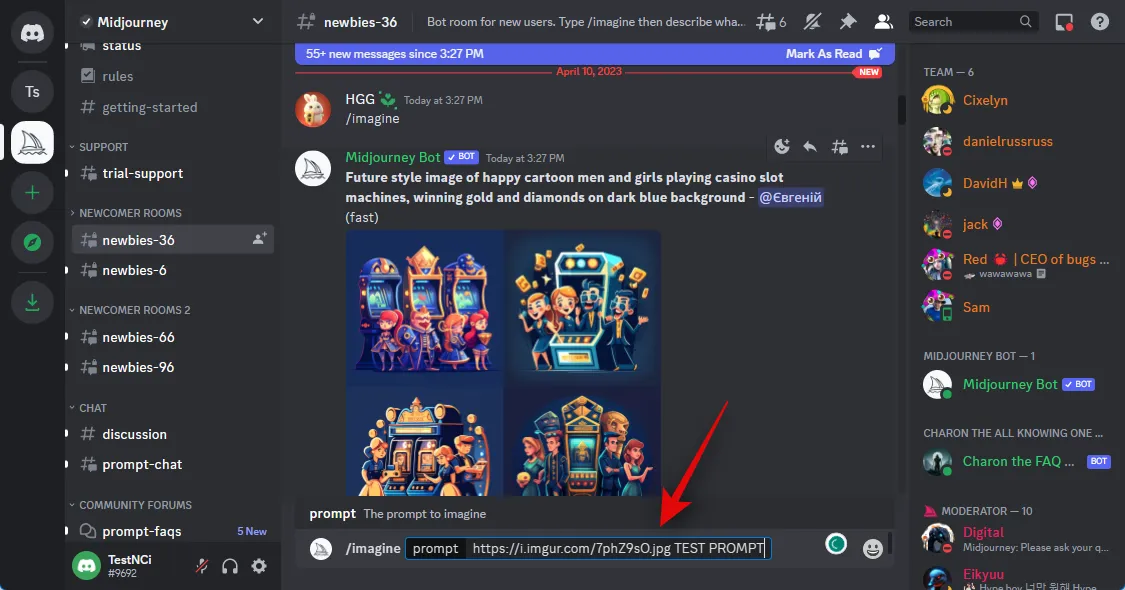
You can now type in a text prompt to go in conjunction with your uploaded image. Ensure you type your prompt after adding a space.
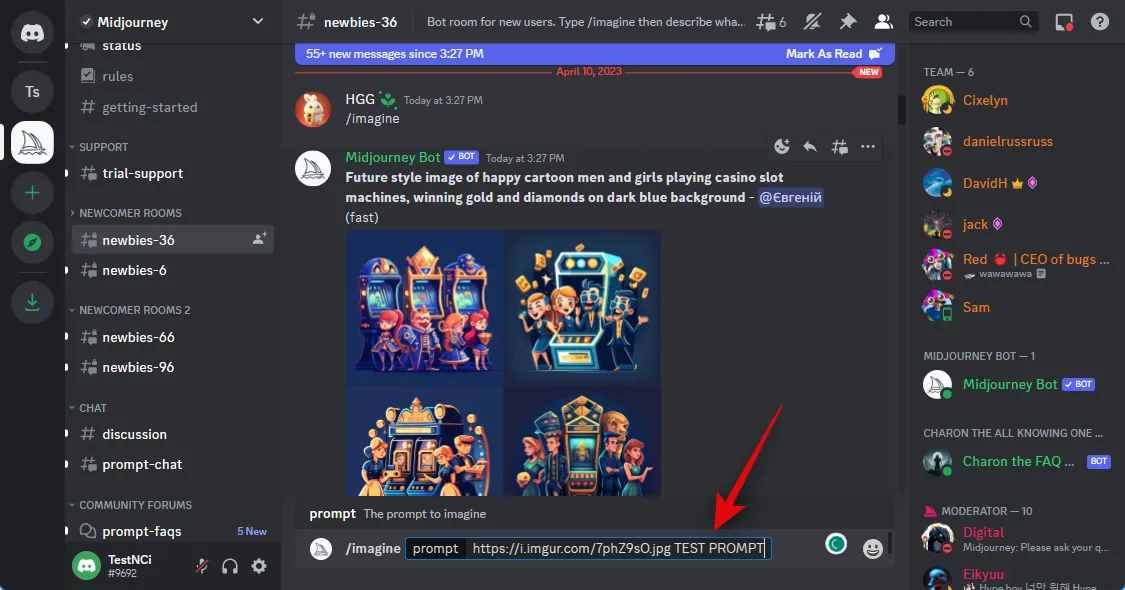
Now use the following command to dictate the image weight. This value will determine how much inspiration is derived from your uploaded image when generating your images. Replace (Value) with the preferred image weight value depending on the version of Midjourney you’re currently using.
–iw (Value)
- Midjourney V5: 0.5 to 2.0
- Midjourney V4: N/A
- Midjourney V3: -10,000 to 10,000
Press Enter once you’re done.
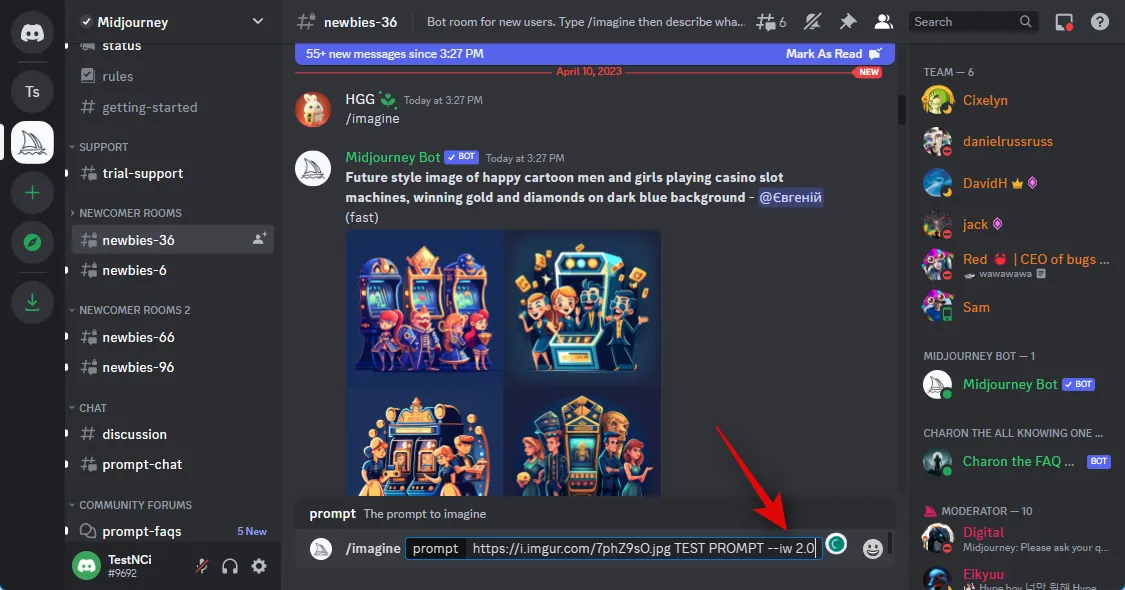
And that’s it! Midjourney will now generate your new images using the image you uploaded to Imgur.
On Mobile
If you’re using your mobile device, then you can use the dedicated Imgur app to upload your images to Midjourney. Follow the steps below to help you along with the process.
Download the Imgur app using the relevant link below, depending on your current device.
- Imgur Download Link | For Android | For iOS
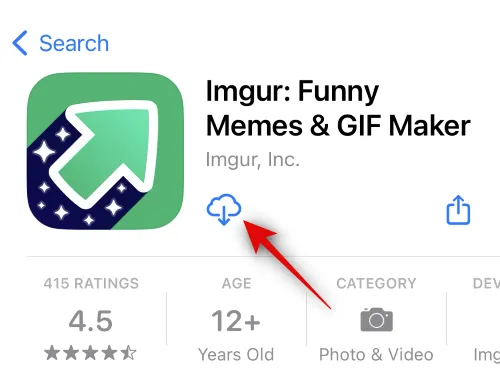
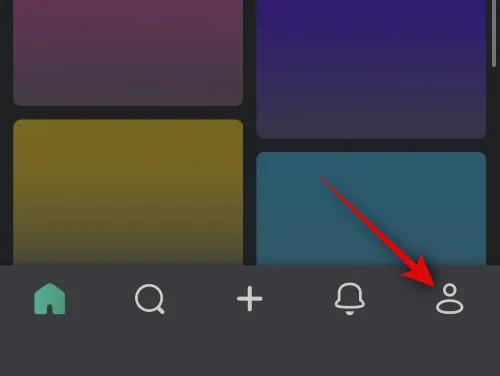
Once downloaded, launch the app and tap the profile icon in the bottom right corner.
Tap Sign In or Sign Up.
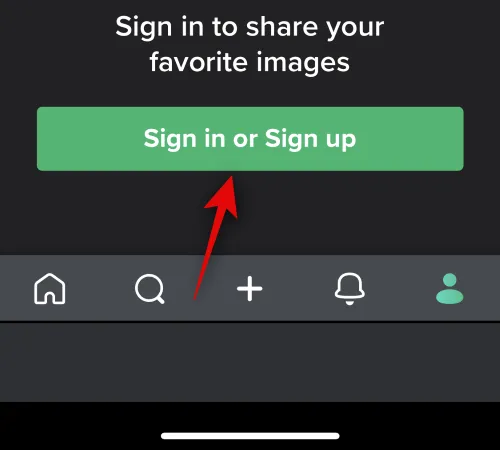
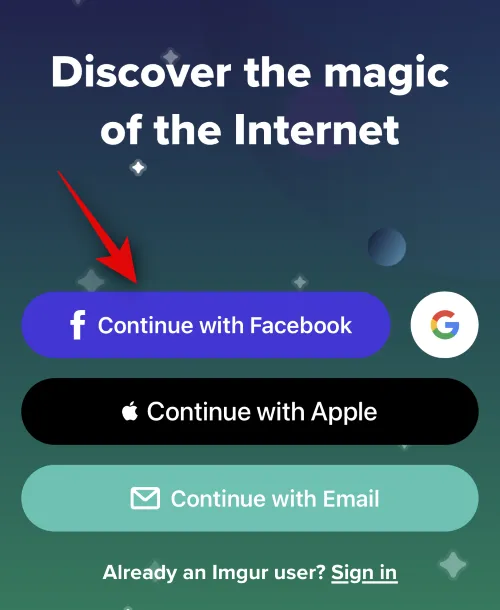
Now use your preferred method to log into your account.
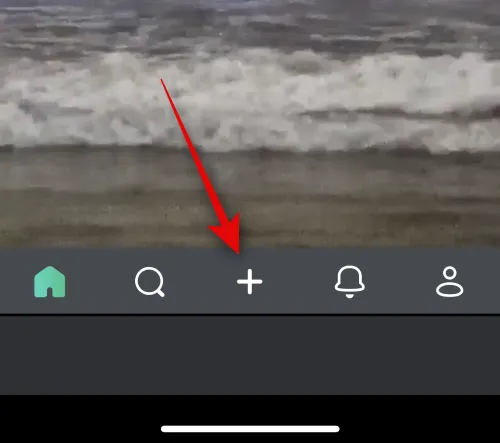
Once you’re logged in, tap the + icon at the bottom.
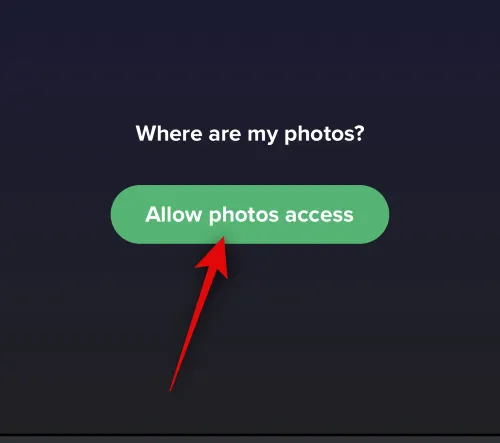
Tap Allow photos access and grant Imgur the necessary permissions to access your images.
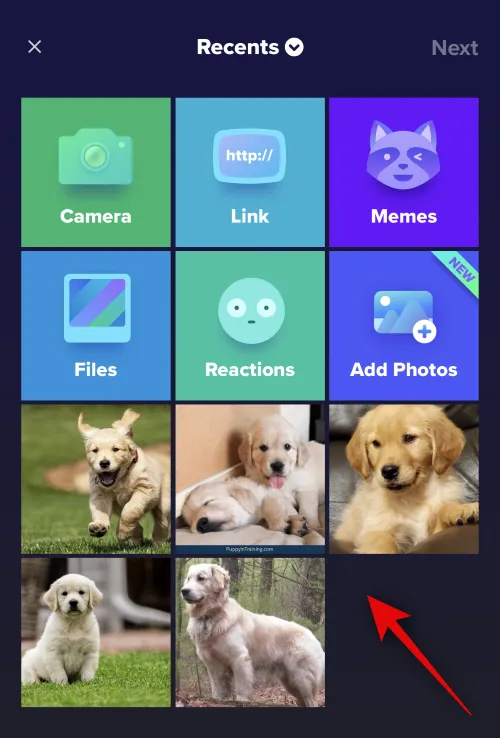
Once done, tap and select the photo you wish to upload to Midjourney.
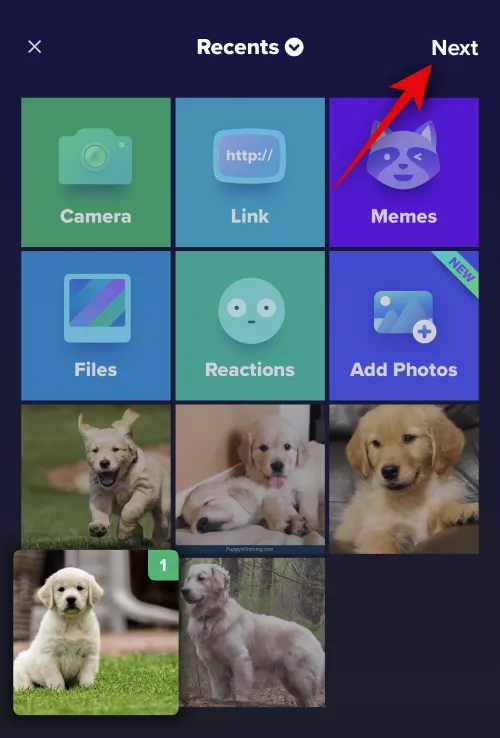
Tap Next in the top right corner.
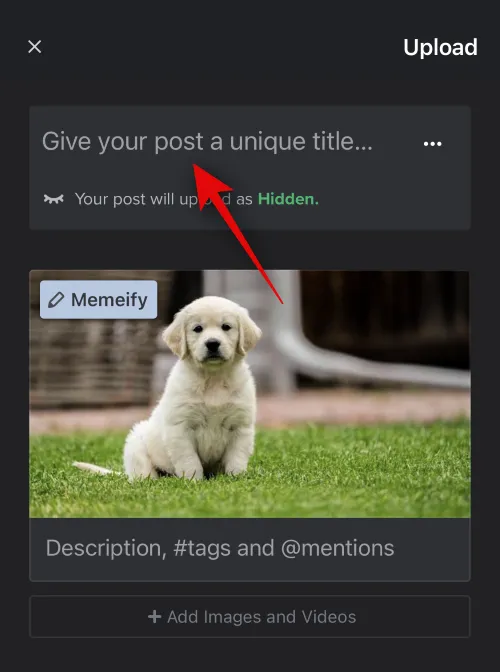
Tap Give your post a unique title… at the top and enter a relevant title for your image.
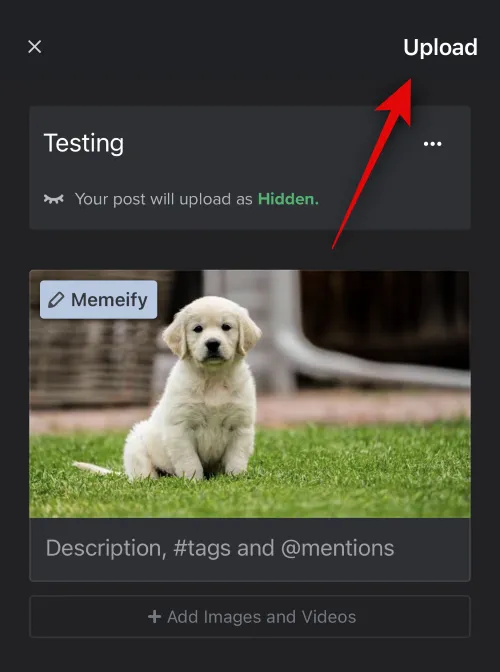
Tap Upload once you’re done.
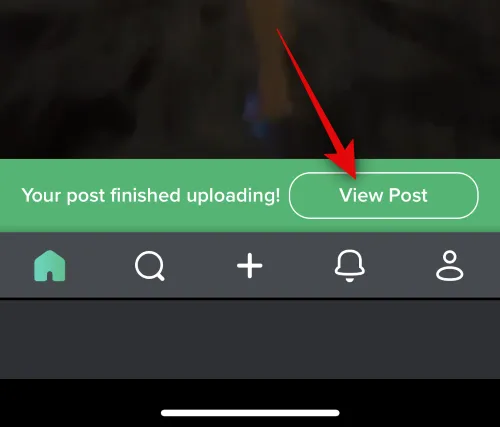
The image will now be uploaded to your profile. Tap View Post.
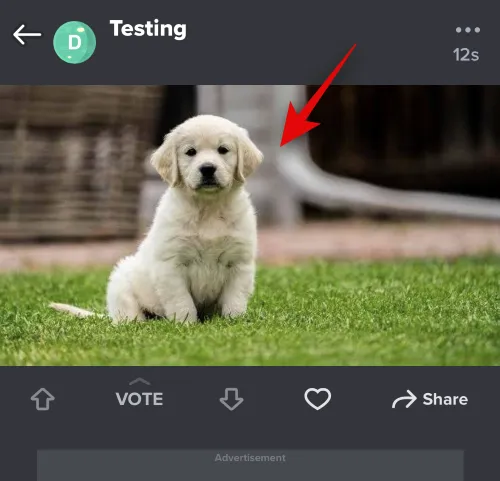
Tap on your image to view it in full screen. This will allow us to get a shareable link to the uploaded image and not the Imgur post.
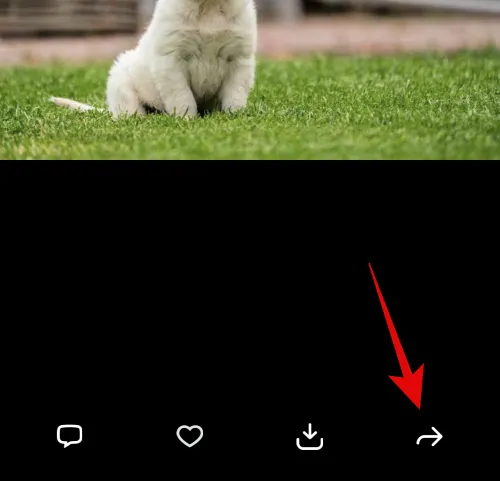
Tap Share at the bottom.
Tap Copy Link.
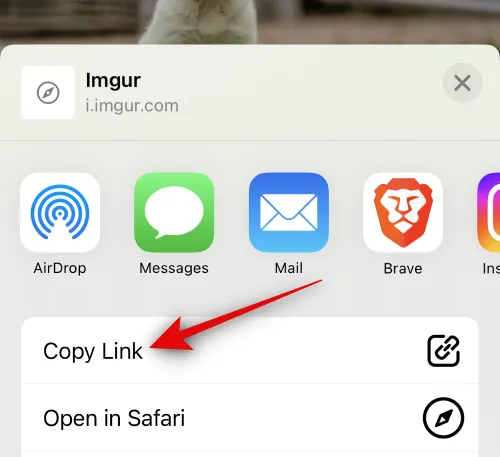
A link for the image will now be copied to your clipboard. Close the Imgur app and open the Discord app now. Log into your account if you are logged out.
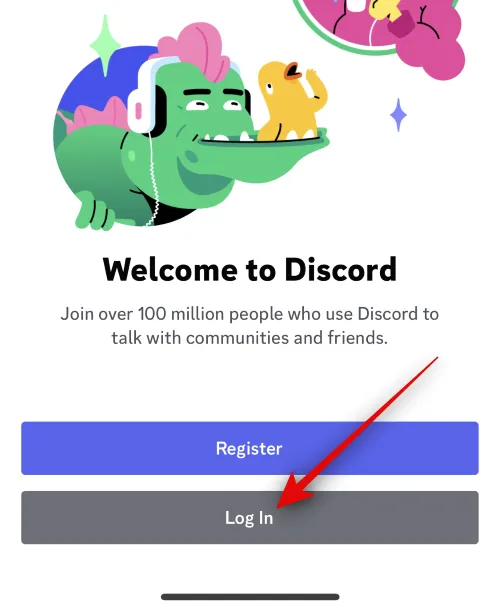
Tap and select the Midjourney server from the left sidebar.
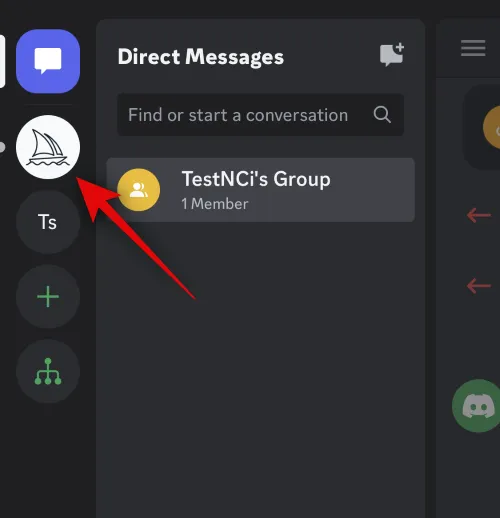
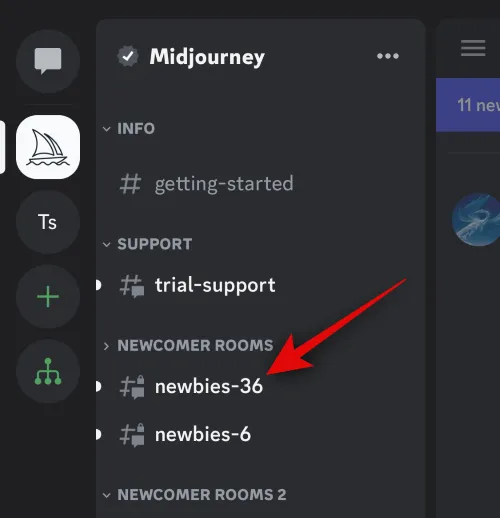
Now tap and select a newbie channel where you wish to generate your images.
Tap the text box at the bottom of your screen.
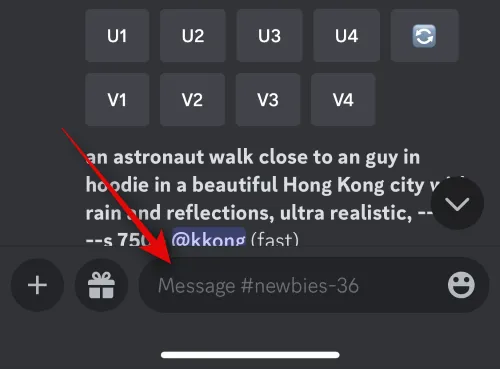
Now type the following command and tap on the same once it shows up in the context menu.
/imagine
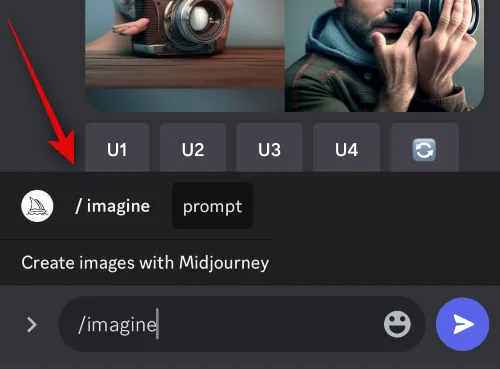
Tap and hold on to the cursor. Tap Paste once it shows up.
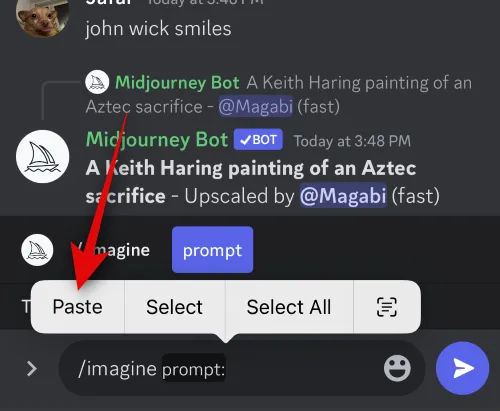
A link to the image we uploaded earlier will now be posted in the text box. Add a space and add a text prompt to further specify your prompt if needed.
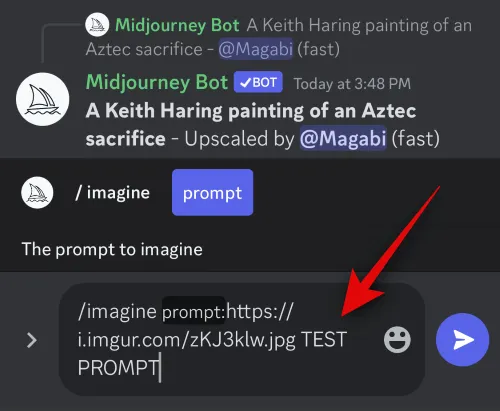
Now use the following parameter to adjust the uploaded image’s weight in your creation. Image weight determines how much inspiration Midjourney will draw from your uploaded image when generating your images. Replace (Value) with your preferred image weight value depending on the Midjourney version you’re currently using.
–iw (Value)
- Midjourney V5: 0.5 to 2.0
- Midjourney V4: N/A
- Midjourney V3: -10,000 to 10,000
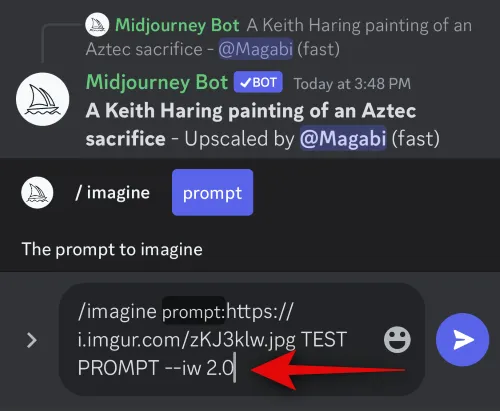
Tap the Send icon once you’re done.
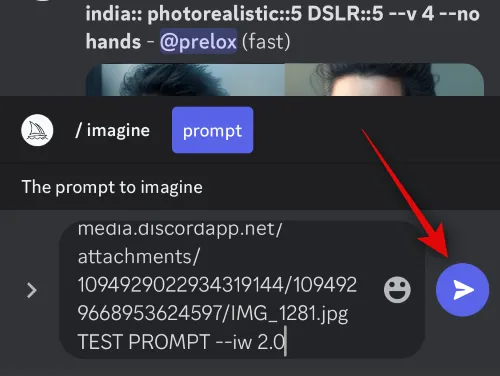
And that’s it! Midjourney will now generate images inspired by your uploaded image as well as the text prompt, if any was included by you.
How to upload an image to Midjourney to use with the /blend command
You can also upload and use your images with the /blend command in Midjourney. This command is used to blend two to five images together to create a new image inspired by all of them. This command can come in handy if you’re trying to create an image inspired by a particular art style or wish to combine multiple subjects together in a single image. Here’s how you can upload images to Midjourney when using the /blend command.
Method 3: Using the /blend command
Here’s how to use the /blend command to upload images in Midjourney on a computer or on a phone.
On PC
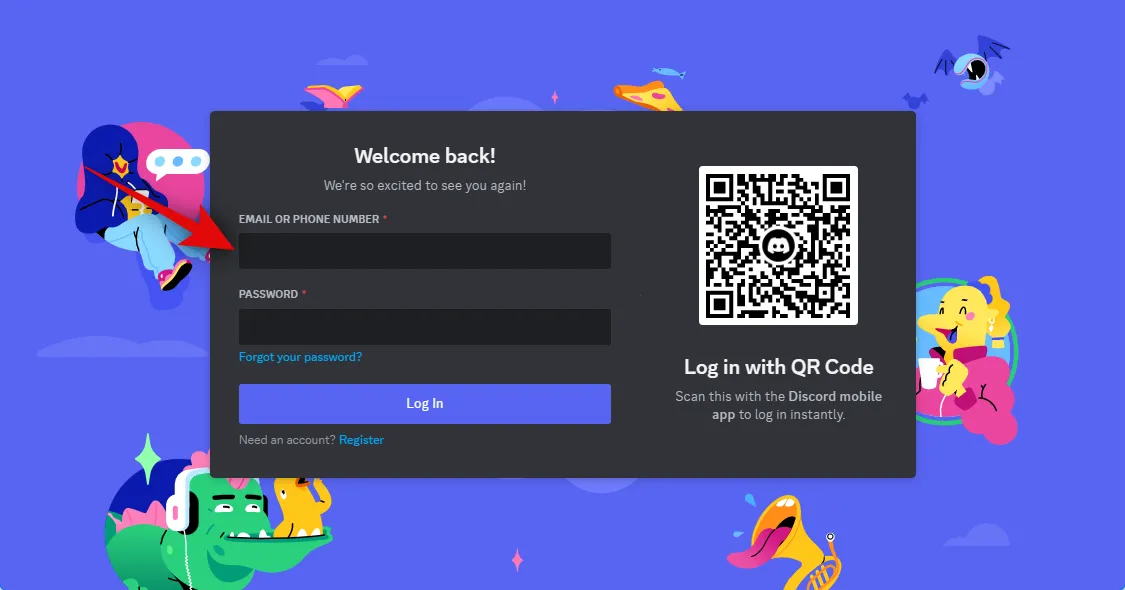
Open Discord on your PC. You can use the dedicated desktop app or the web version of Discord. Log into your account if you’re logged out.
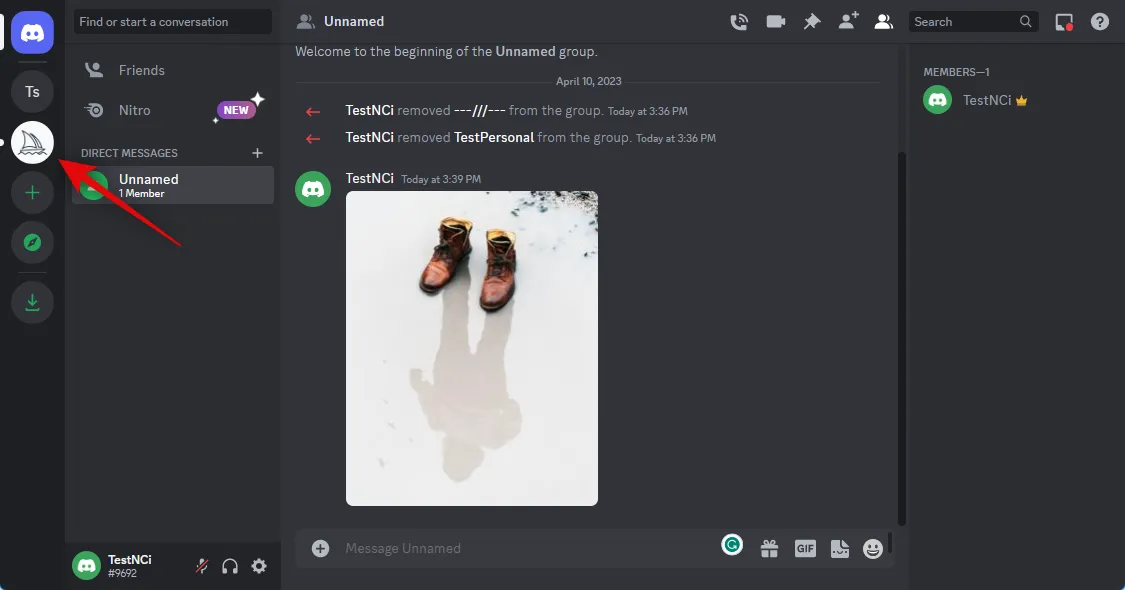
Now click and select the Midjourney server from the left sidebar.
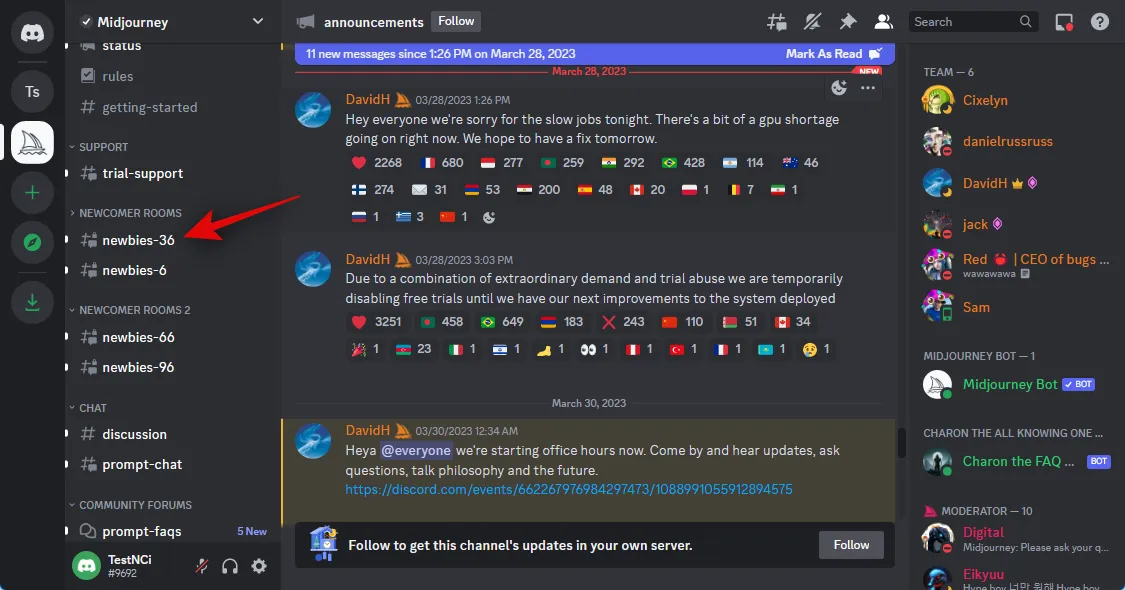
Click and select a newbie channel where you wish to blend and create your new image.
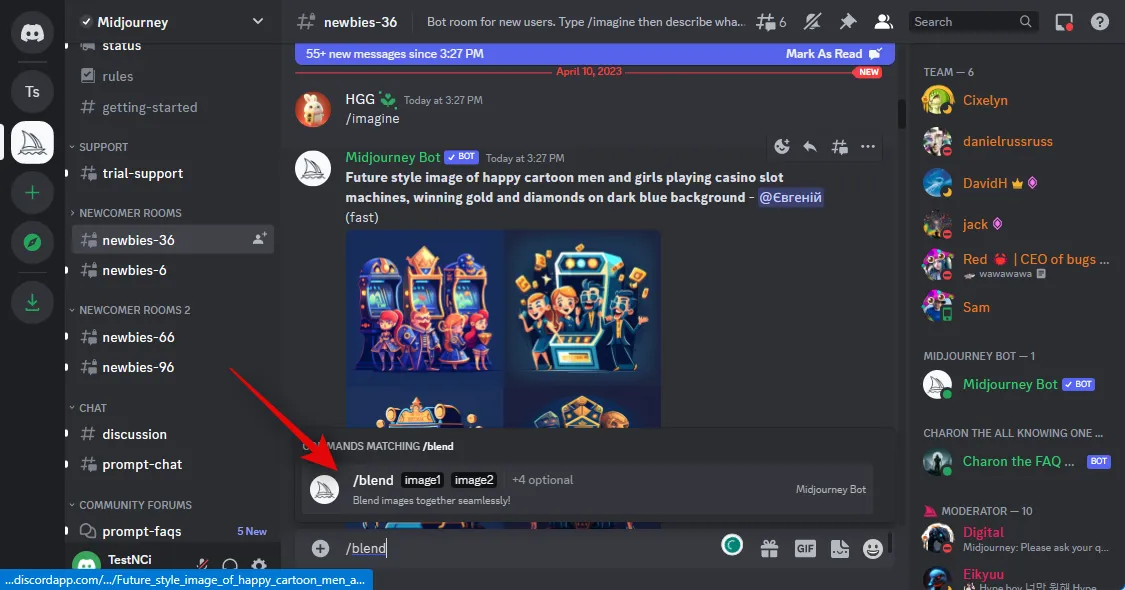
Click the text box at the bottom. Now type the following command and click and select it once it shows up in the context menu.
/blend
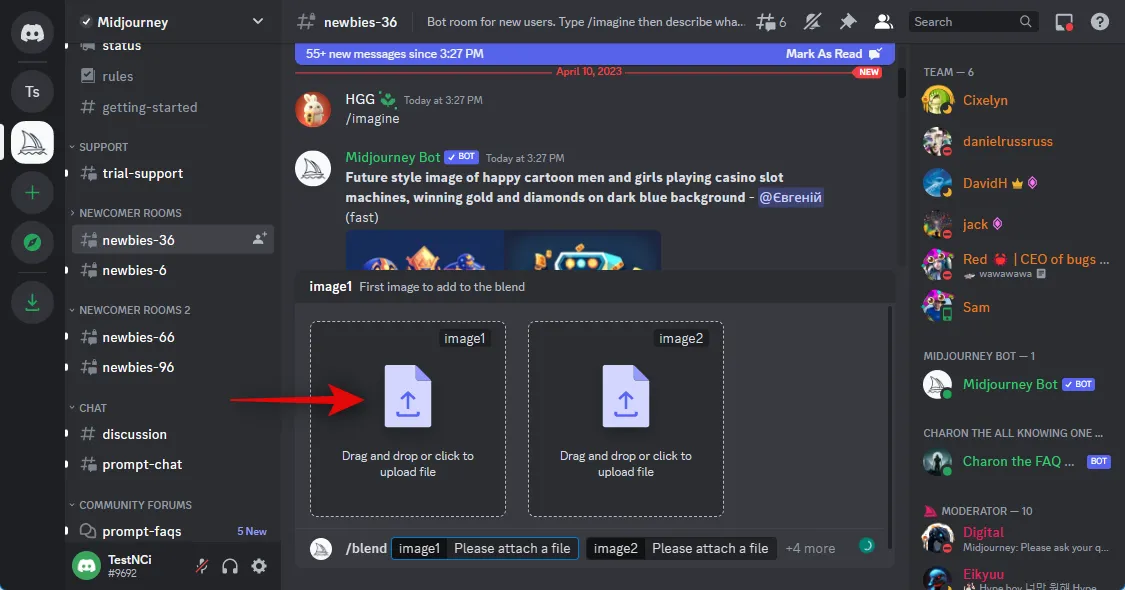
Click the first placeholder to upload your first image.
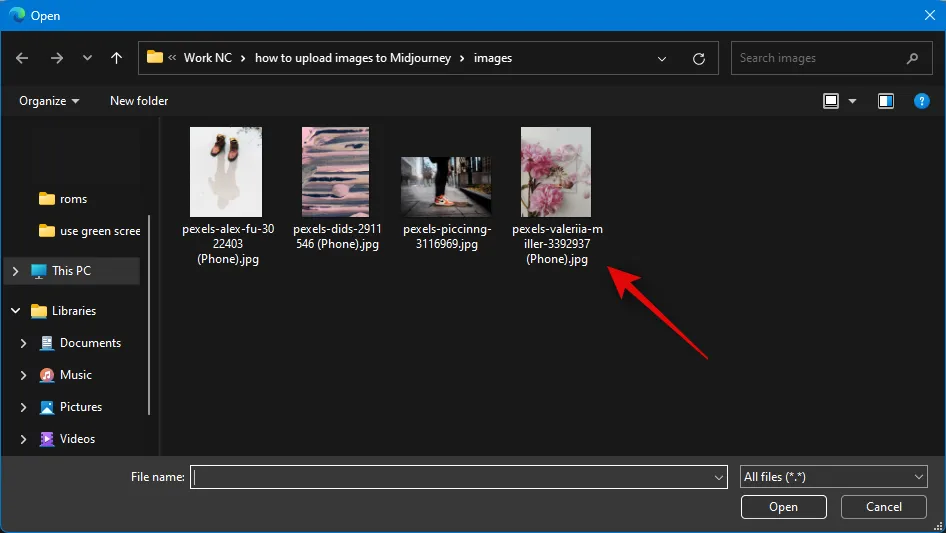
Navigate to the image you wish to upload. Click and select the image.
Click Open.
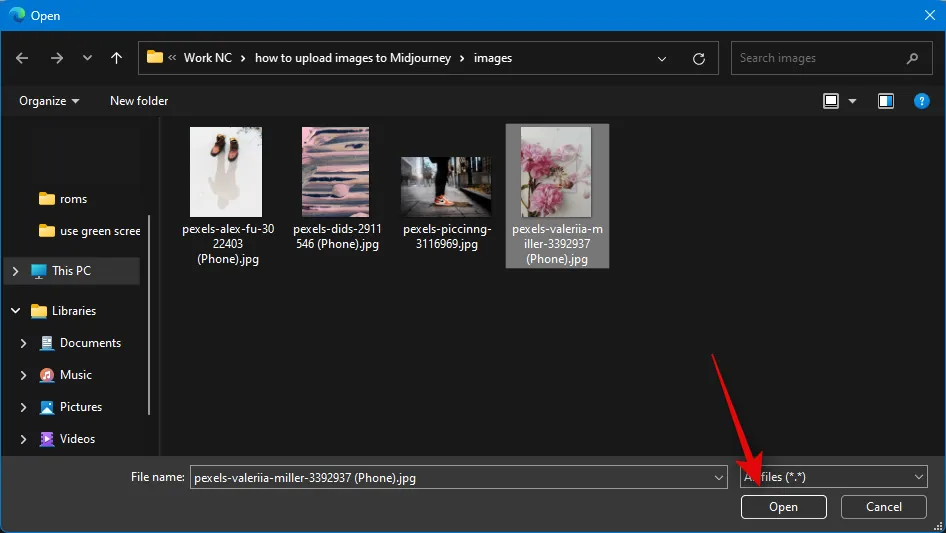
Repeat the steps above to upload your second image as well.
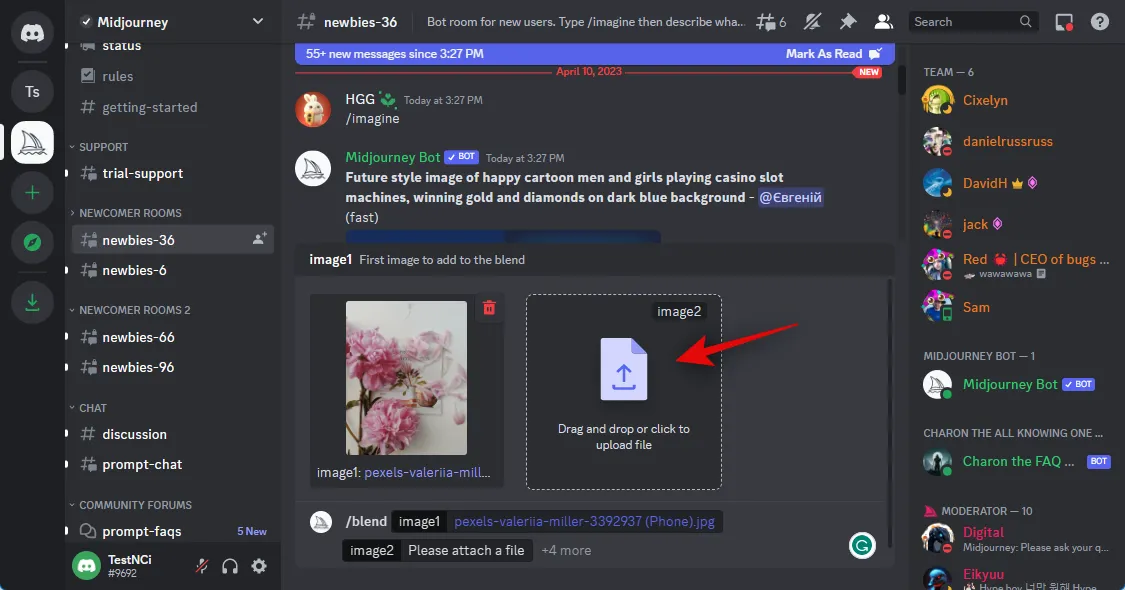
If you wish to add more than two images, click and place the cursor in your text box at the bottom.
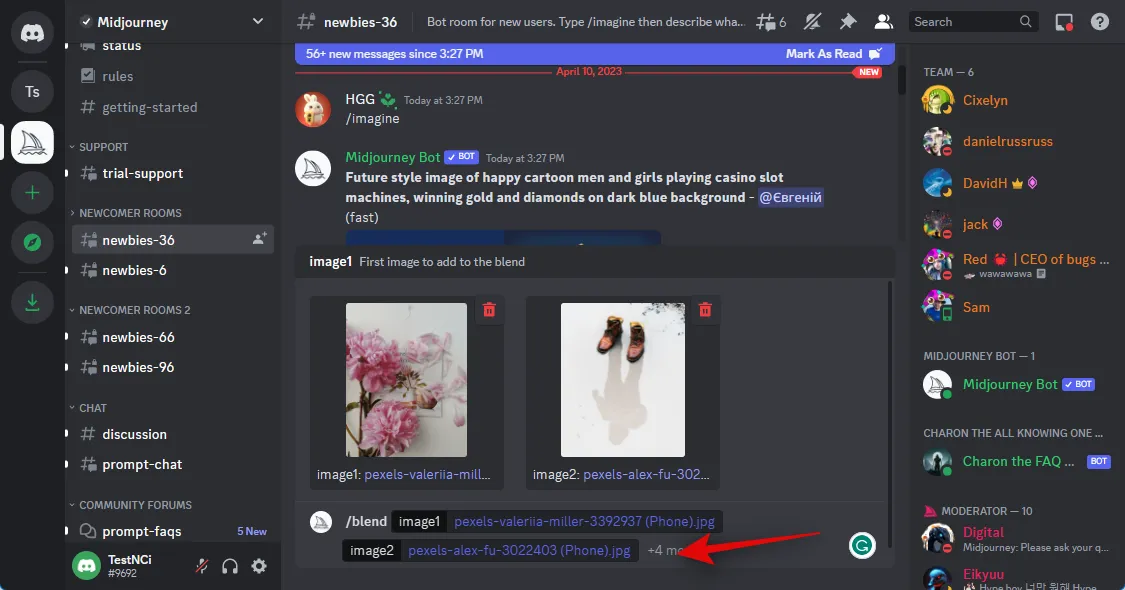
Now click and select Image 3.
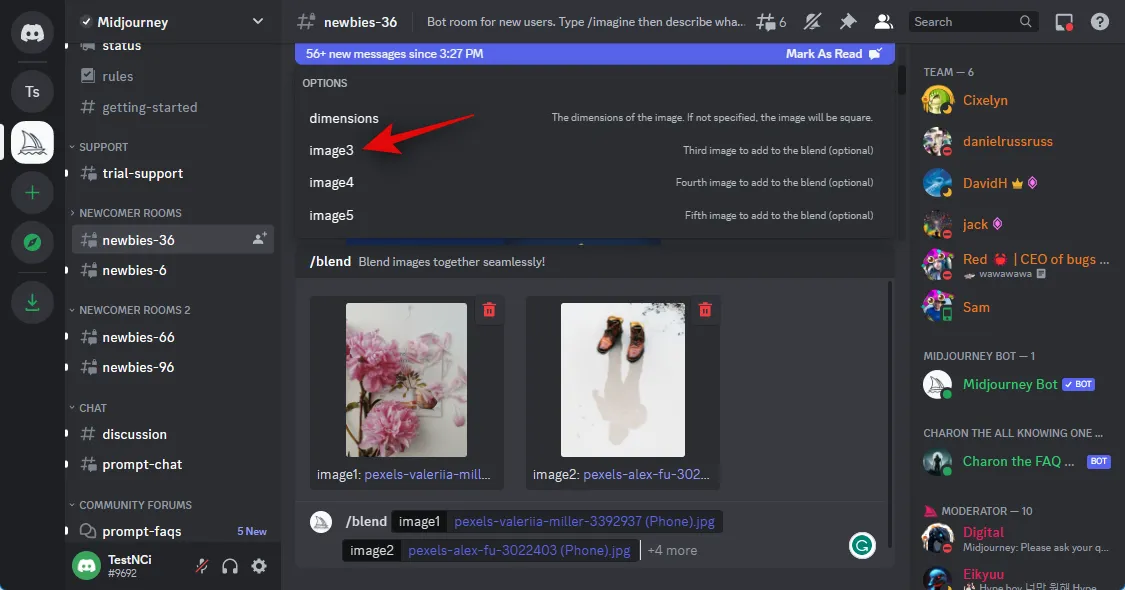
Click the placeholder and upload your preferred image, as we did earlier.
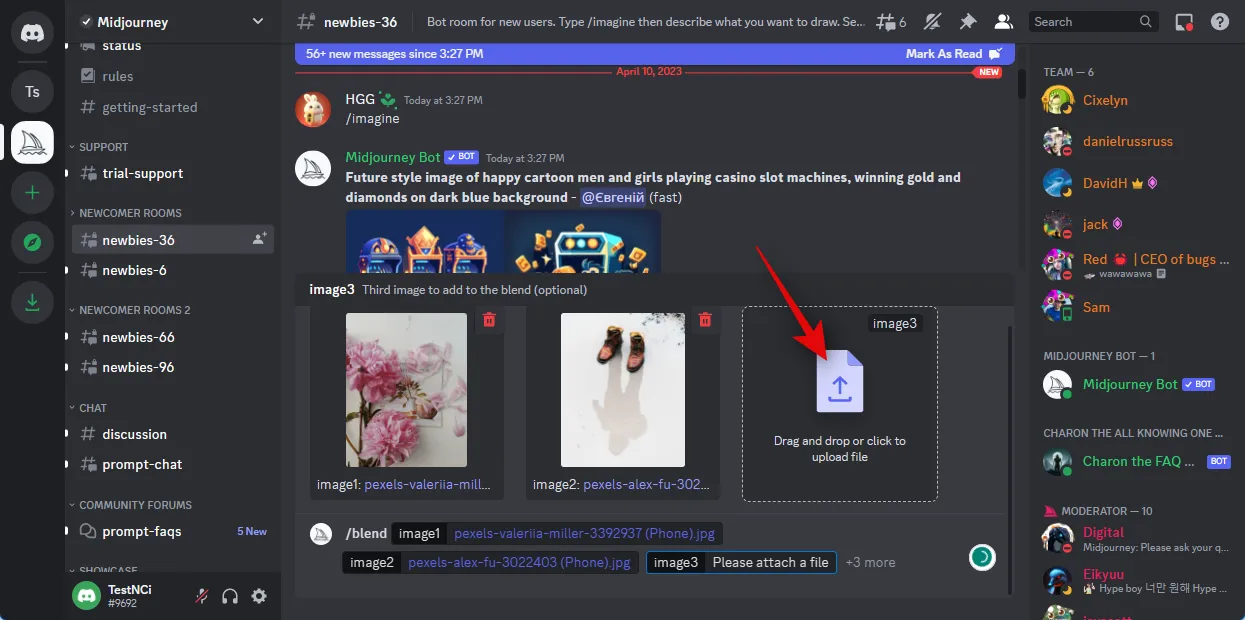
You can now repeat the steps above and more placeholders to upload more images if needed.
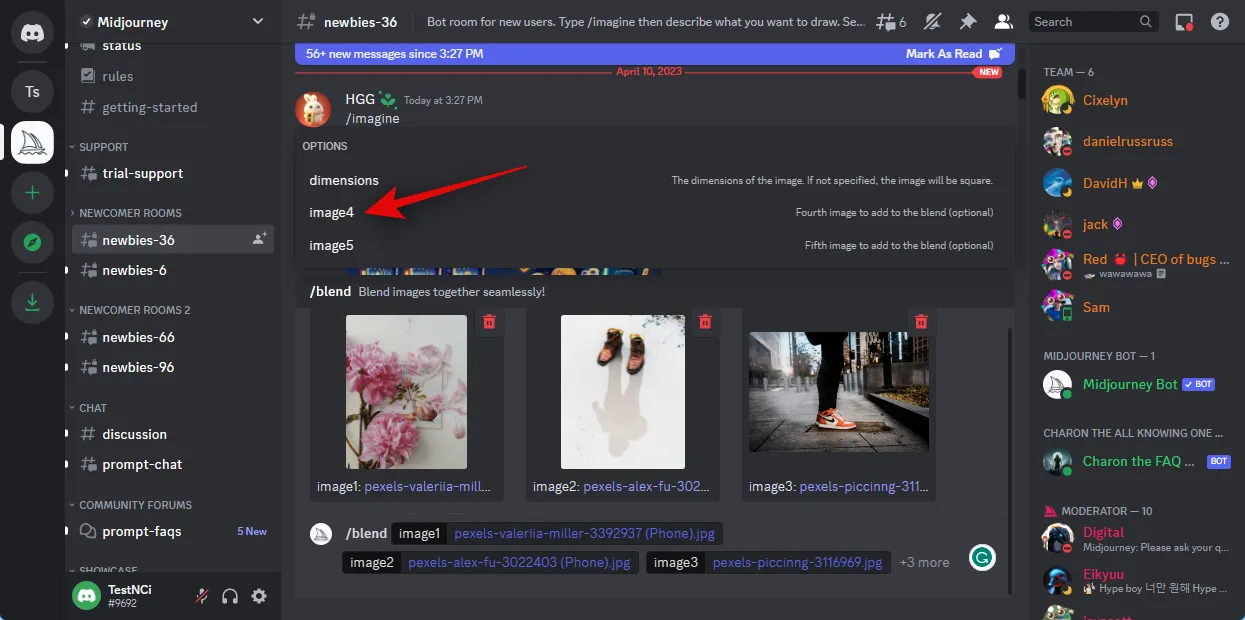
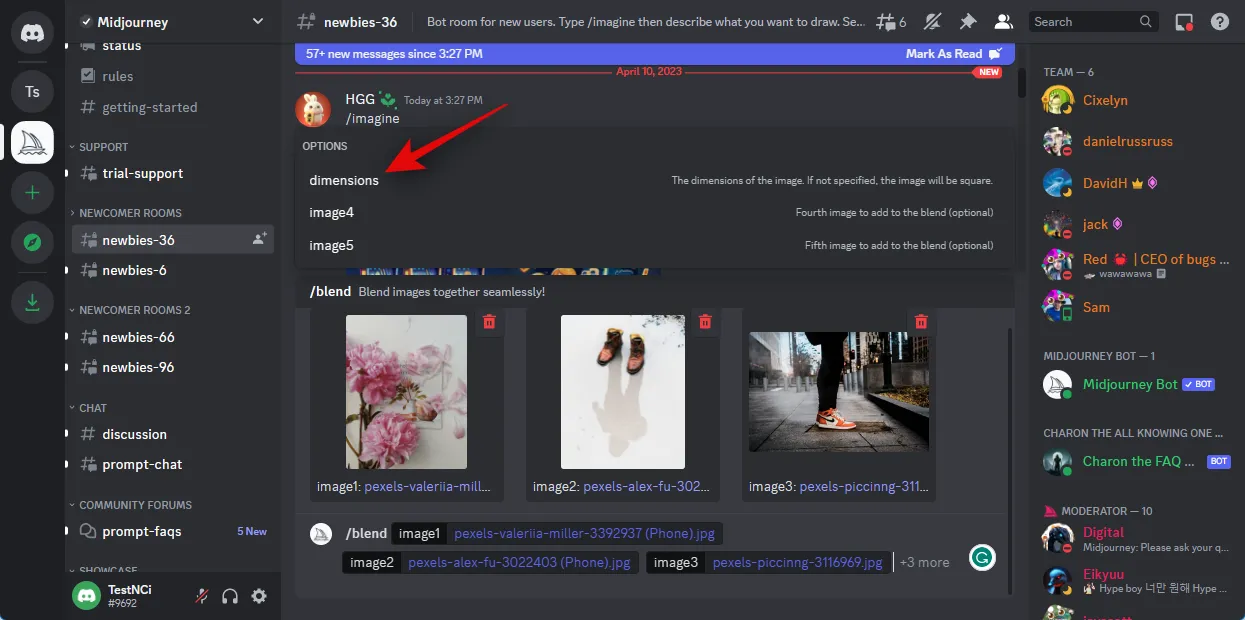
Once you’re done selecting the images you wish to upload, place the cursor in your textbox again and select dimensions.
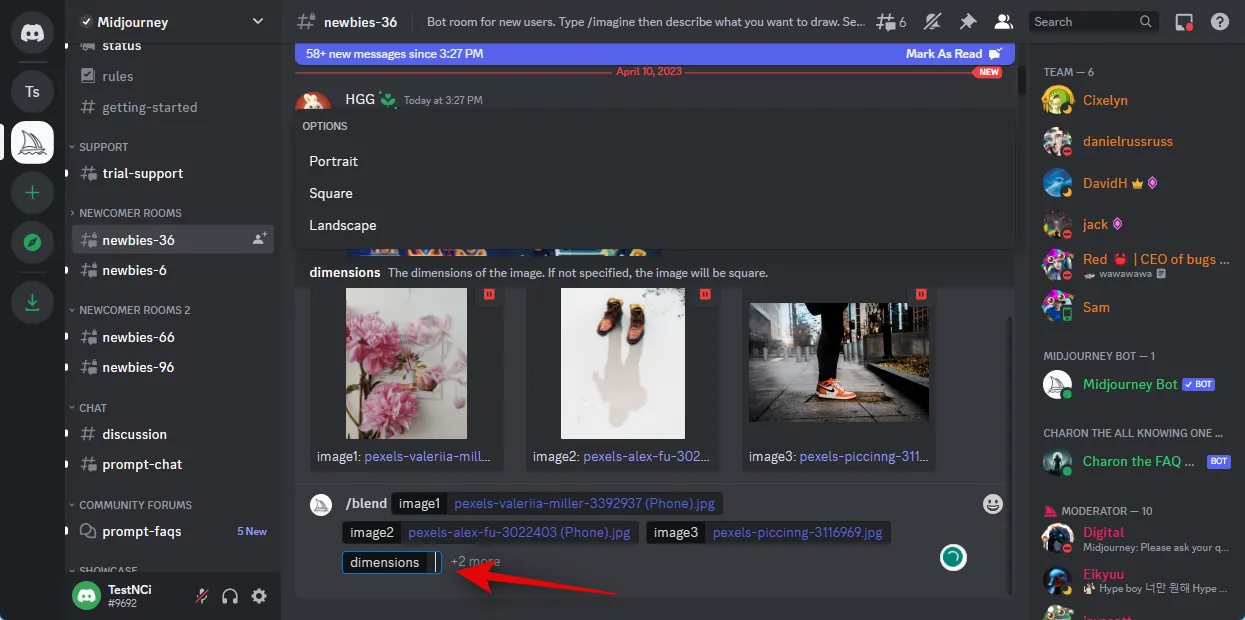
Now type in one of your preferred aspect ratios for the output from the choices at the bottom.
- 1:1
- 2:3 (Portrait)
- 3:2 (Landscape)
Press enter once you’re done.
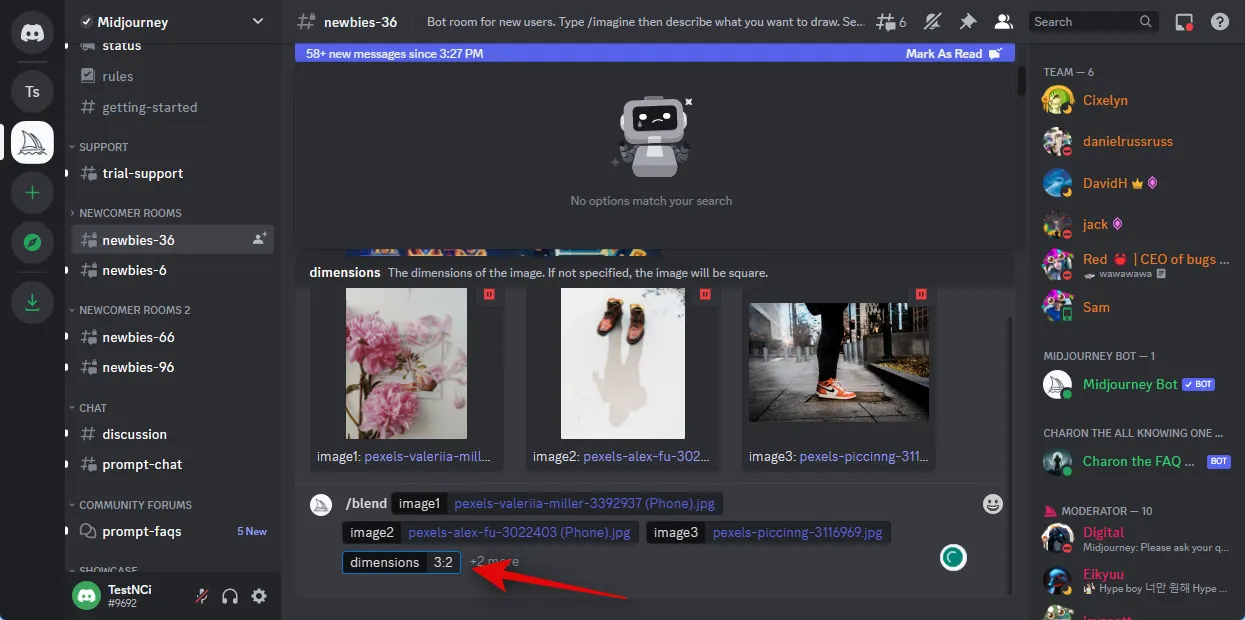
And that’s it! The images will now be submitted to Midjourney, and the AI will generate a blended image based on your selected images.
On Mobile
You can also use the /blend command when using the Discord mobile app. Follow the steps below to help you along with the process.
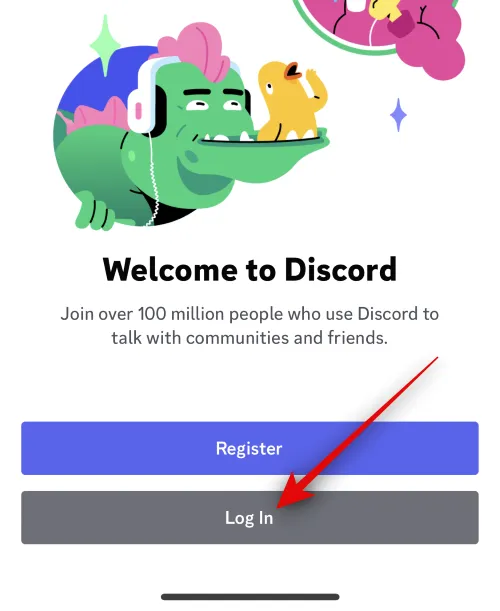
Open the Discord app and log into your account if you’re logged out.
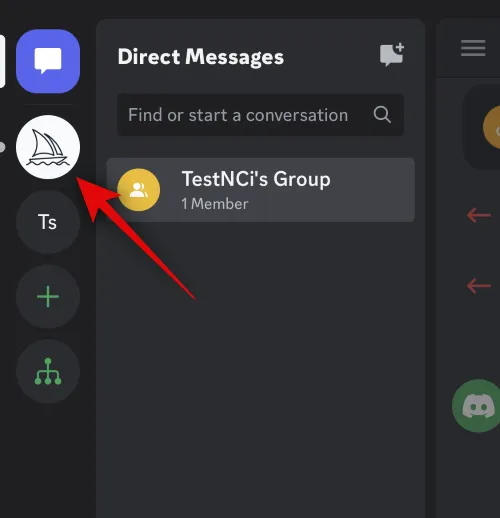
Now tap and select the Midjourney server from the left sidebar.
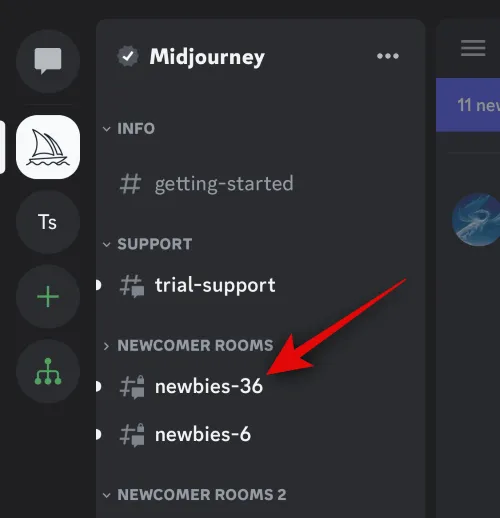
Tap and select a newbie channel where you wish to generate and blend your images.
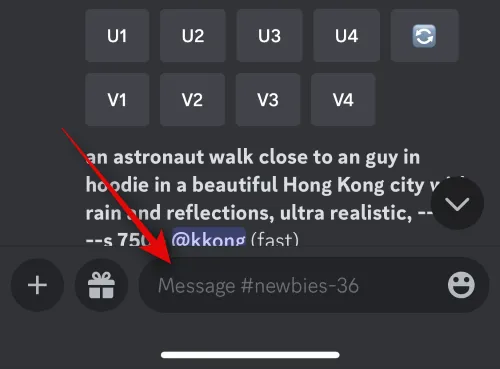
Tap the text box at the bottom.
Now type the following command and press the spacebar once it shows up in the context menu.
/blend
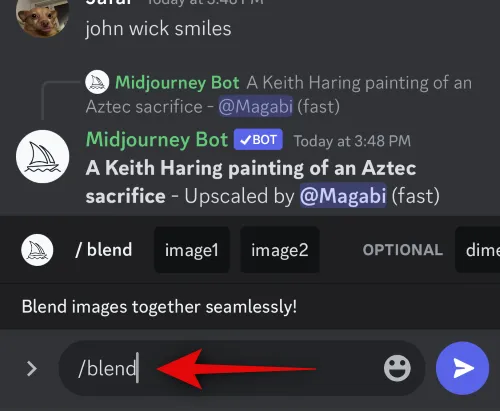
A new placeholder will be automatically added for your first image, and your gallery will open at the bottom. Tap and select the first image you wish to use with /blend.
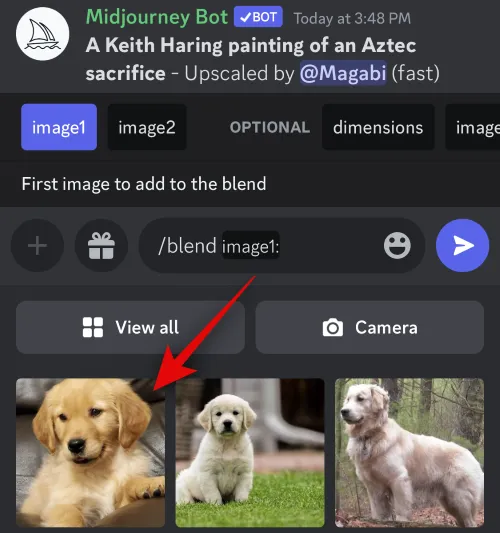
Once done, a second placeholder will be automatically added again. Tap and select your second image.
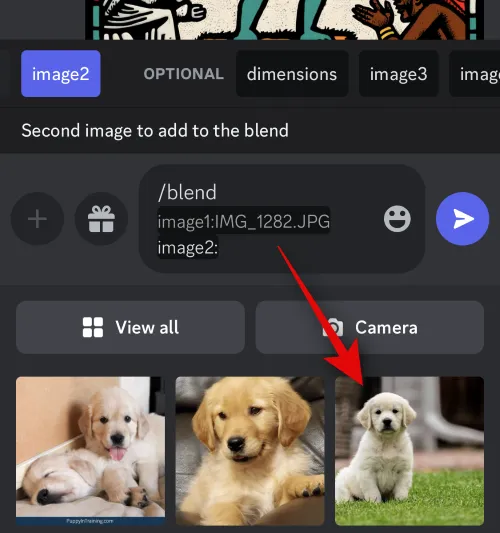
If you wish to add a third image, tap and select Image3 from the top.
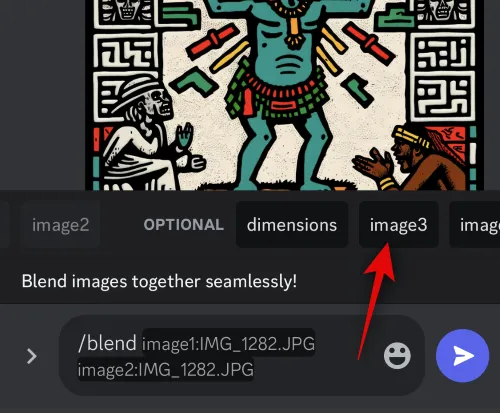
Now tap and select the preferred image to add it to the /blend command.
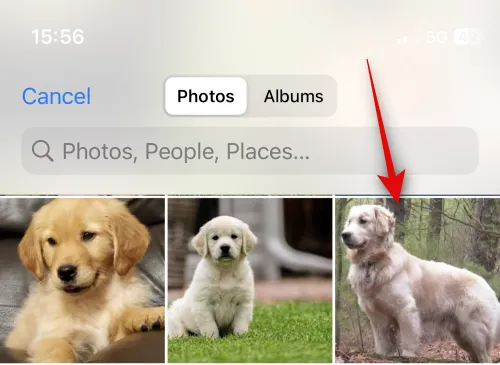
Repeat the steps above to add your fourth or fifth image if needed. Now tap dimensions at the top.
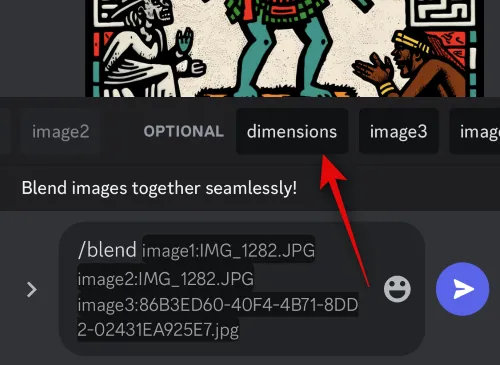
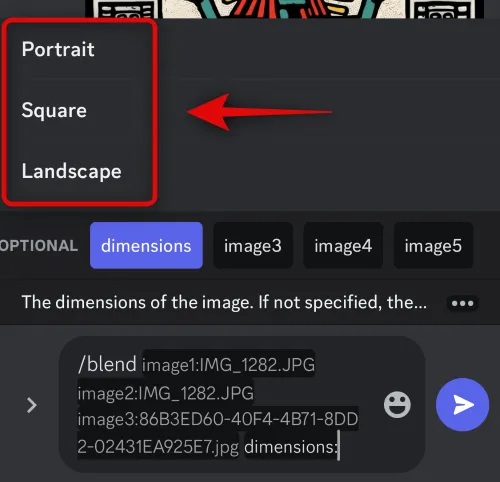
Select your preferred aspect ratio from the choices at the top. You get the following choices to choose from.
- Portrait (2:3)
- Square (1:1)
- Landscape (3:2)
Once you’re done, tap the Send icon.
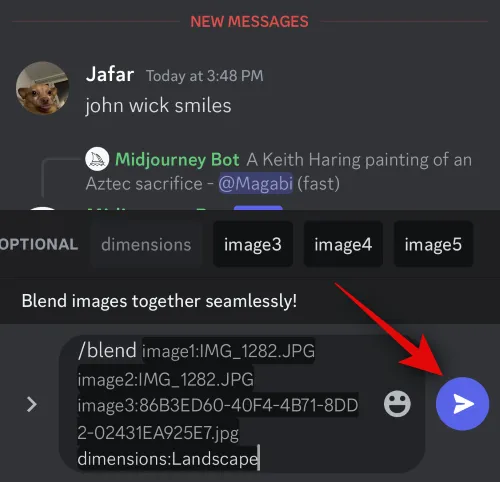
And that’s it! The selected images will now be uploaded to Midjourney and blended together to create a new image.
Why upload an image to Midjourney?
Apart from generating images based on text prompts, Midjourney can also generate images inspired by an uploaded image. This is why you might have noticed users uploading their own images to Midjourney so they can be used as an inspiration for your next prompt. Uploaded images can also be used in conjunction with a text prompt so that you can get more specific in terms of detail when generating your images.
Additionally, apart from generating images inspired by your uploaded image, Midjourney can also blend two images together. This can help create unique images inspired by a certain art style or look. These are some of the major reasons why you might want to upload images to Midjourney.
We hope the post above helped you easily upload images to Midjourney. If you face any issues or have any more questions, feel free to reach out to us using the comments section below.
Leave a Reply