0x800f080a: How to Quickly Fix This Windows Update Error
There are various ways to upgrade to Windows 11 if you haven’t already. Most users opt to do so from settings, but it seems some cumulative updates are failing. An error code 0x800f080a may pop up on your screen, putting things at a standstill.
What is error code 0x800f080a?
The error 0x800f080a is a Windows update error that appears on your screen when you try to update the latest cumulative updates.
Normally, this process should proceed seamlessly with no hiccups, but once you encounter this error, there may be other underlying issues.
Of course, users have been able to continue using Windows 11 while having disabled updates permanently, but this exposes your system to vulnerabilities, and you may miss out on some critical features.
Back to the 0x800f080a error, why does it happen? Some possible causes include:
- System requirements – Windows 11 requires your PC to meet some system and hardware requirements. If it doesn’t, at a certain stage, the installation is bound to fail.
- Firewall restrictions – Since Windows update requires you to download some files, your firewall or antivirus may block the update. This is because it has marked the files as suspicious and could put your system at risk.
- Corrupt system files – It is possible that there are already some corrupt system files in your PC before the installation.
- Conflicting application – If you have recently installed any program, try disabling or uninstalling it. Sometimes third-party apps trigger errors such as 0x800f080a.
How do I fix error 0x800f080a?
We recommend you try the following first before proceeding to the more complex solutions:
- Ensure your PC meets the system requirements for running Windows 11.
- Disconnect all peripherals from your PC and only connect those necessary for the Windows update process.
- Ensure your PC has up-to-date drivers.
- Check for any viruses that may be present on your PC. These can easily halt the update process.
- Verify that your time and date settings are correct. Sometimes, updates may fail because of location issues.
- Free up space for Windows updates, as sometimes they fail if there’s insufficient storage.
- Finally, try restarting your PC to reset any temporary settings that could hinder the update process.
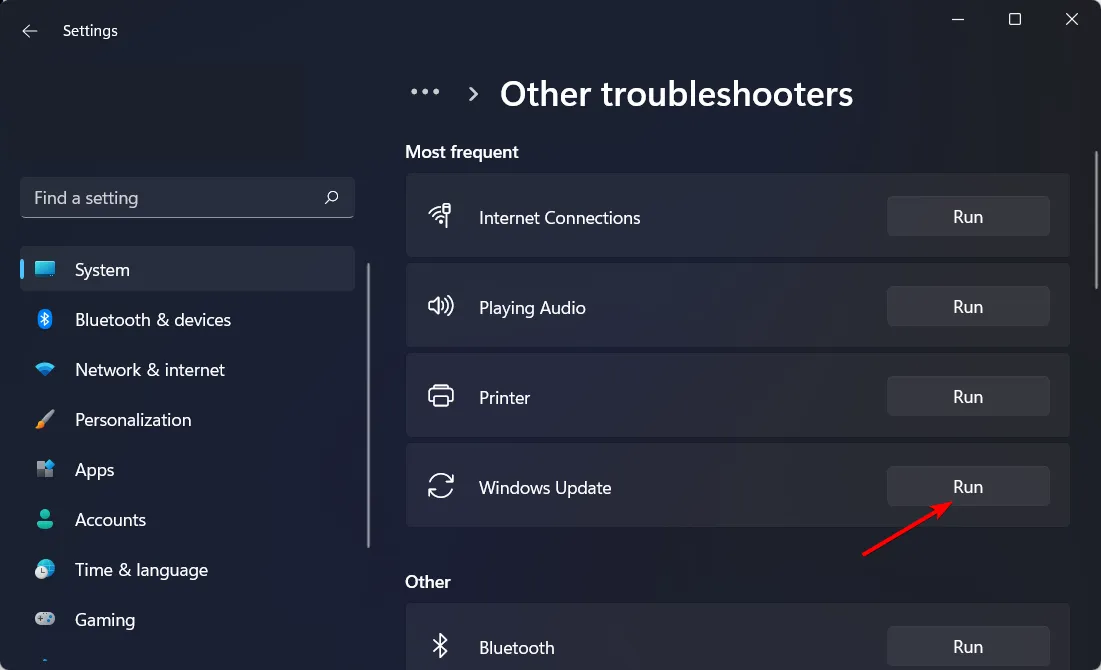
1. Run the Windows Update troubleshooter
- Hit the Windows key and click on Settings.

- Click on System and select Troubleshoot.

- Navigate to Other troubleshooters.

- Click the Run option for the Windows Update troubleshooter.
2. Run DISM and SFC scans
- Hit the Start Menu icon, type cmd in the search bar, and click Run as administrator.

- Type the following commands and press Enter after each one:
DISM.exe /Online /Cleanup-Image /Restorehealthsfc /scannow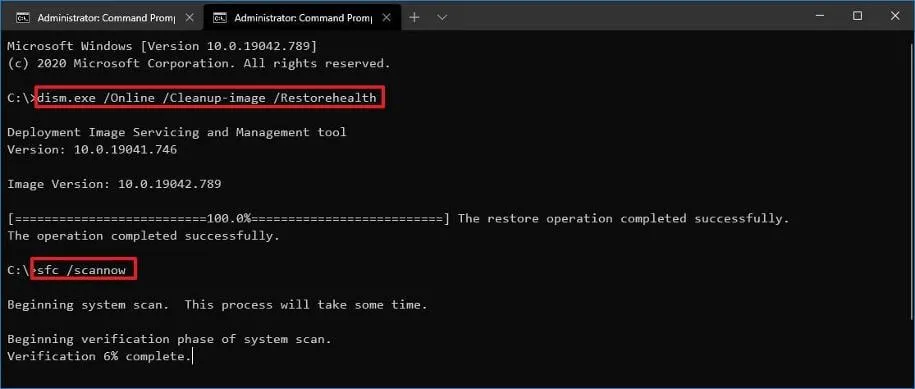
- Restart your PC.
3. Disable your firewall/antivirus
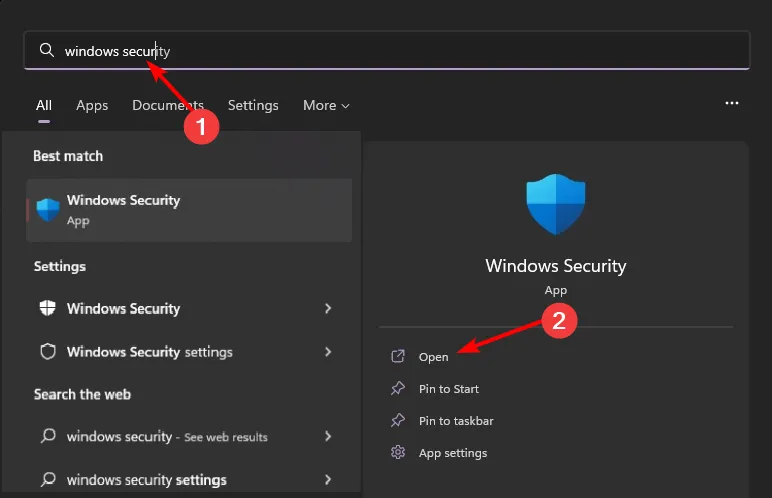
- Hit the Windows button, type Windows Security in the search bar, and click Open.
- Click on Firewall & network protection, then select Public network.
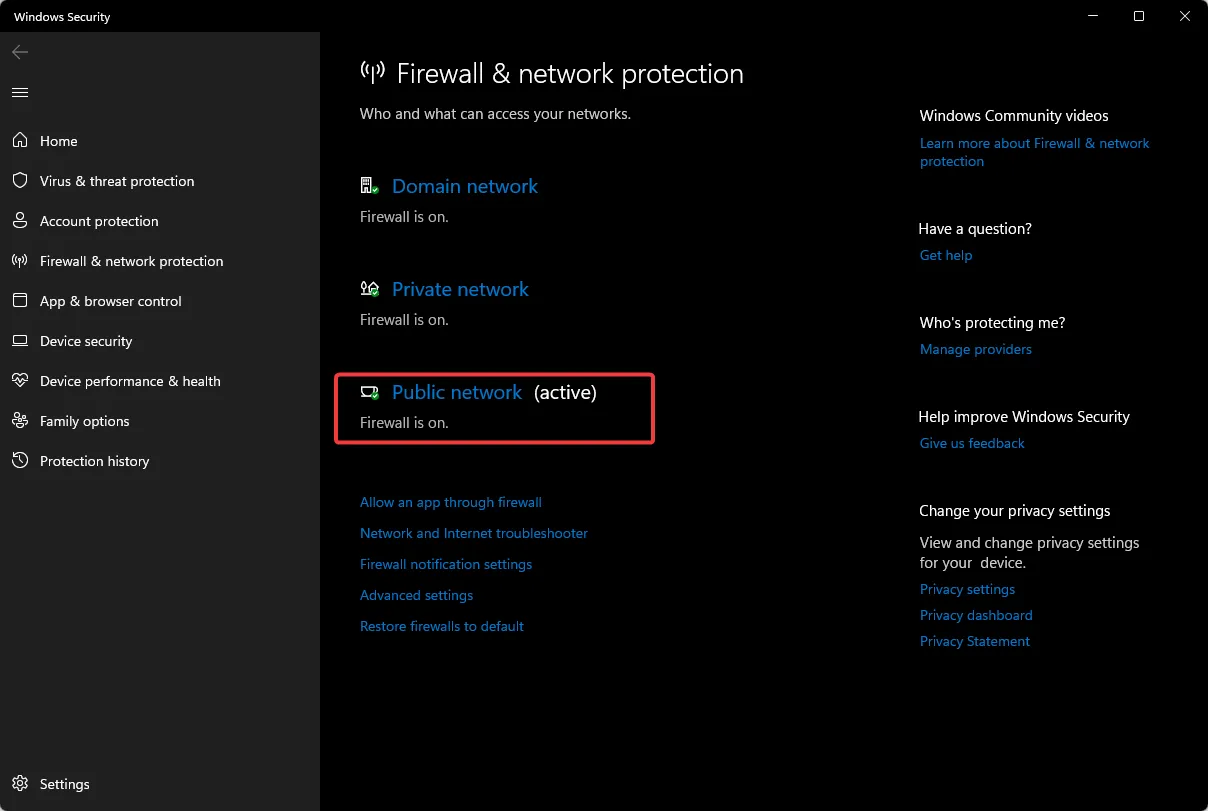
- Locate Microsoft Defender Firewall and toggle the off button.

4. Reset Windows update components
- Hit the Windows key, type cmd in the search bar, and click Run as administrator.

- Type the following commands and press Enter after each one:
net stop bitsnet stop wuauservnet stop appidsvcnet stop cryptsvcDel "%ALLUSERSPROFILE%\Application Data\Microsoft\Network\Downloader\*.*"rmdir %systemroot%\SoftwareDistribution /S /Qrmdir %systemroot%\system32\catroot2 /S /Qregsvr32.exe /s atl.dllregsvr32.exe /s urlmon.dllregsvr32.exe /s mshtml.dllnetsh winsock resetnetsh winsock reset proxynet start bitsnet start wuauservnet start appidsvcnet start cryptsv
5. Perform a clean boot
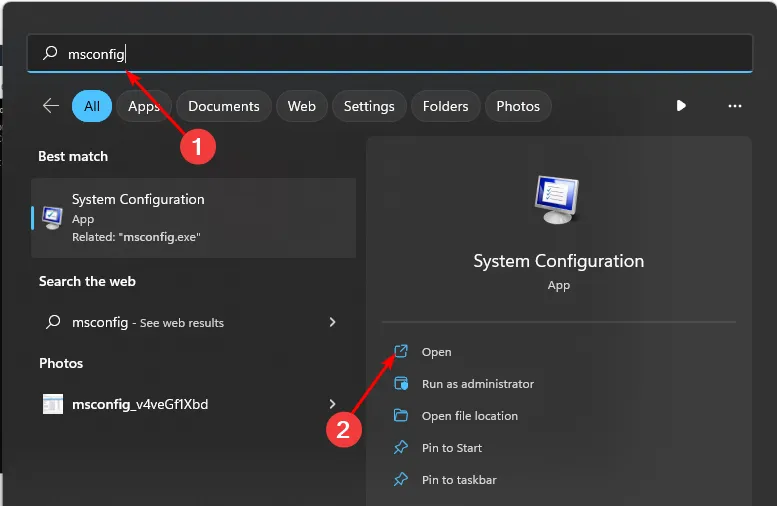
- Hit the Windows key, type msconfig, and open System Configuration.
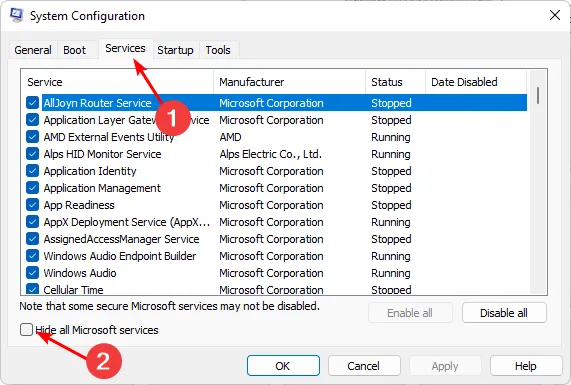
- Switch to the Services tab and select Hide all Microsoft services.
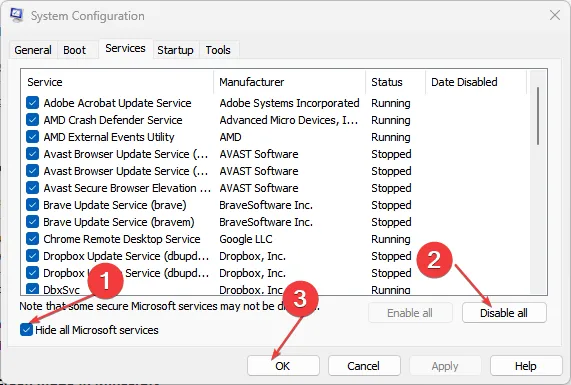
- Click on the Disable all button, then hit the Apply button to save the changes.
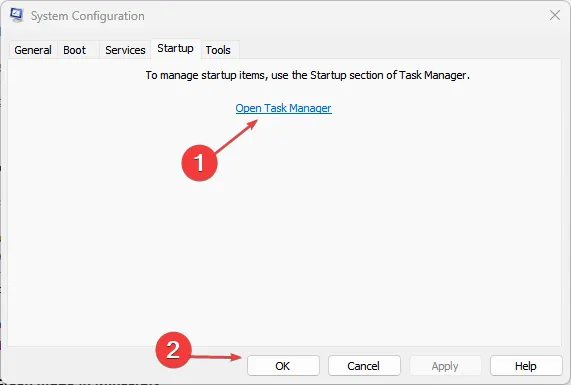
- Go back and click on the Startup tab, select Open Task Manager then click OK.
- In the Startup tab of the Task Manager, Disable all the Enabled startup items.
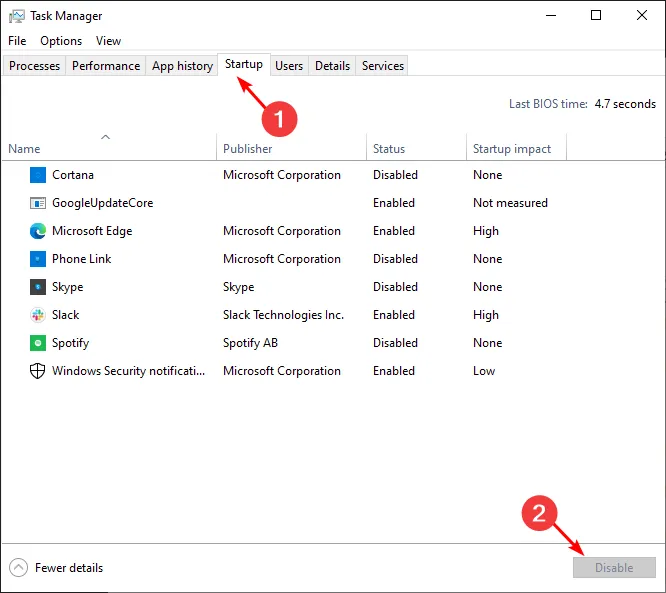
- Close Task Manager and restart your PC.
Feel free to share any more solutions that may have assisted you in this error below.
Leave a Reply