0x8009001D Windows Update Error: How to Fix It
Windows updates are critical both to the performance of the PC and for its security. With every new version, you usually get a set of enhancements and vital security updates. But, the Windows Update errors act as a barrier here. One such is the 0x8009001D error.
The complete message, in this case, reads, There were problems installing some updates, but we’ll try again later. Error code: 0x8009001d. The error is similar to others in the same category and can be resolved in no time. Let’s find out how!
Why do I get the 0x8009001D Windows Update error?
Here are a few reasons users come across 0x8009001D:
- Corrupt system files: The most common reason behind the error is corrupt system files. Besides the Windows update errors, these affect the PC’s performance and even lead to BSOD.
- Problems with the update components: The Windows Update Components play a vital role in the process, and even the smallest of problems here can lead to the 0x8009001D error.
- Third-party software blocking the updates: In many cases, it was a third-party antivirus or firewall blocking the process, triggering the error.
How do I fix the 0x8009001D error?
Before we proceed, try these quick solutions:
- Restart the computer and try checking for updates.
- Ensure to disable any third-party antiviruses or security software installed on the PC. In case that works, uninstall the app, and go with a reliable and OS-friendly antivirus solution.
If none work, move to the fixes listed next.
1. Run the DISM and SFC scan
- Press Windows + S to open Search, type Command Prompt in the text field, and click on Run as administrator.
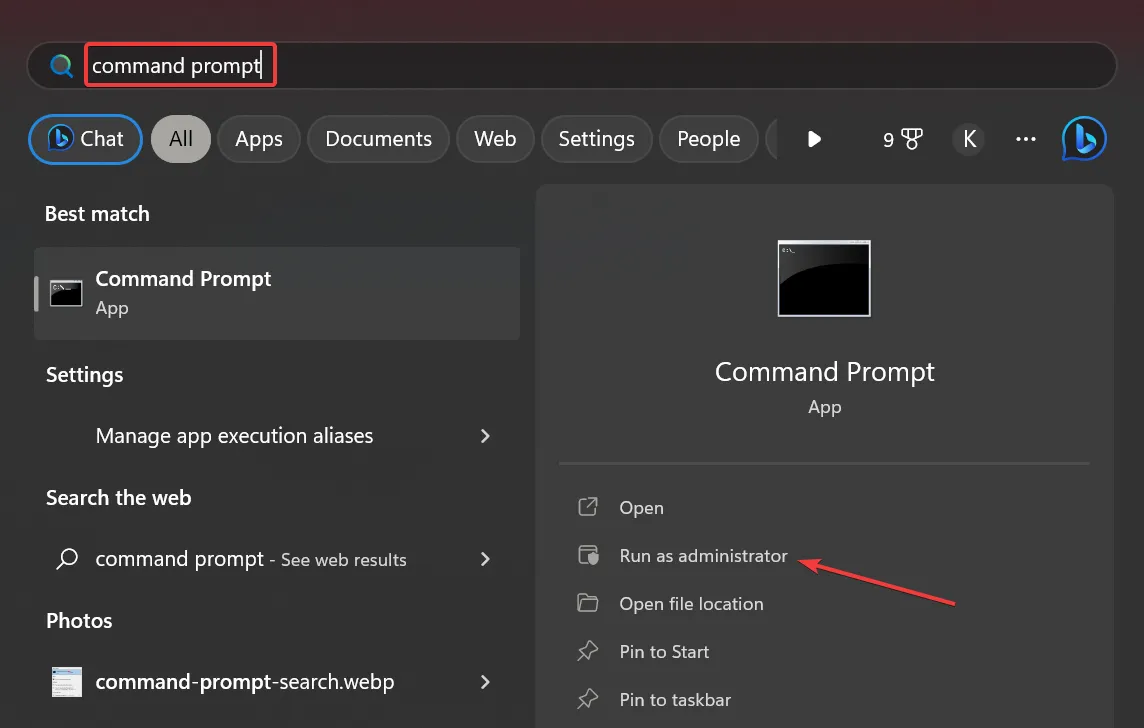
- Click Yes in the UAC prompt.
- Paste the following three commands individually and hit Enter after each:
DISM /Online /Cleanup-Image /CheckHealthDISM /Online /Cleanup-Image /ScanHealthDISM /Online /Cleanup-Image /RestoreHealth - Once done, execute this command to run the SFC scan:
sfc /scannow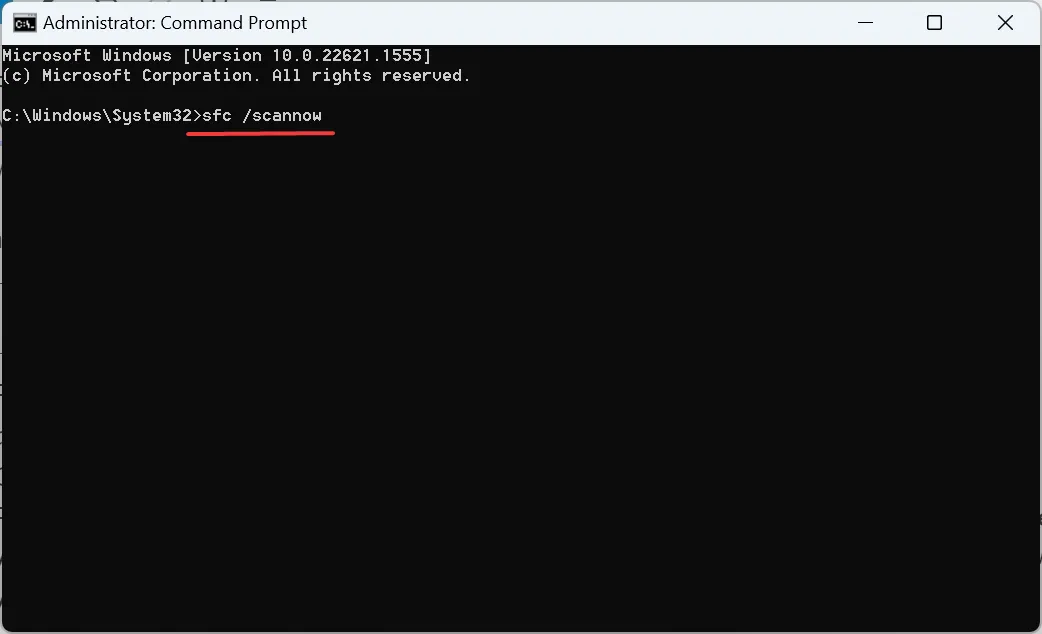
A quick fix when you get the 0x8009001D update error is to check for corrupt system files and use the DISM and SFC scans to repair them.
Alternatively, you could resolve such issues more efficiently with a dedicated software application designed to patch your PC 100% automatically.
2. Make sure the relevant services are running
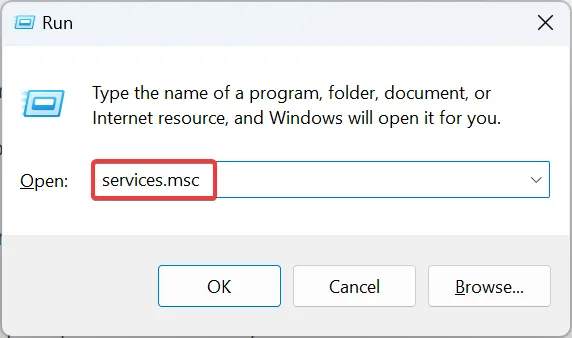
- Press Windows + R to open Run, type services.msc in the text field, and hit Enter .
- Locate the Background Intelligent Transfer Service, right-click on it, and choose Properties.
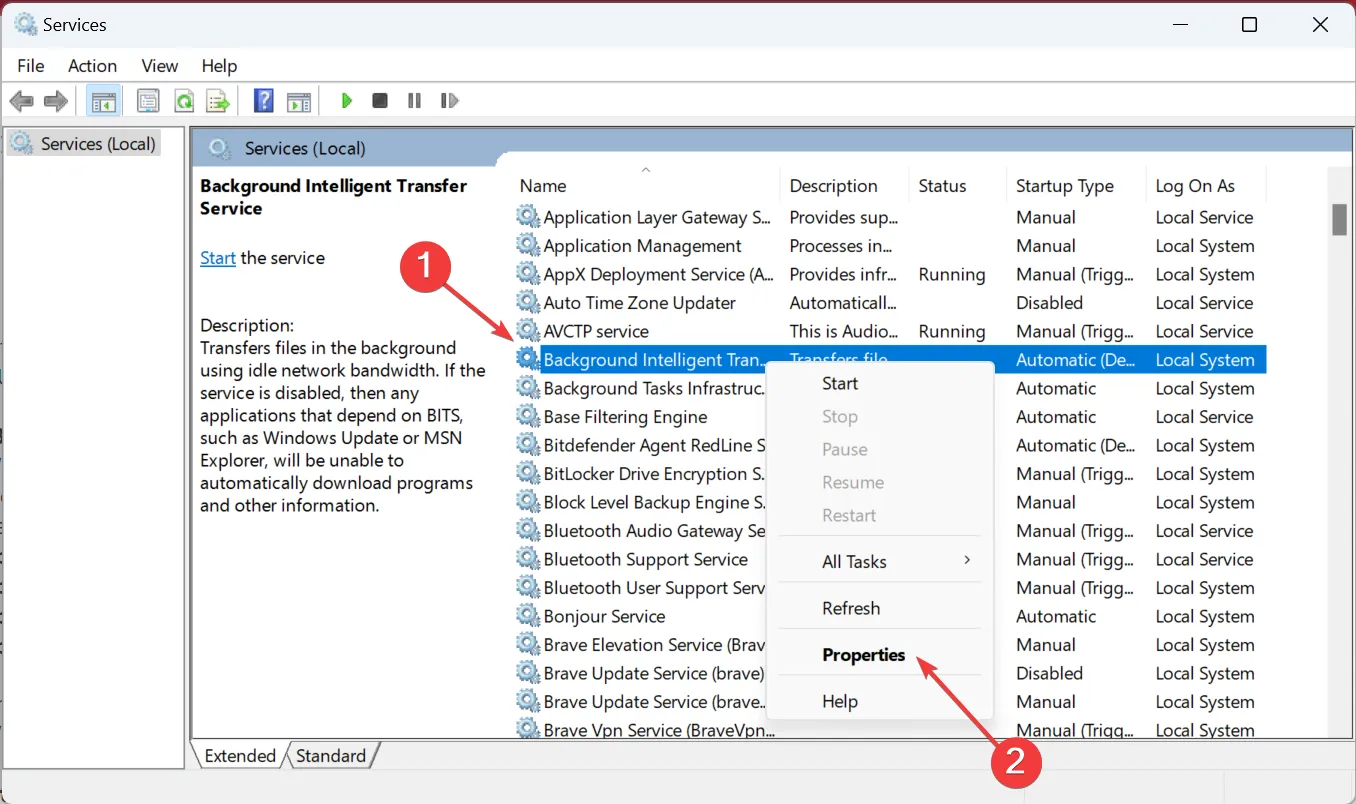
- Select Automatic from the Startup type dropdown menu, click the Start button, and then on OK.
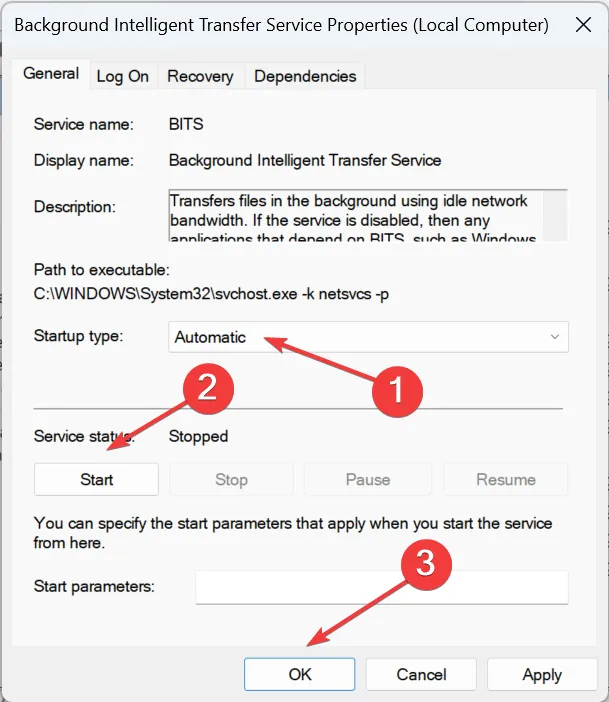
- Once done, make similar changes to the following services as well:
- Cryptographic Services
- MSI Installer
- Windows Update
3. Update Windows from the official website (Windows 10)
- Go to Microsoft’s official website, and click on the Update now button.
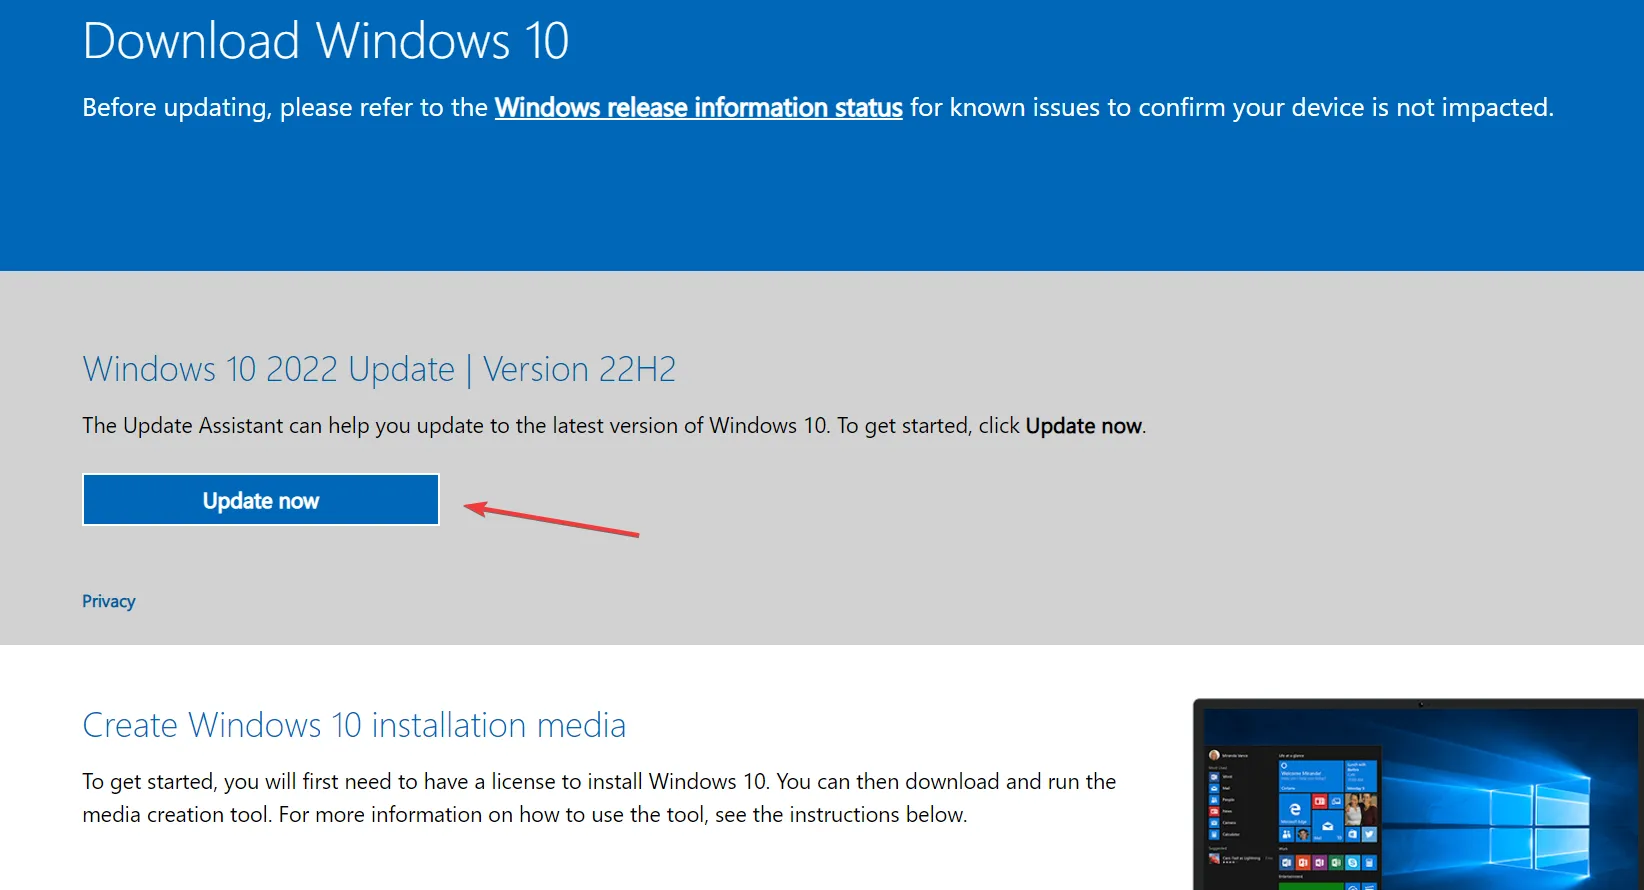
- Run the Windows Update Assistant downloaded on the PC and follow the on-screen instructions to complete the process.
4. Clear the SoftwareDistribution folder
- Press Windows + E to open File Explorer, paste the following path in the address bar, and hit Enter :
C:\Windows\SoftwareDistribution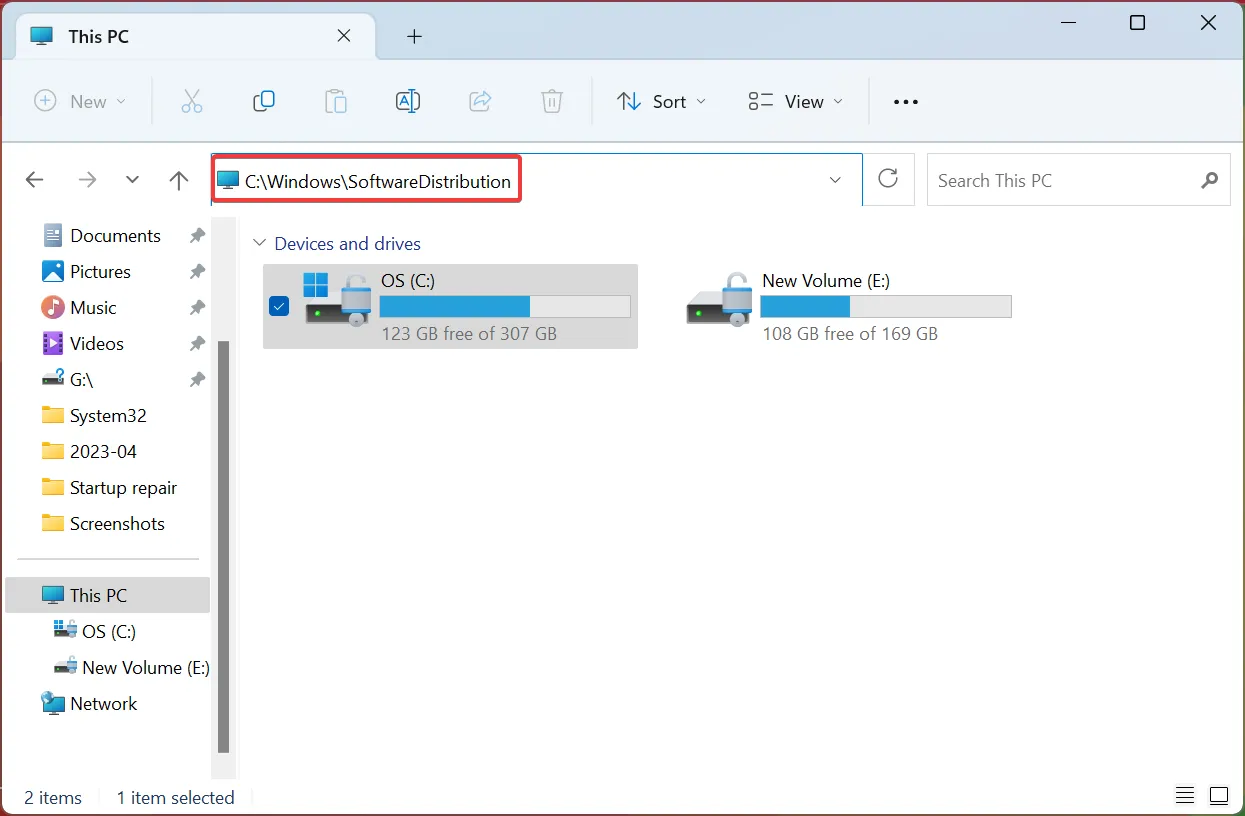
- Now, press Ctrl + A to select all the files here, and then hit Delete to clear them.
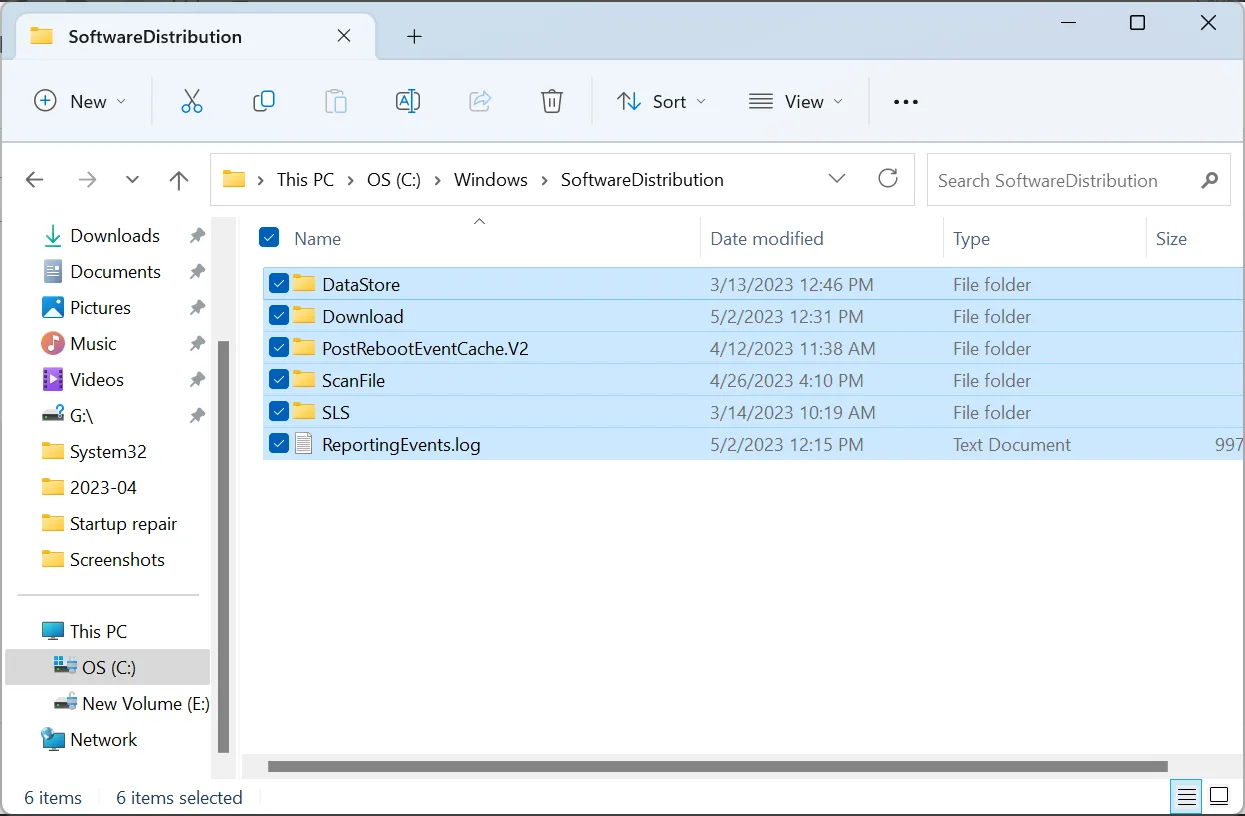
- Once done, restart the computer and again check for updates.
5. Reset the Windows Update components
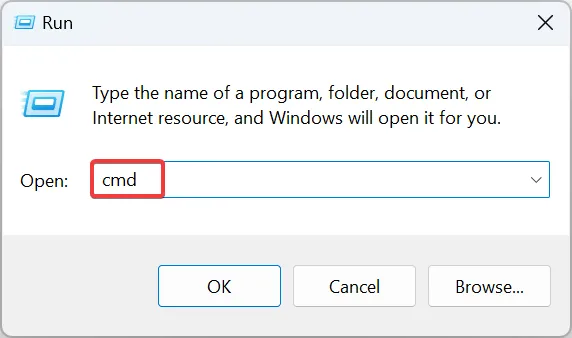
- Press Windows + R to open Run, type cmd, and hit Ctrl + Shift + Enter .
- Click Yes in the prompt.
- Now, run these commands to stop the Windows Update, BITS, Cryptographic, and MSI Server services:
net stop wuauservnet stop cryptSvcnet stop bitsnet stop msiserver - Paste the two commands and hit Enter to rename the SoftwareDistribution and catroot2 folders:
Ren C:\Windows\SoftwareDistribution SoftwareDistribution.oldRen C:\Windows\System32\catroot2 Catroot2.old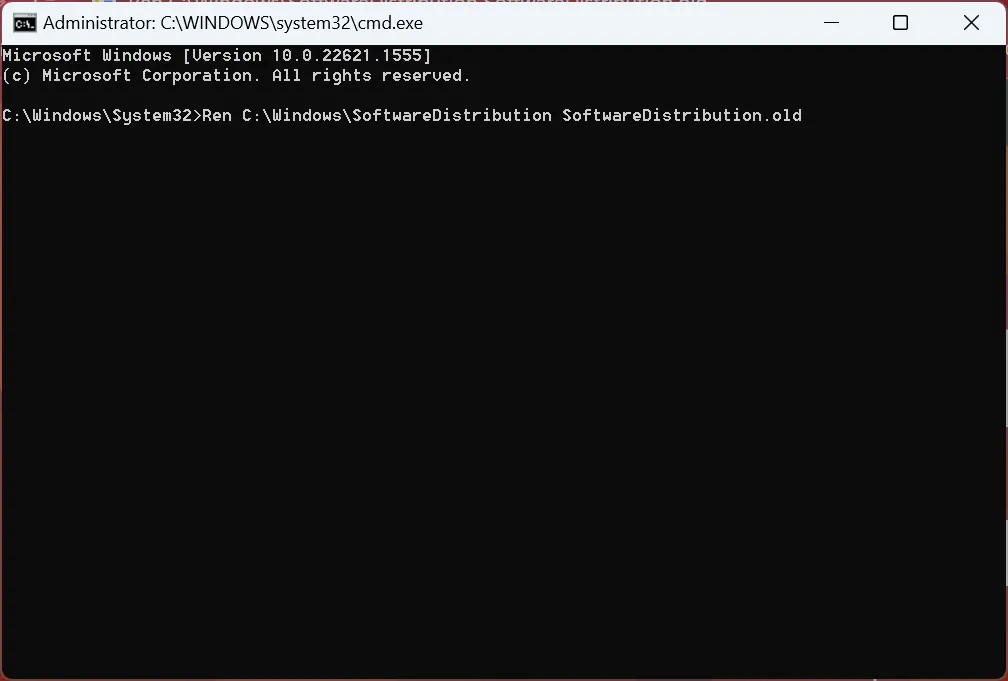
- Next, execute these commands to restart the services stopped earlier:
net start wuauservnet start cryptSvcnet start bitsnet start msiserver - Finally, restart the computer for the changes to come into effect.
Resetting the Windows Update Components, a critical part of the process, has helped many users get rid of the 0x8009001D error. So, make sure you give it a try!
6. Manually install the updates
- Locate the KB (Knowledge Base) number of the update that failed to install.
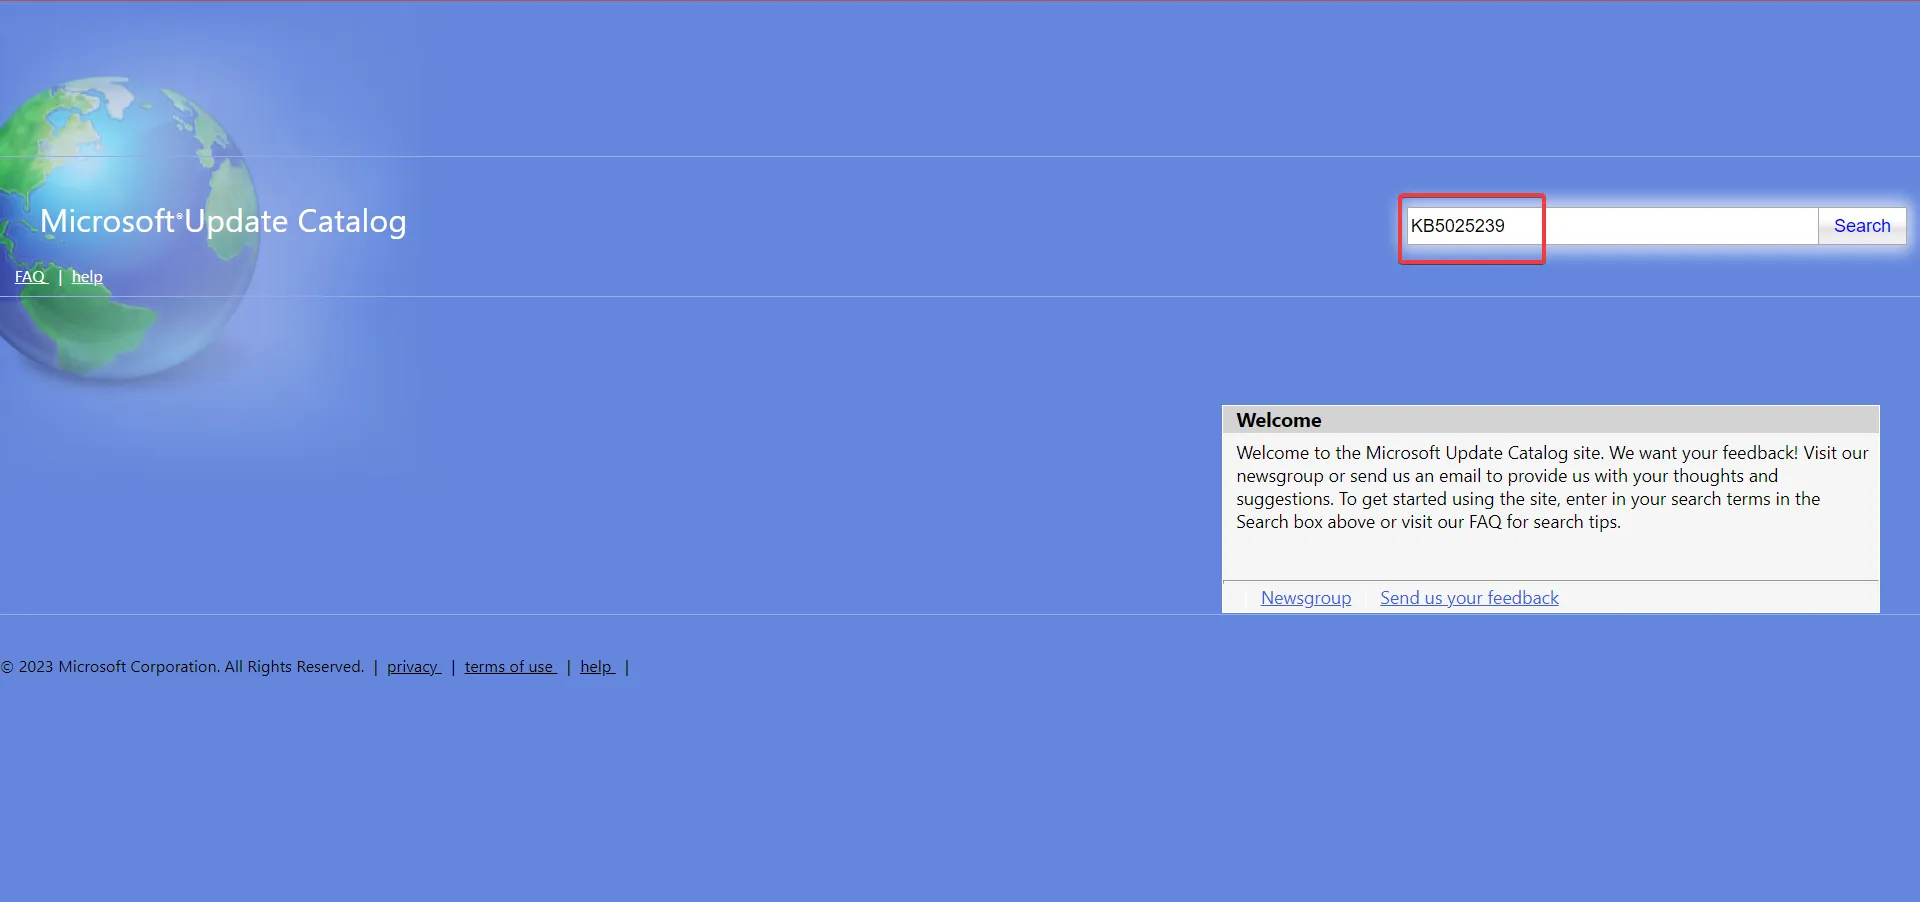
- Go to Microsoft Update Catalog, paste the KB number in the search box, and hit Enter .
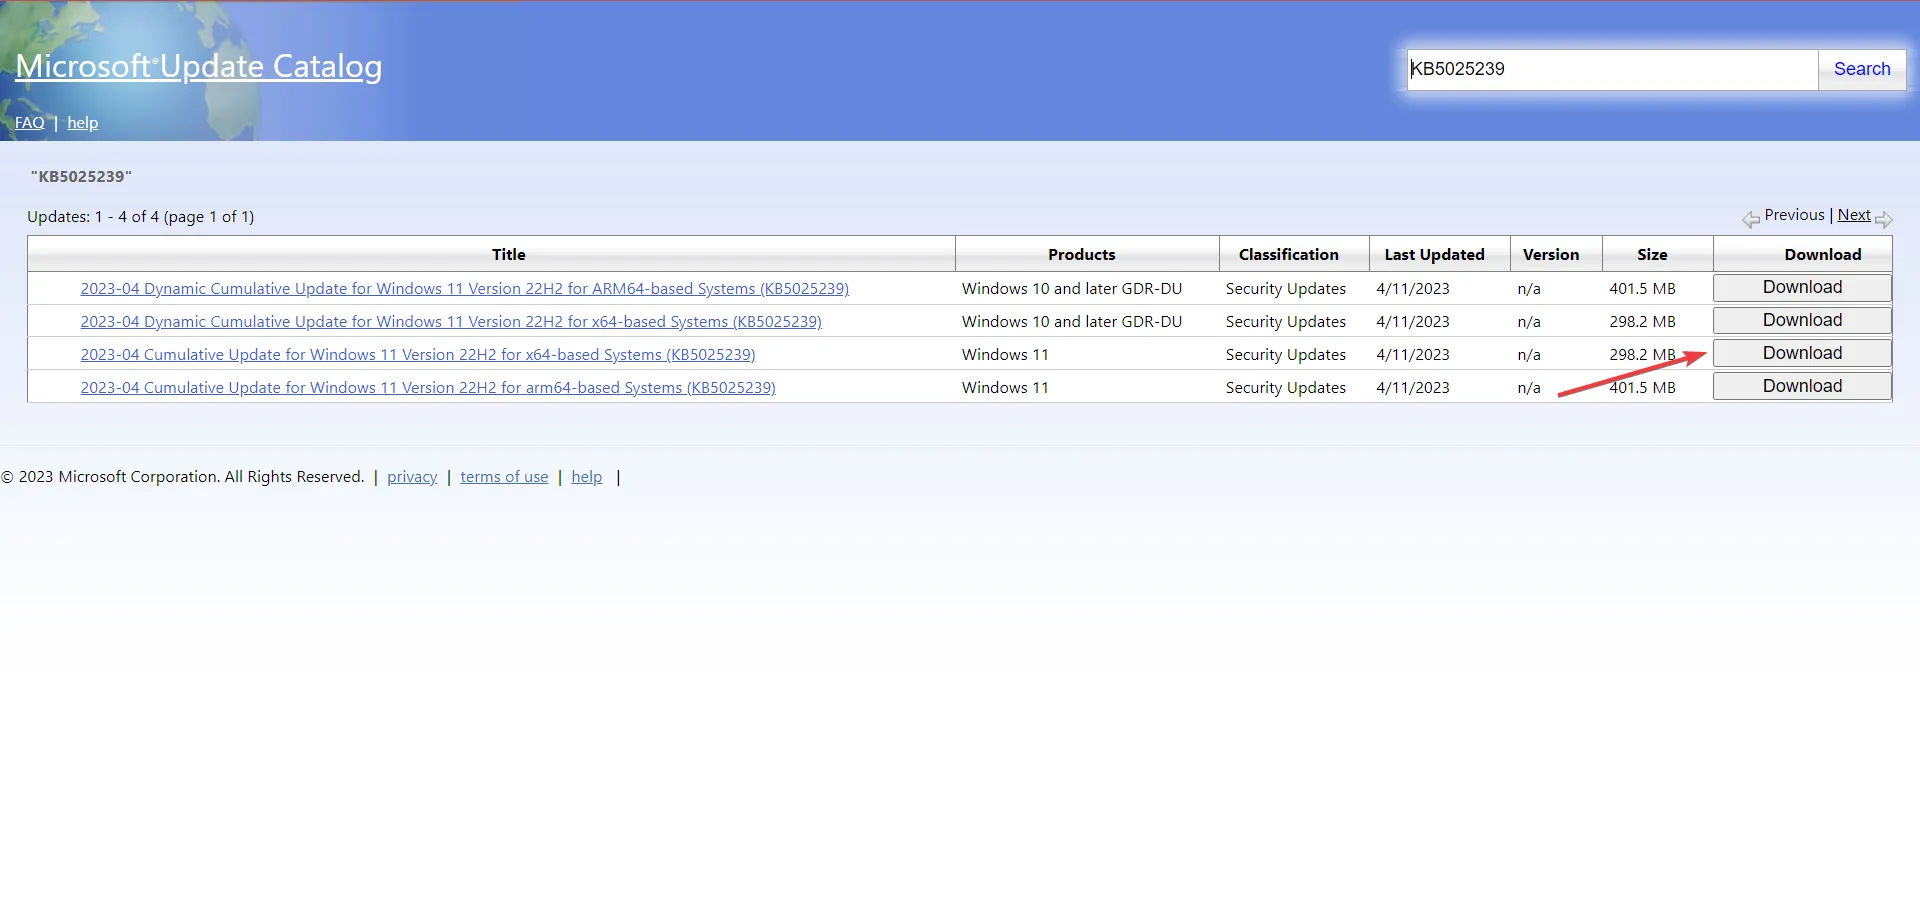
- Click on Download next to the update that best matches your OS architecture and iteration.
- Click on the download link in the pop-up browser window.
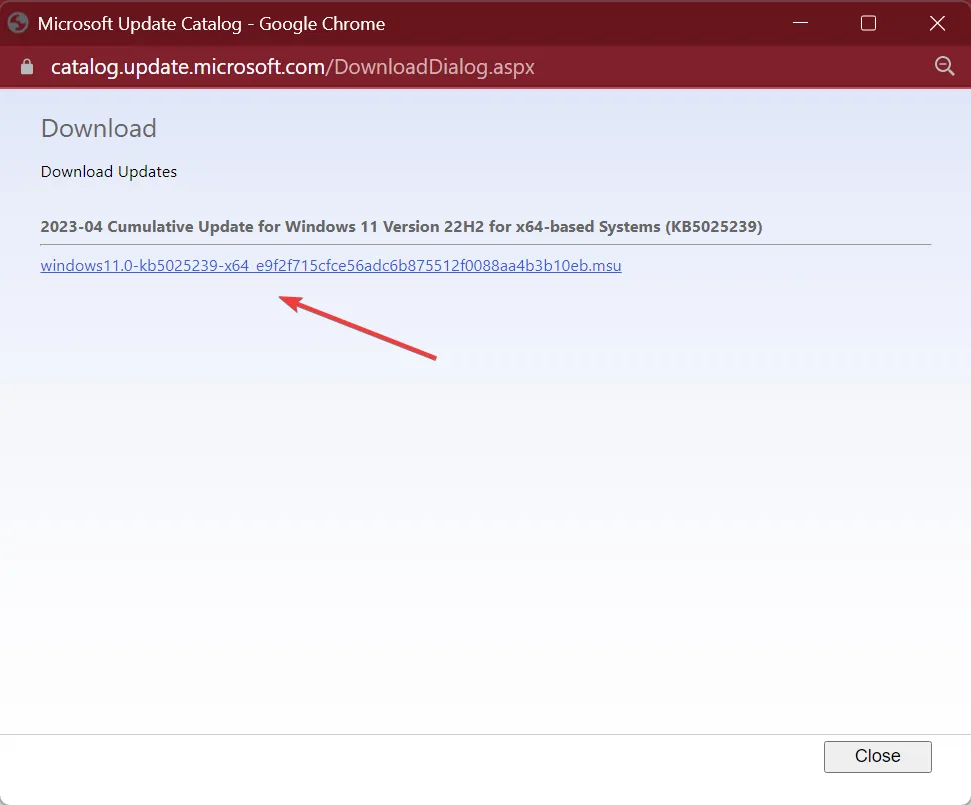
- Run the setup and follow the on-screen instructions to install the update.
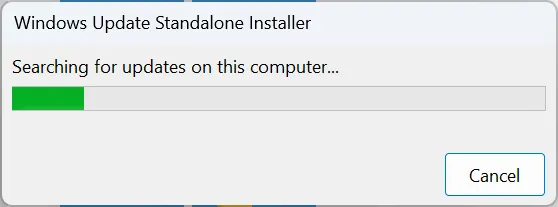
That’s it! When the previous methods fail to work against 0x8009001D, another solution is to manually install the missing updates in Windows. The process is quick but requires a basic understanding of the OS and the knowledge of PC specifications.
7. Reset Windows
When nothing else works, the last option is to factory reset Windows. You have two options here: keep the files or clear them all. We recommend the latter. But make sure to use an effective backup tool or copy the critical files to a USB drive to avoid loss of data.
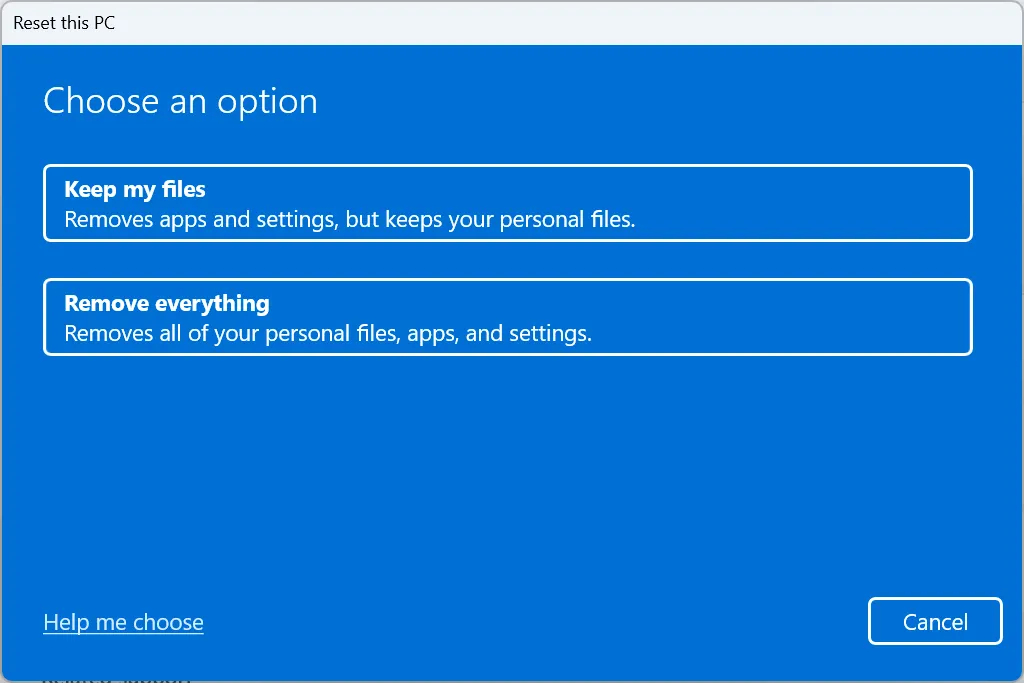
The process will take some time but has an extremely high likelihood of getting things up and running.
After fixing the 0x8009001D error, do not forget to check some quick tips to make Windows faster than ever.
For any other queries or to share a solution that worked for you, drop a comment below.
Leave a Reply