0x80090011 Windows Hello Pin Error: How to Quickly Fix It
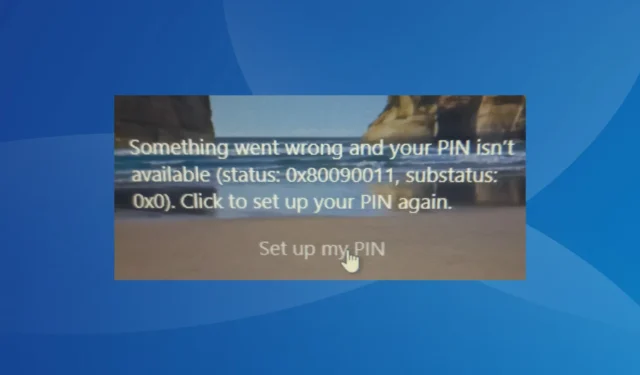
Microsoft has an excellent and secure sign-in way to access a PC, Windows Hello. Though it has simplified the ways users log in, there are still some Windows 11 errors that you may come across, 0x80090011 being the most common.
The error message reads, Something went wrong and your PIN isn’t available (status: 0x80090011, substatus: 0x0). Click to set your PIN again. In most cases, the error appeared after an update, and some users even came across 0x80090011 in Microsoft Office 365. Let’s find out more about it!
Why do I see the 0x80090011 error when signing in?
Here are a few reasons you get the Windows Hello error:
- A buggy Windows update: For most users, the problem appeared after updating Windows, which points to a bug in the latest version of the OS.
- Problems with the NGC folder: The NGC folder stores all the information related to login, and issues with it can trigger an error when signing in to the PC.
- Corrupt system files: Even when the system files are corrupt, there’s a chance that it may affect the sign-in process.
How do I fix code 0x80090011?
Before we proceed, try these quick tricks first:
- Restart the computer and check if you can now sign in.
- If you recently changed the pin or password, use an older password.
If these don’t work, head to the solutions listed next.
1. Run startup repair
- Turn off the PC, press the power button to turn it on, and as soon as the display lights up, again hold the button to shut down the computer abruptly.
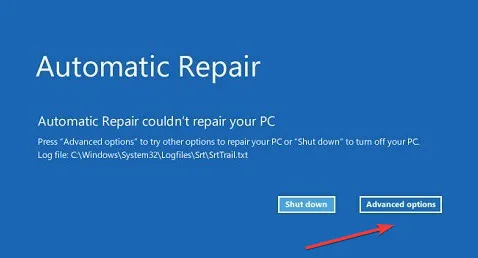
- Repeat the process another two times, and when you next turn on the computer, Automatic Repair will kick in. Wait for it to identify and fix any issues. If it can’t, click on Advanced options.
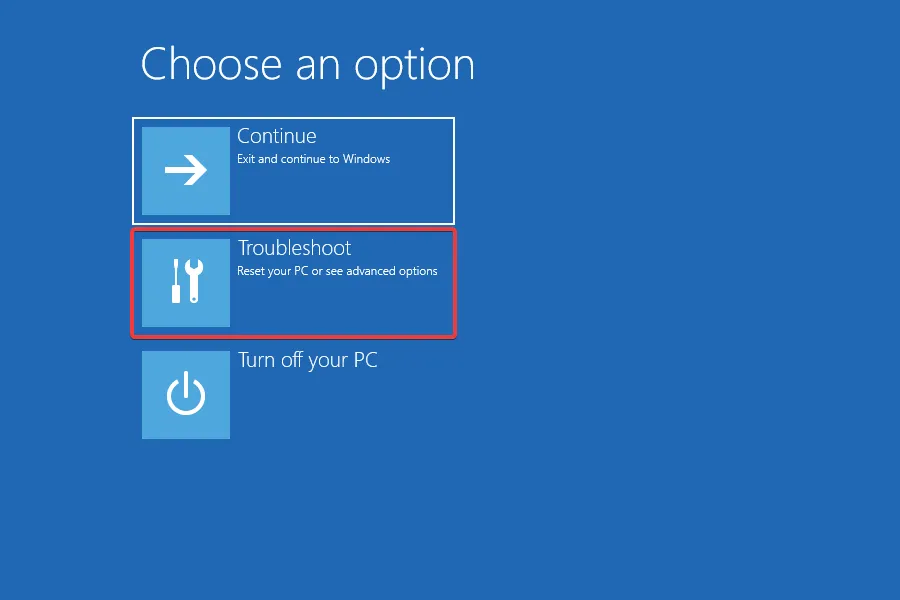
- Now, choose Troubleshoot.
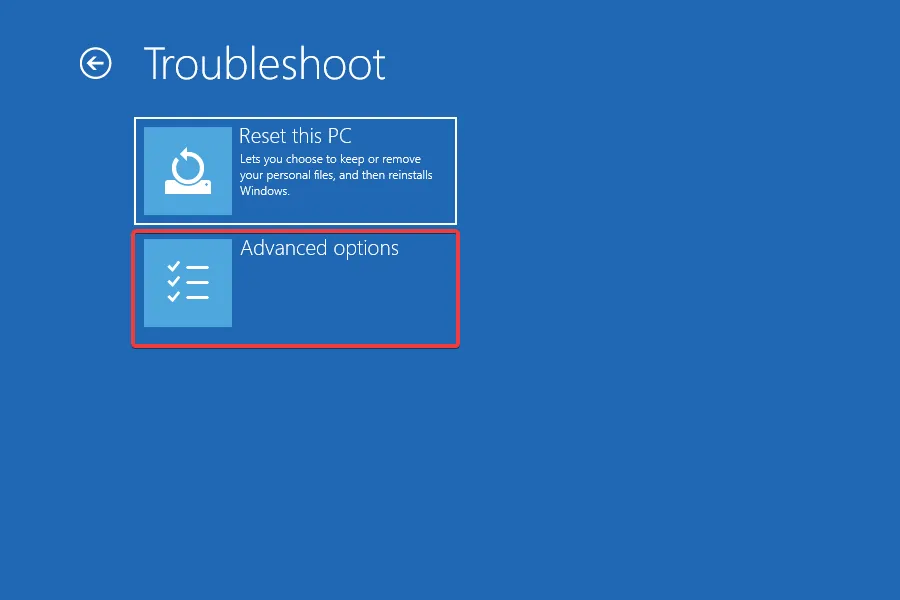
- Again, click on Advanced options.
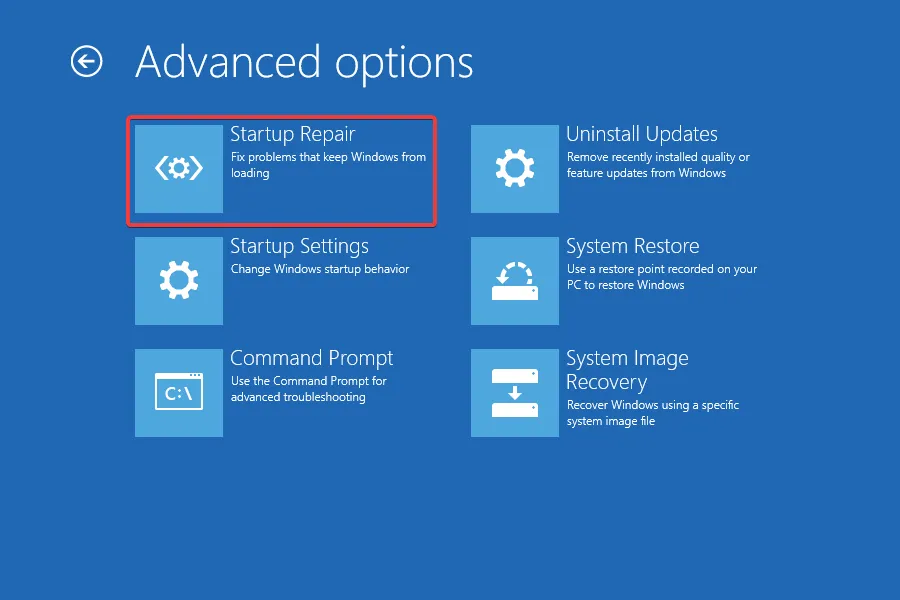
- Select Startup Repair from the options listed here.
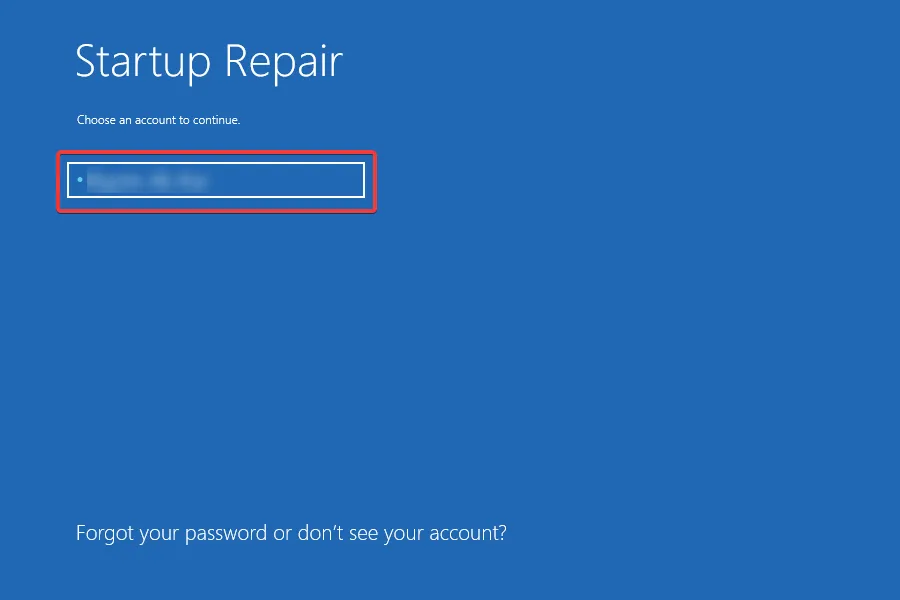
- Now, choose the user account you are facing the problem with.
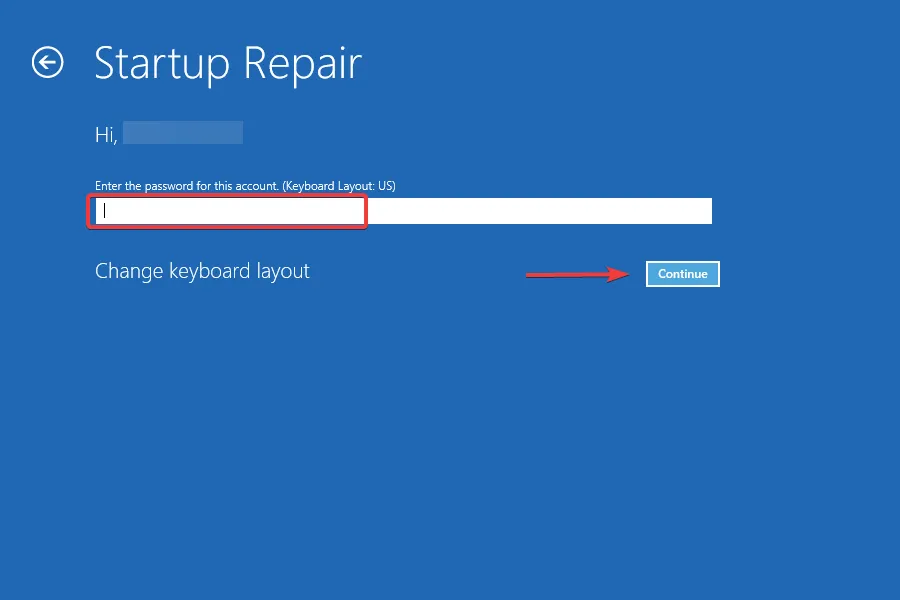
- Enter the password for it, if one is set, and click Continue to proceed.
For most users, running Startup Repair, a built-in option in Windows to eliminate issues that prevent it from booting effectively, fixed the 0x80090011 Windows Hello error.
2. Uninstall Windows updates
- Abruptly restart the computer thrice to run Automatic Repair, and click Advanced options.
- Click on Troubleshoot.
- Select Advanced options.
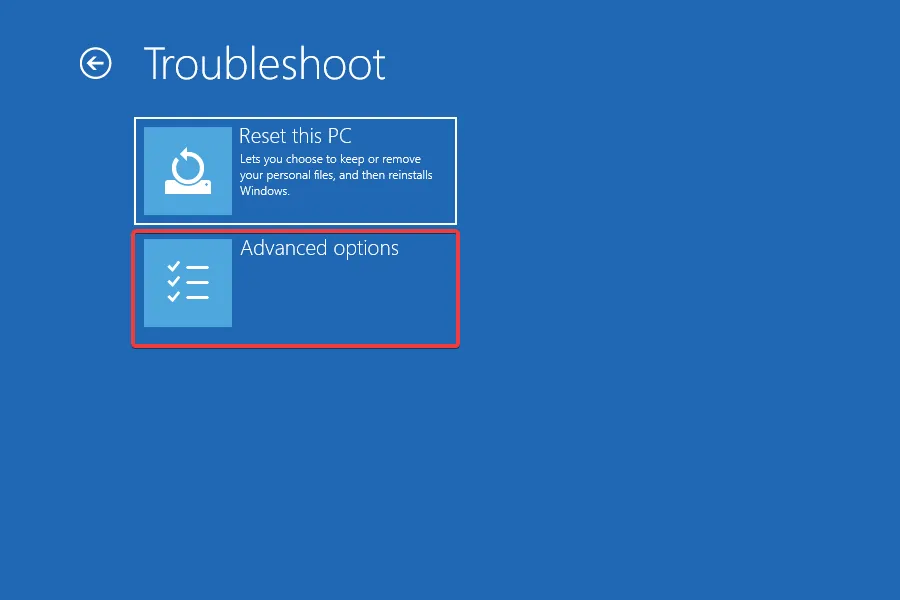
- Now, click on Uninstall Updates.
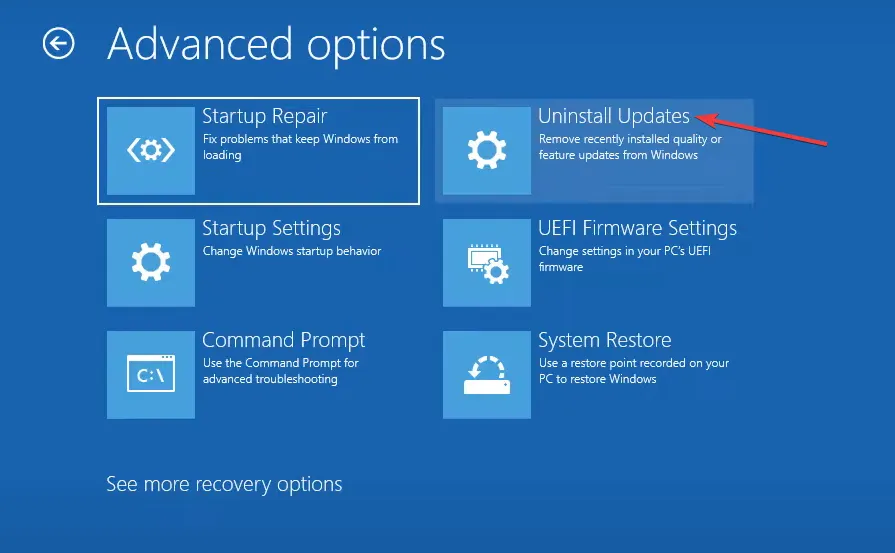
- Choose the one you want to remove, Feature or Quality update.
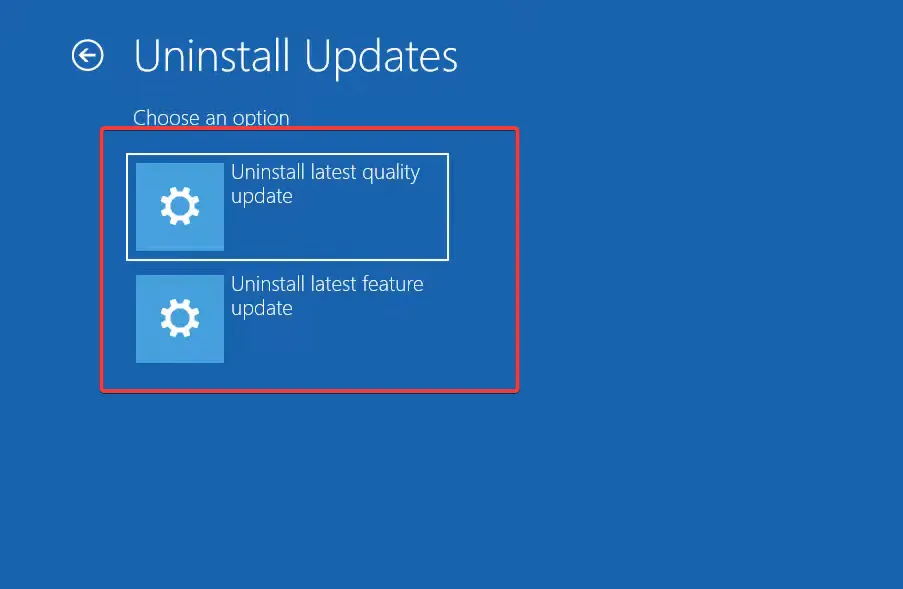
- If you earlier choose quality update, click the Uninstall quality update button.
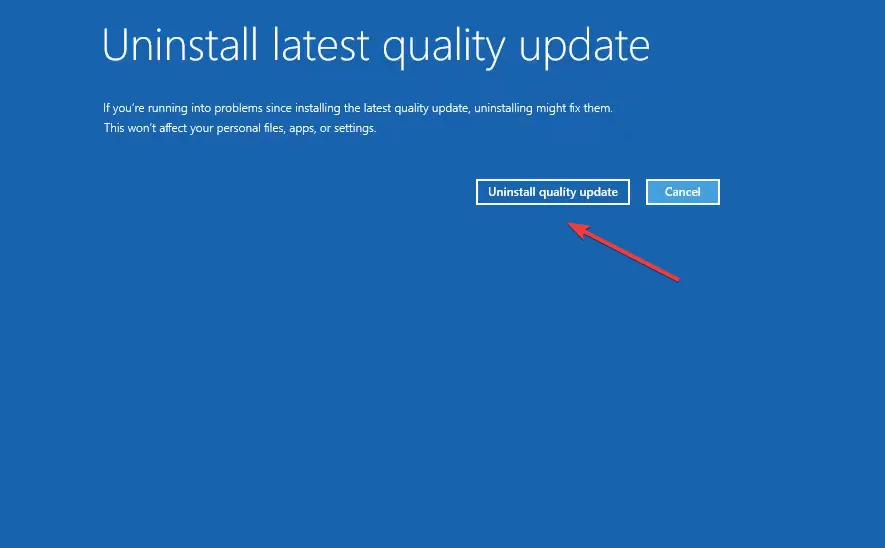
- Follow the on-screen instructions to complete the process.
If the problem appears after updating Windows, uninstalling the update should get things up and running in no time and help you get rid of 0x80090011 in Windows 11.
3. Enable the administrator account
- Power off the computer, turn it on, and again turn it off as soon as the display appears. Do this thrice and on the fourth attempt, let Automatic Repair run. Then click on Advanced options.
- Click Troubleshoot to proceed.
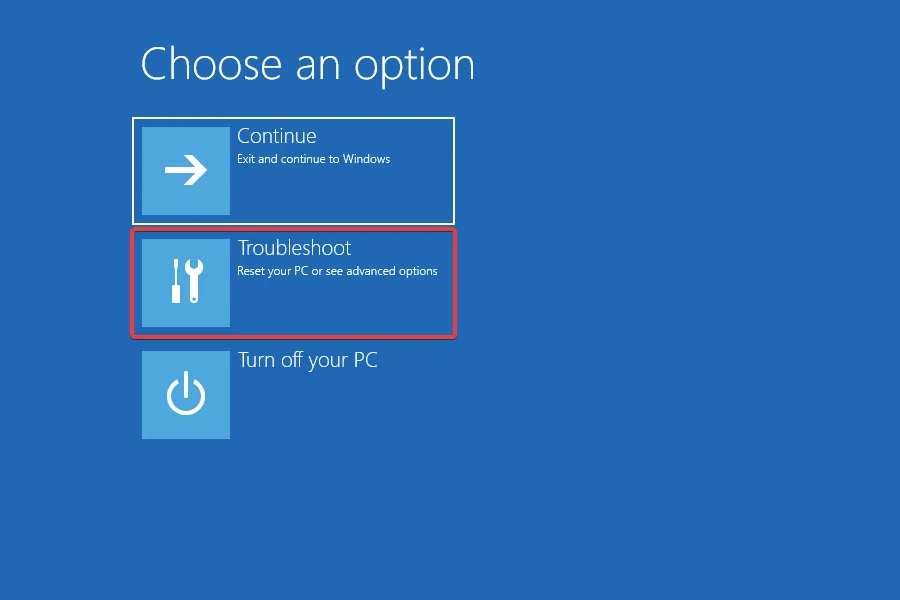
- Now, click on Advanced options.
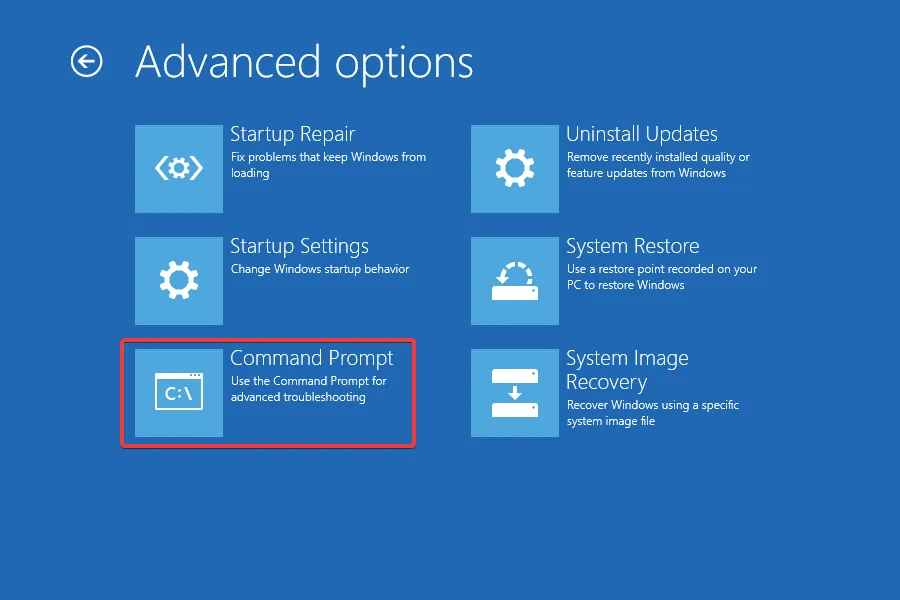
- Choose Command Prompt from the list of options.
- Choose an account and enter the password for it.
- Now, paste the following command and hit Enter :
net user administrator /active:yes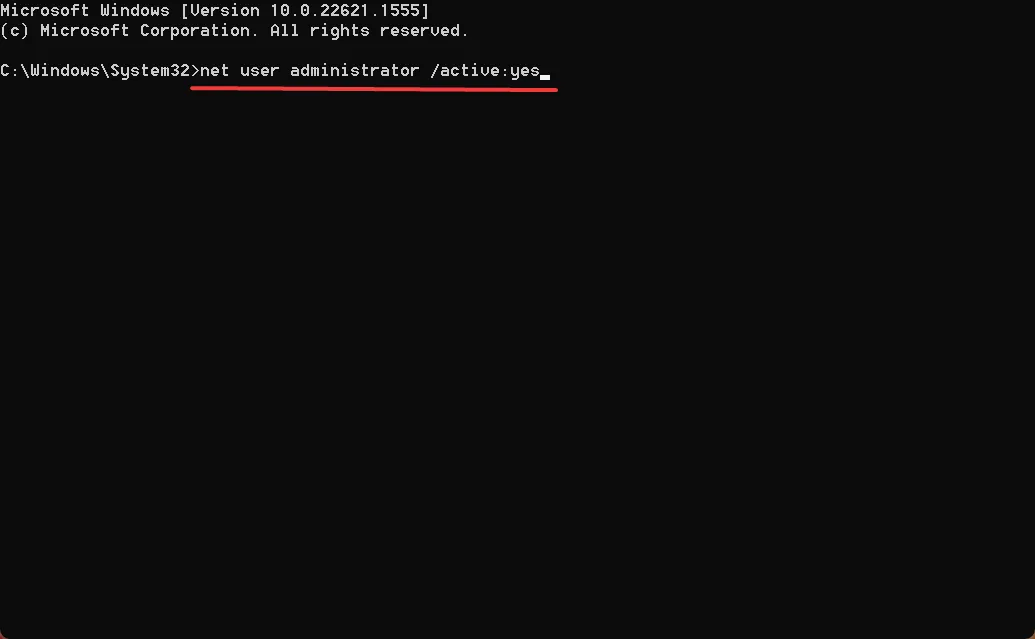
- Once done, restart the computer and try to log into the affected account.
Enabling the built-in administrator account, in some cases, allowed users to sign in to the problematic one throwing the 0x80090011 error. However, if that’s not the case, you can always create a new user account via the one you just enabled and use the new one on the PC.
4. Delete the NGC folder
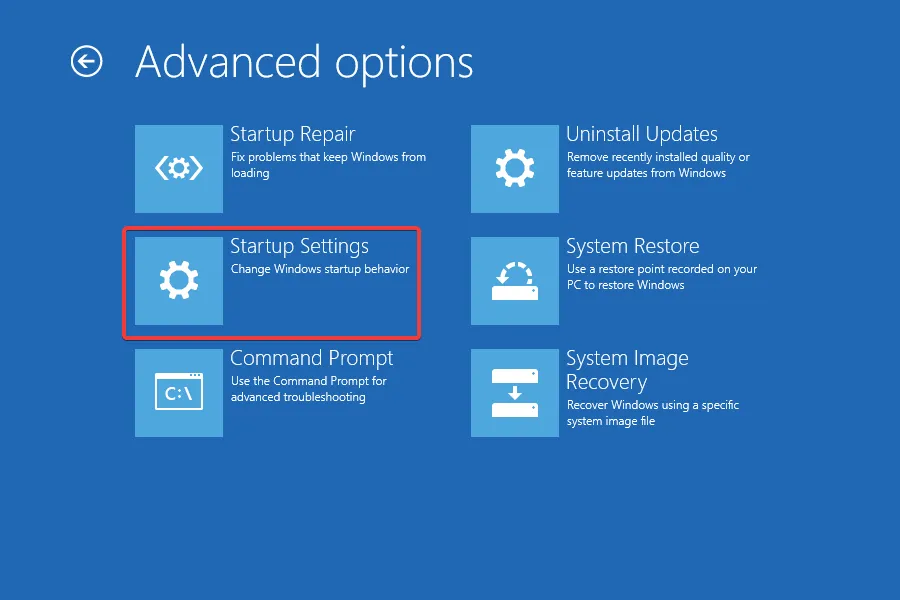
- Boot Windows into Recovery Mode, and click on Startup Settings.
- Now, press 4 or F4 to start the Safe Mode.
- Once the PC boots, press Windows + E to open File Explorer, paste the following path in the address bar, and hit Enter :
C:\Windows\ServiceProfiles\LocalService\AppData\Local\Microsoft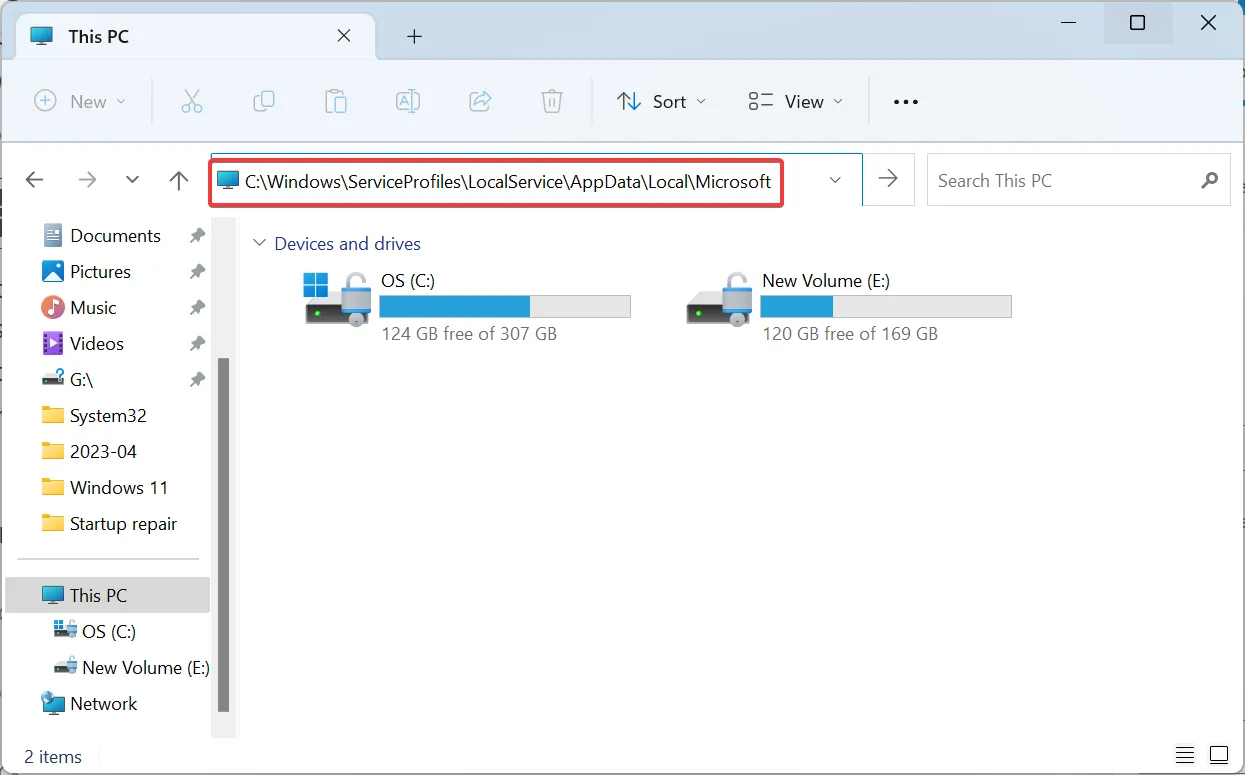
- If you can’t access it, navigate the path, and take ownership permissions for LocalService.
- Now, select the Ngc folder and click the Delete icon.
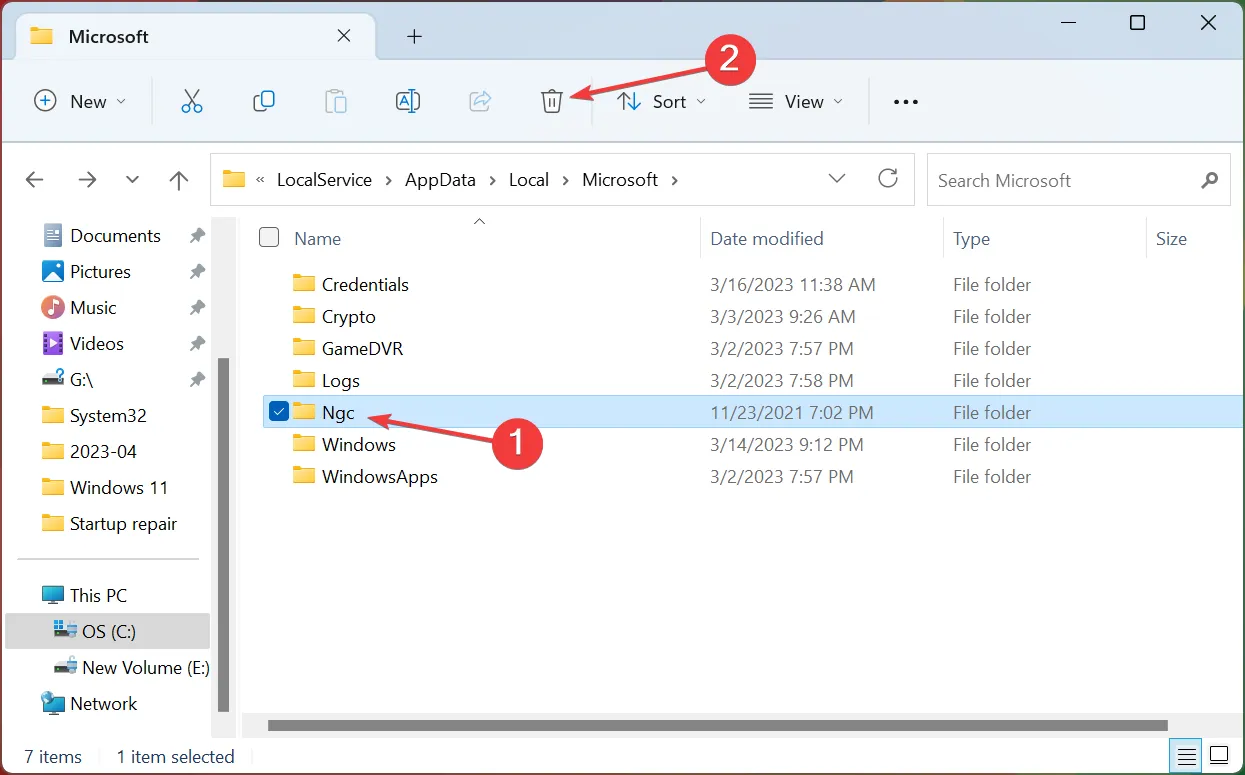
- Once done, boot Windows into normal mode and verify whether you can now sign in.
5. Perform a system restore
- Access the Recovery Menu in Windows and select System Restore.
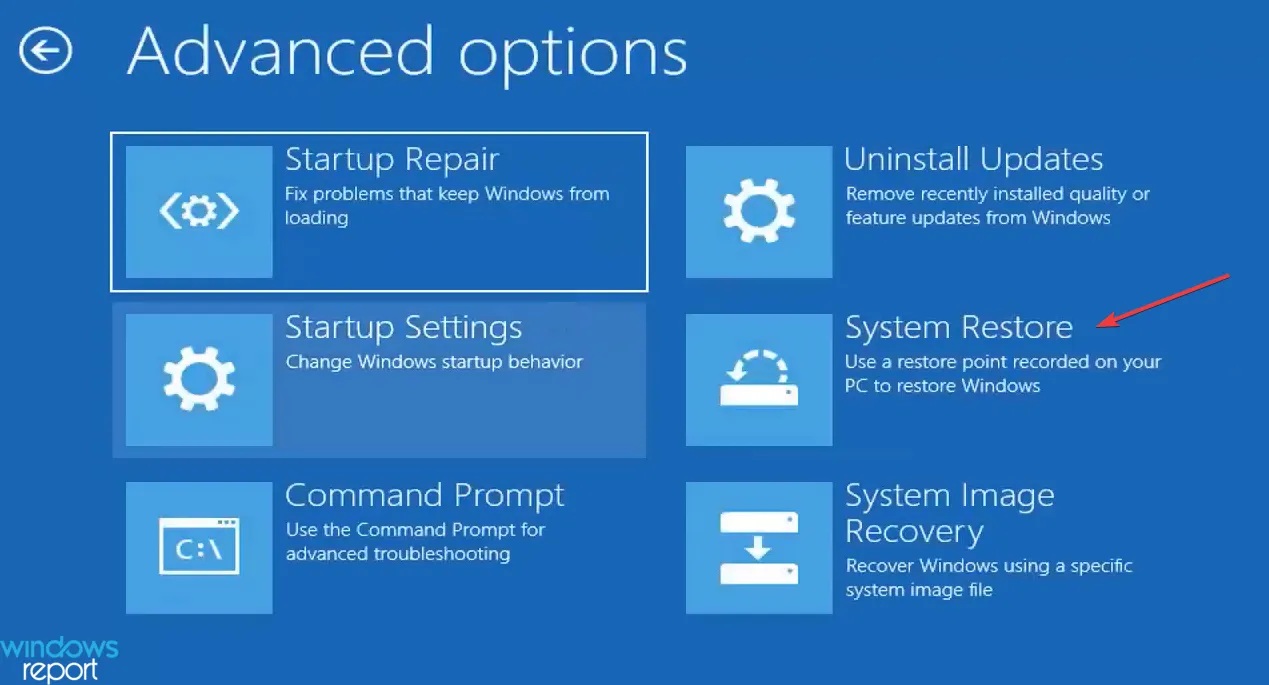
- Choose an account to proceed.
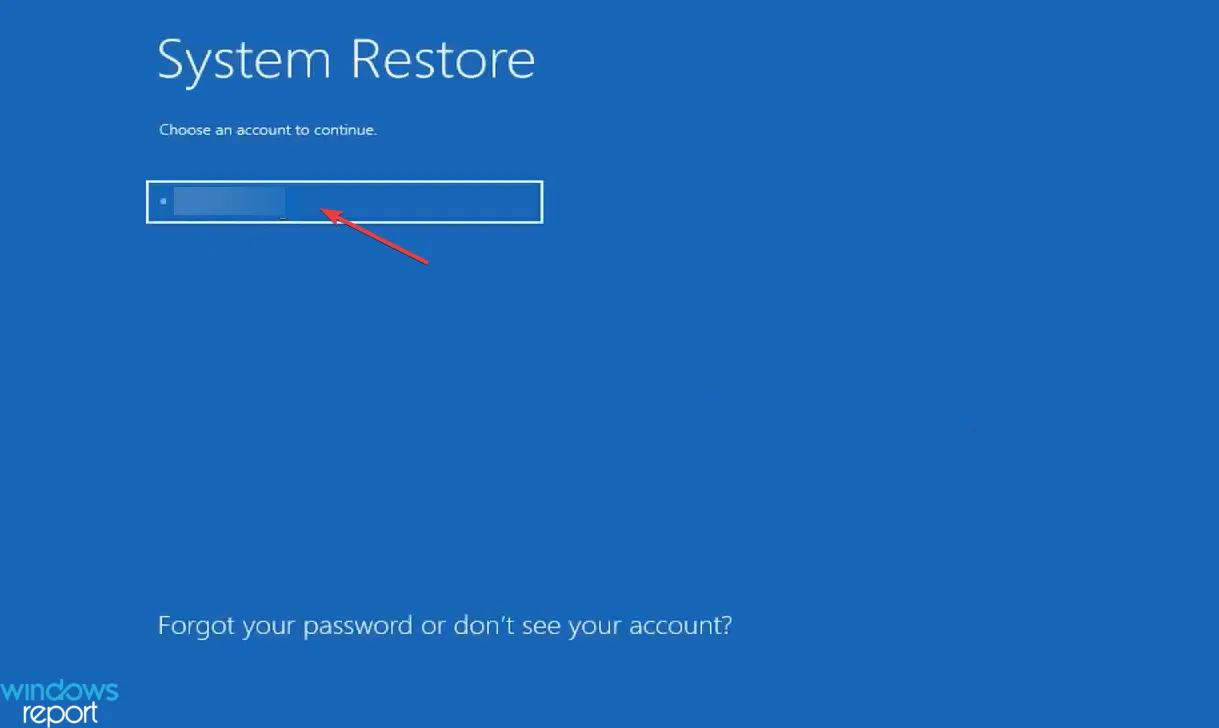
- Enter the password for the selected account, and click Continue.
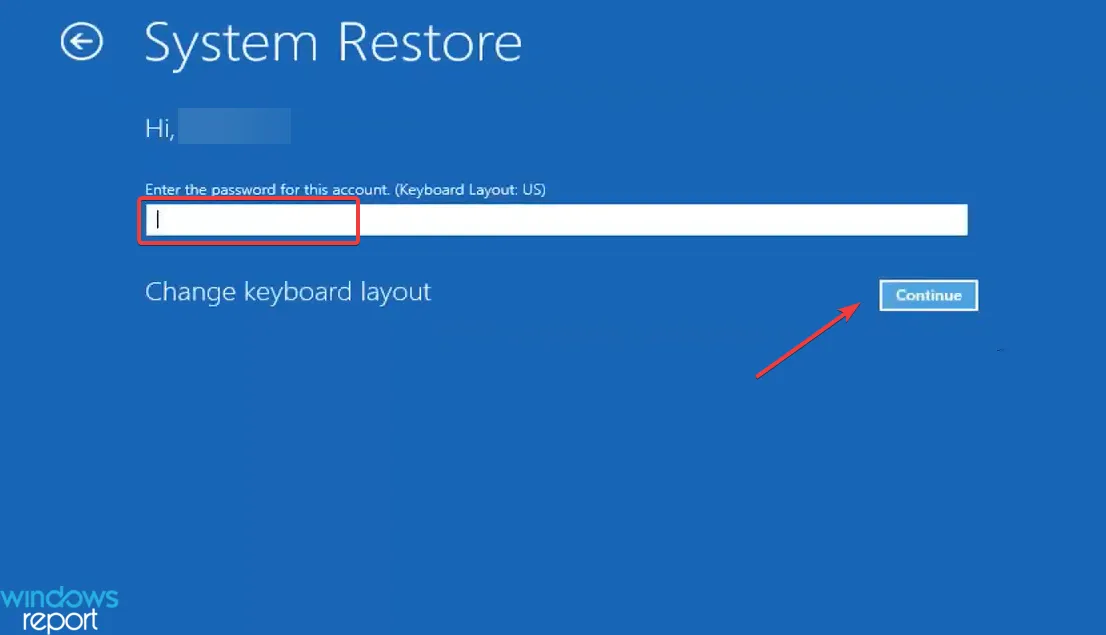
- Click on Next.
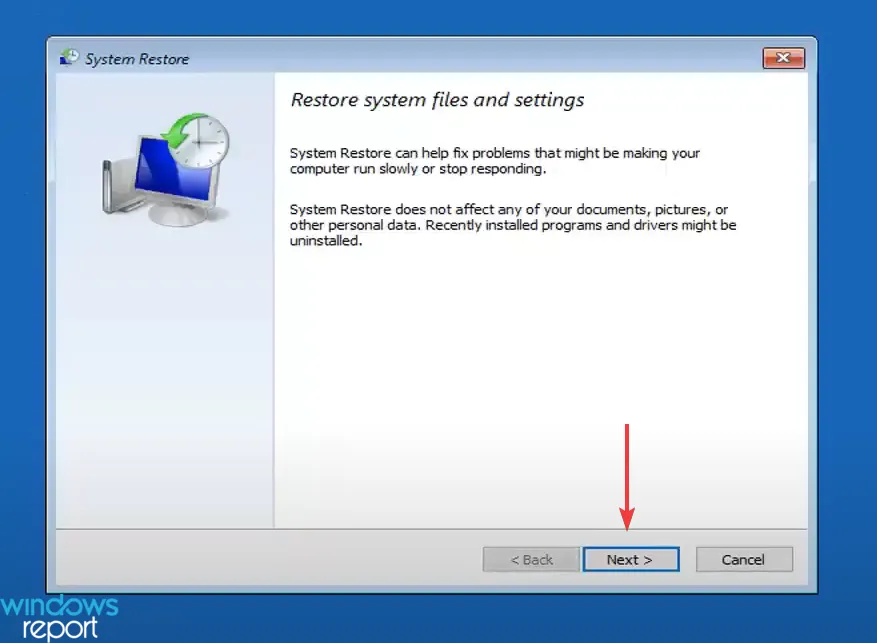
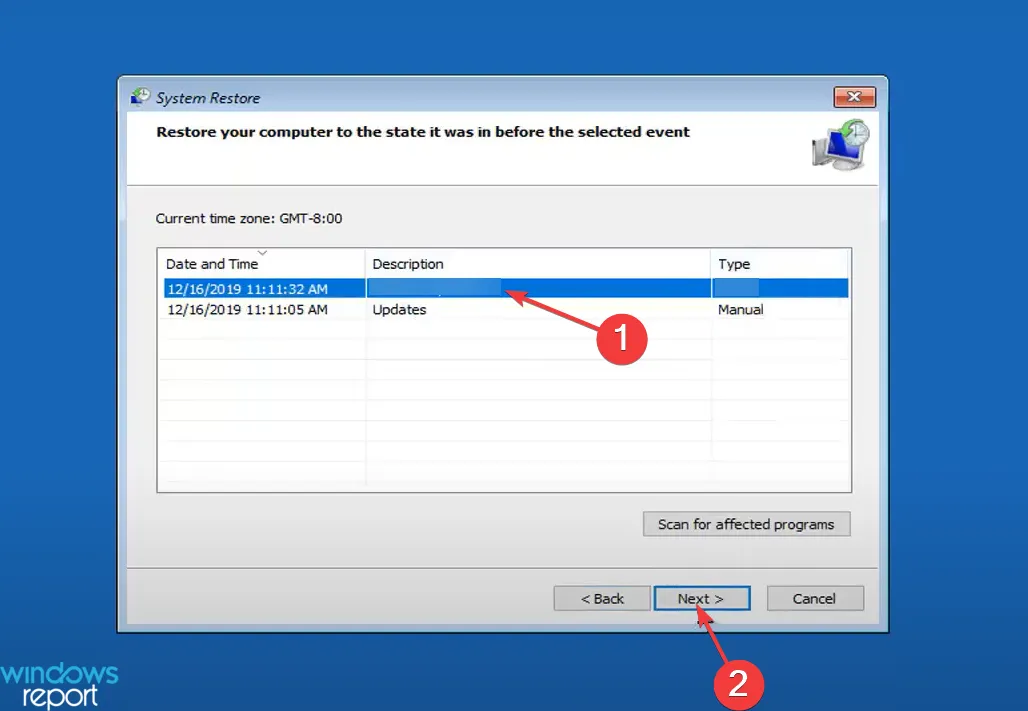
- Now, select a restore point from the list, one created before the problem first appeared, and click Next.
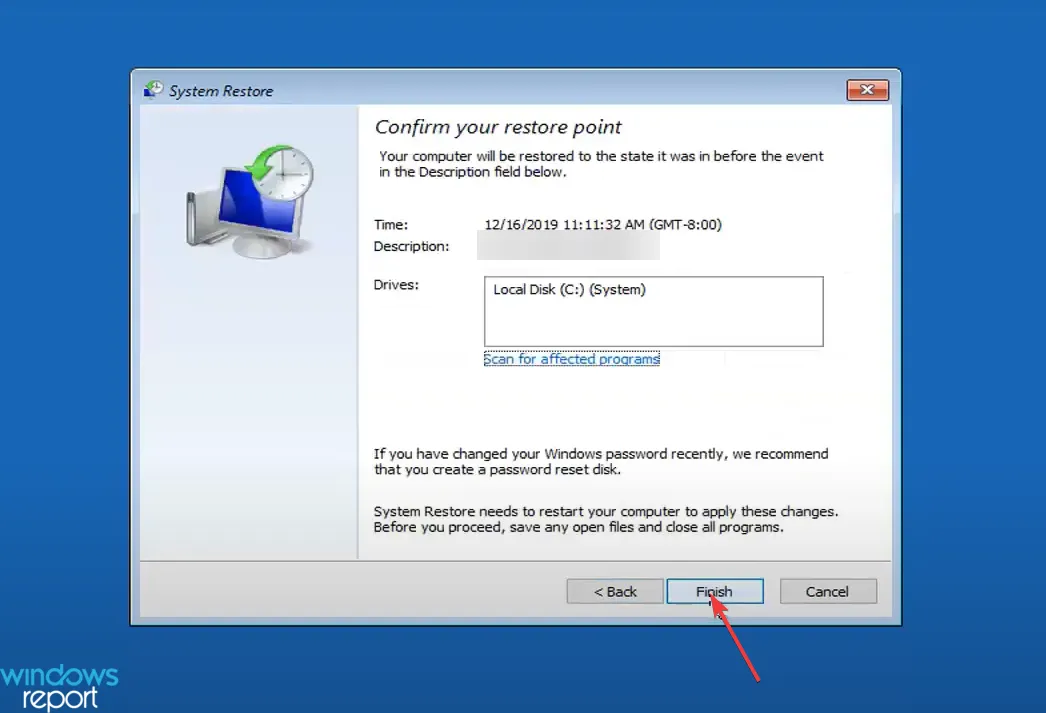
- Verify the restore details and click Finish to start the process.
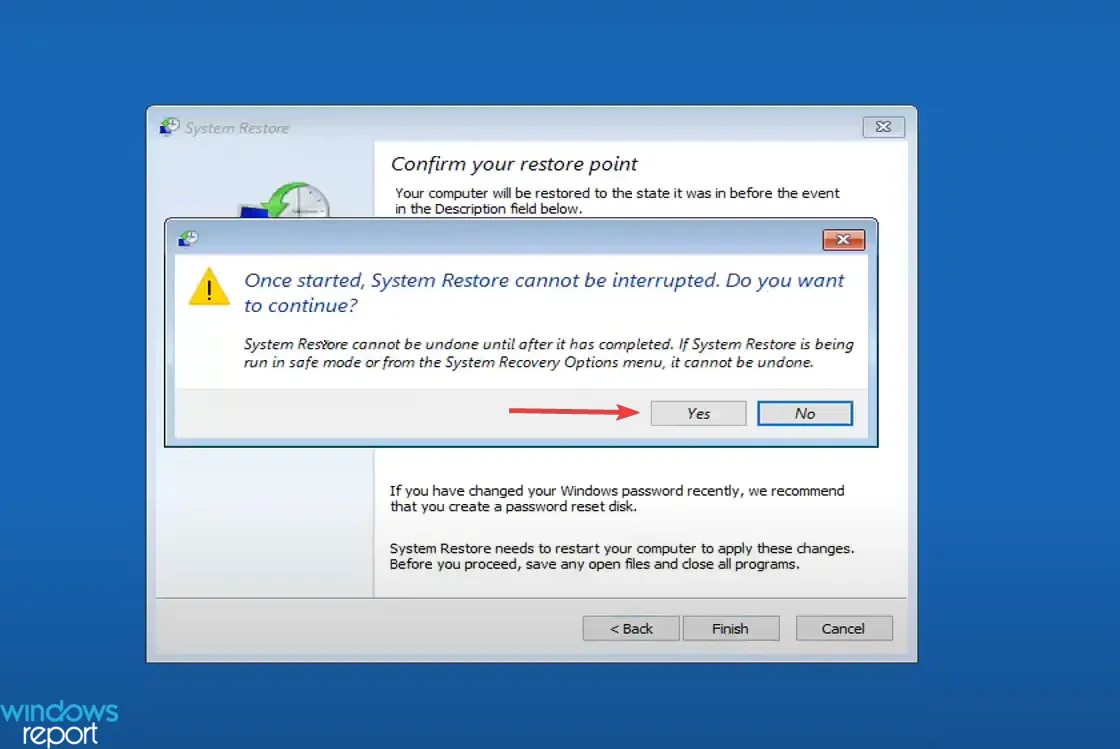
- Click Yes in the confirmation prompt.
- Wait for the restore to complete.
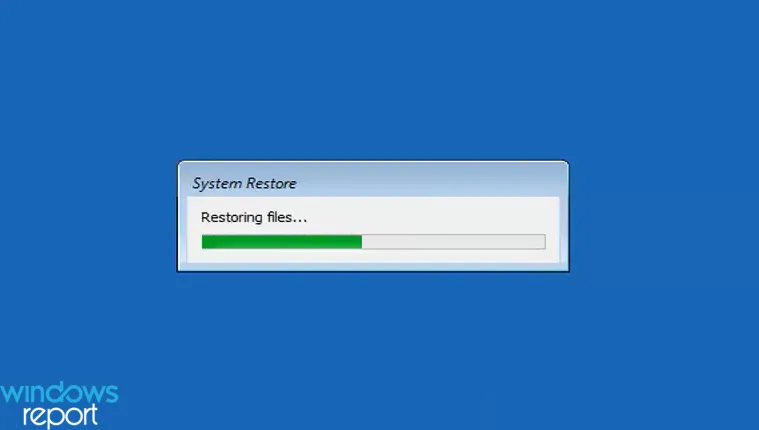
That’s it! Performing a system restore should help when other solutions fail to work. But you need to create a restore point before the 0x80090011 error first appeared.
Though Windows automatically creates them when system protection is enabled, we recommend you manually create restore points to counter such situations.
6. Reinstall Windows
When all else fails to work, you will have no option but to reinstall Windows. The process is a bit complex but will definitely help with the Windows Hello 0x80090011 sign in error. To do that, create a bootable drive, boot the PC through it, and run the setup to install Windows.
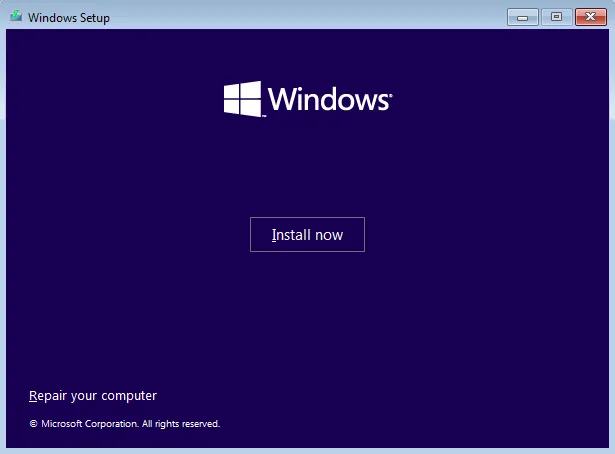
The setup is simple, with each step explained in detail. And, in all likelihood, you should be able to seamlessly install the OS and fix the error in every iteration of Windows.
The Windows Hello 0x80090011 error can be tricky to troubleshoot, but with the right approach, you can get things up and running in no time.
Before you leave, check some quick tips to boost Windows performance and make it faster than ever.
Tell us which fix worked for you in the comments section below.
Leave a Reply