0x8007012F Windows Update Error: How to Fix It
Updating Windows is essential as it helps your computer’s security, stability, and performance. However, errors like 0x8007012F will interrupt the process, leading to a failed update.
It often comes with the notification failed to install. We have researched the error, and in this guide, we introduce the most effective solutions in this article.
What causes the 0x8007012F Windows update error?
We gather that the elements below are the primary causes:
- Update interruption – This may happen when some vital update services are not running or are poorly configured.
- Cache-related issues – A few people will experience the error if they have old or corrupted cache files.
- Old installer files – If you have old download files on your computer, it may cause conflicts when installing new files and trigger the error.
- Bad system files – For many users, corrupt system files will interfere with the update process and may trigger an error.
The solutions below would come in handy.
How do I fix the 0x8007012f error?
1. Run the Update troubleshooter
- Press Windows + I to open the Settings app.
- Click on Troubleshoot.

- Select Other troubleshooters.

- Search for Windows Update and click Run.
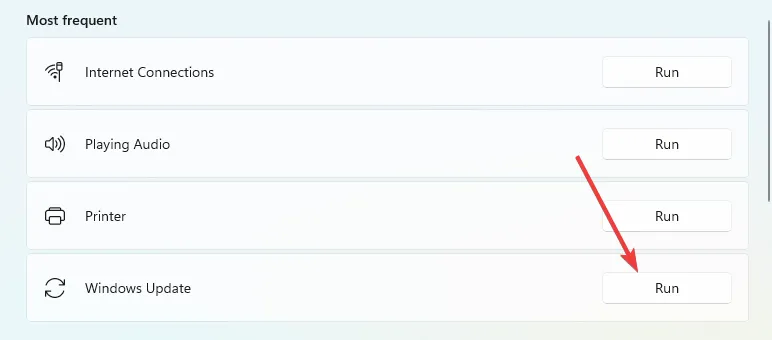
- Retry the update and verify the error is fixed.
The manual process of troubleshooting your Windows may take longer or don’t fix the issue at all.
However, you have the alternative of using a dedicated system repair tool and entirely restoring corrupted PC files.
2. Reset BITS and other Windows update components
- Press Windows + R , type cmd, and hit Ctrl + Shift + Enter .

- Type the scripts below and hit Enter after each one to stop vital update components:
net start wuauserv
net stop cryptSvc
net stop bits
net stop msiserver
- Rename the SoftwareDistribution and Catroot2 folders by typing the scripts below and hitting Enter after each one.
ren C:\Windows\SoftwareDistribution SoftwareDistribution.old
ren C:\Windows\System32\catroot2 Catroot2.old
- Restart the stopped services by running the scripts below:
net start wauserv
net start cryptSvc
net start bits
net start msiserver
3. Fix system files with a file scan
- Press Windows + R , type cmd, and hit Ctrl + Shift + Enter .

- Input the script below and hit Enter :
sfc /scannow
- The process may take a while. Follow the sunscreen instructions if any repair is needed, then verify it fixed the 0x8007012f error.
4. Clean the cache folder
- Press Windows + R , type services.msc, and hit Enter .

- Search for the Windows Update service, double-click on it, and hit Stop if it is running.

- Don’t close the Services Windows since you will need to restart the stopped service.
- Press Windows + E , then navigate to the path below, select all the items, and delete them.
C:\Windows\SoftwareDistribution
- Repeat the process, deleting all the content in the path below:
C:\Windows\System32\catroot2 - Return to the open services Windows and restart the stopped Windows Update service.

5. Remove the residual Pending.xml files
- Press Windows + R , type cmd, and hit Ctrl + Shift + Enter .

- Type the code below and hit Enter :
Ren c:\windows\winsxs\pending.xml pending.old
- Restart the update and confirm the 0x8007012f error is fixed.
Old updates in this file may stop you from getting new security patches. So, renaming the file forces the computer to create a new Pending.xml file.
Any of the solutions above should fix the update problem. It would be best to try what feels most applicable since they have not been written in any particular order.
Lastly, please update us on the fix that worked using the comments section below.
Leave a Reply