0x80070008: How to Fix This Windows Update Error
The Windows Update error 0x80070008 occurs when the OS fails to update and it’s usually accompanied by the message: ERROR_NOT_ENOUGH_MEMORY, The system is out of memory. Let’s see why is this happening and how to fix the Windows Update error 0x80070008.
Why do I get the 0x80070008 error when updating Windows?
There are many reasons why the 0x80070008 error occurs but we will mention the most important:
- Not enough memory – As the message suggests, there is not enough memory to install the update.
- Connection problems – If you have a poor internet connection, the update is not downloaded properly and you get the 0x80070008 error code.
- Insufficient disk space – You might run out of space on the system drive, so the update can’t be downloaded properly.
- System file corruption – If the system has corrupted files, the 0x80070008 error will follow.
Now that we know what we’re up against, let’s fix this problem by using the solutions below.
How do I fix the 0x80070008 Windows Update error?
Before going to more complex troubleshooting, let’s perform some preliminary actions that might solve the problem quicker:
- Try to free up some disk space and close all the apps you don’t need at the moment and try to install the update again.
- Restart your router and try to download and install the update afterward.
- Restart your PC. Sometimes, all the problems can get solved by this simple action.
If none of these actions fixed the issue, start applying the solutions below to fix the 0x80070008 error.
1. Empty the SoftwareDistribution and catroot2 folders
- Click the Start button, type cmd, and select Run as administrator from the results.
- Type the following command to stop the Windows Update Service and press Enter to run it:
net stop wuauserv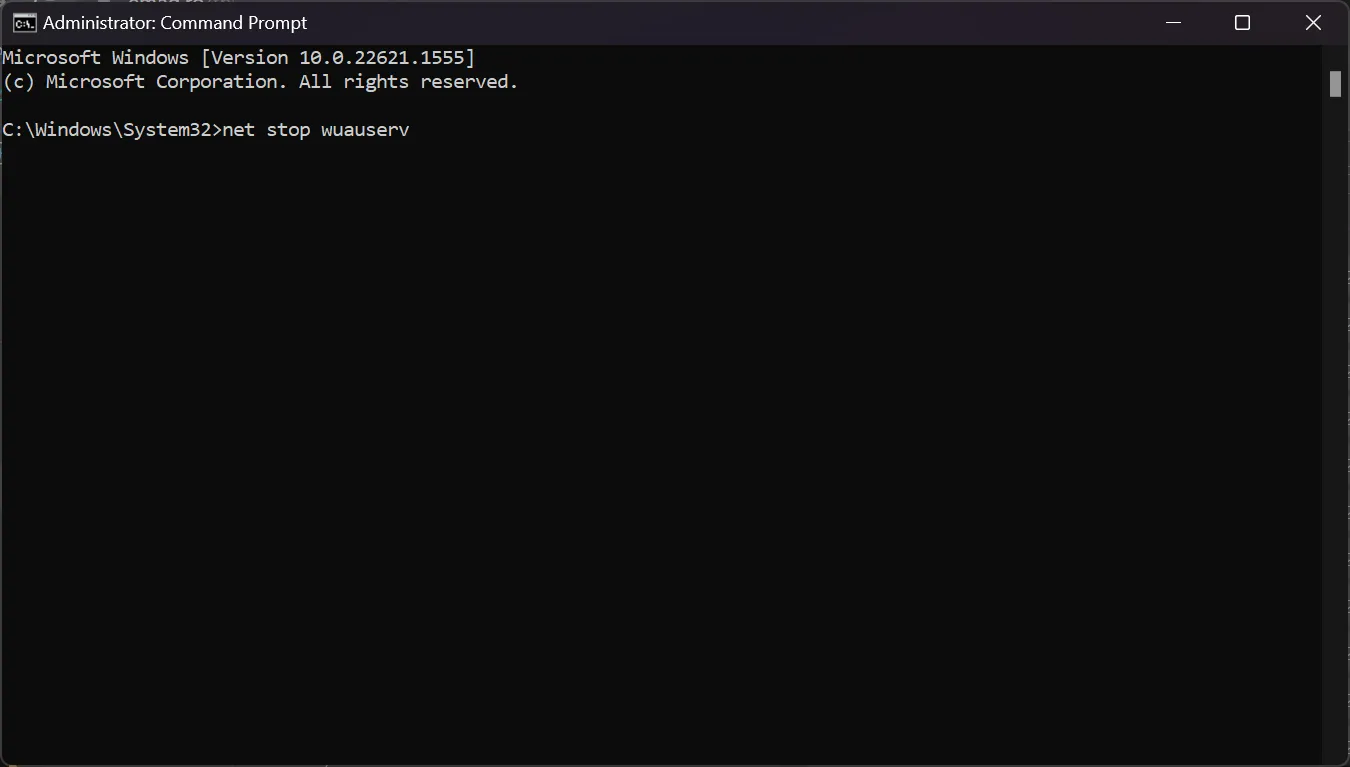
- Now, paste the following command and press Enter :
net stop bits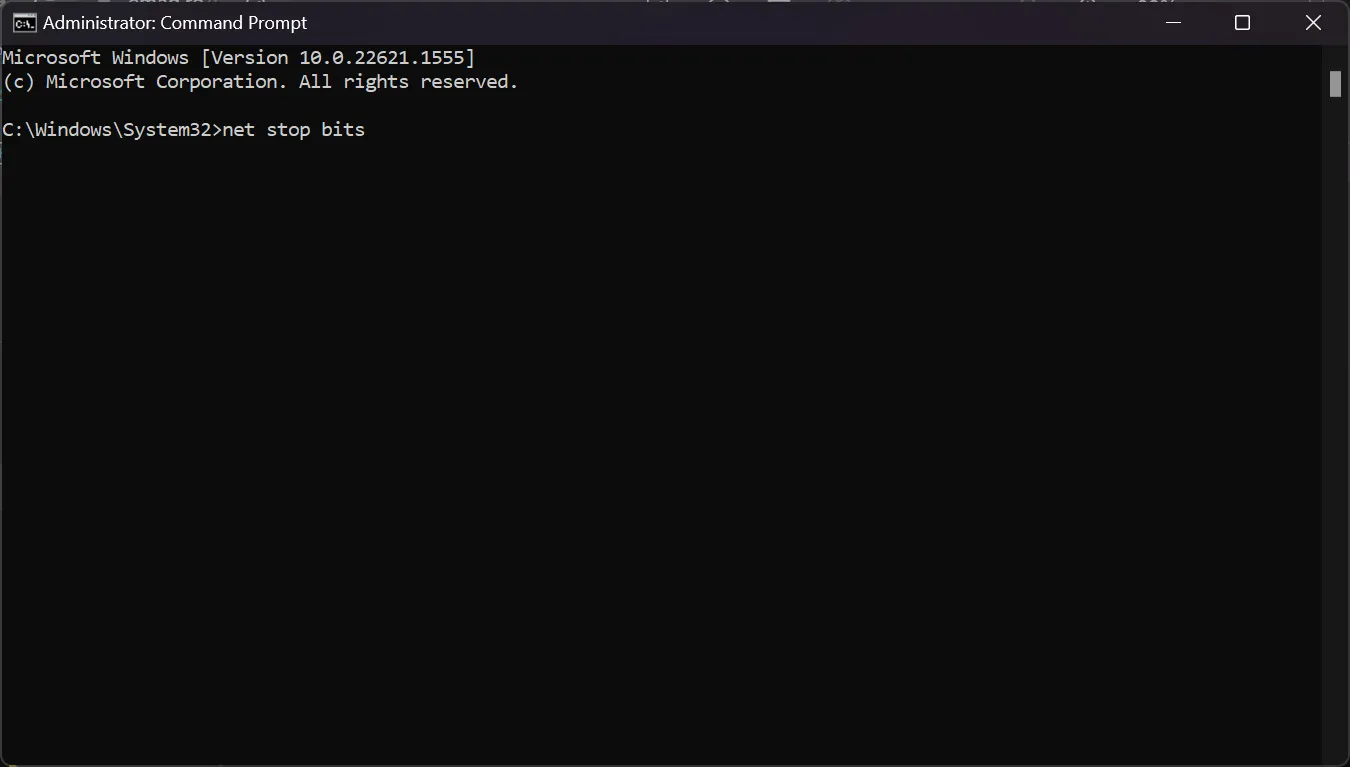
- Press the Windows key + E to open File Explorer and go to the following path:
C:\Windows\SoftwareDistribution - Select all the contents in the folder, right click on one of the files and select the Delete icon.
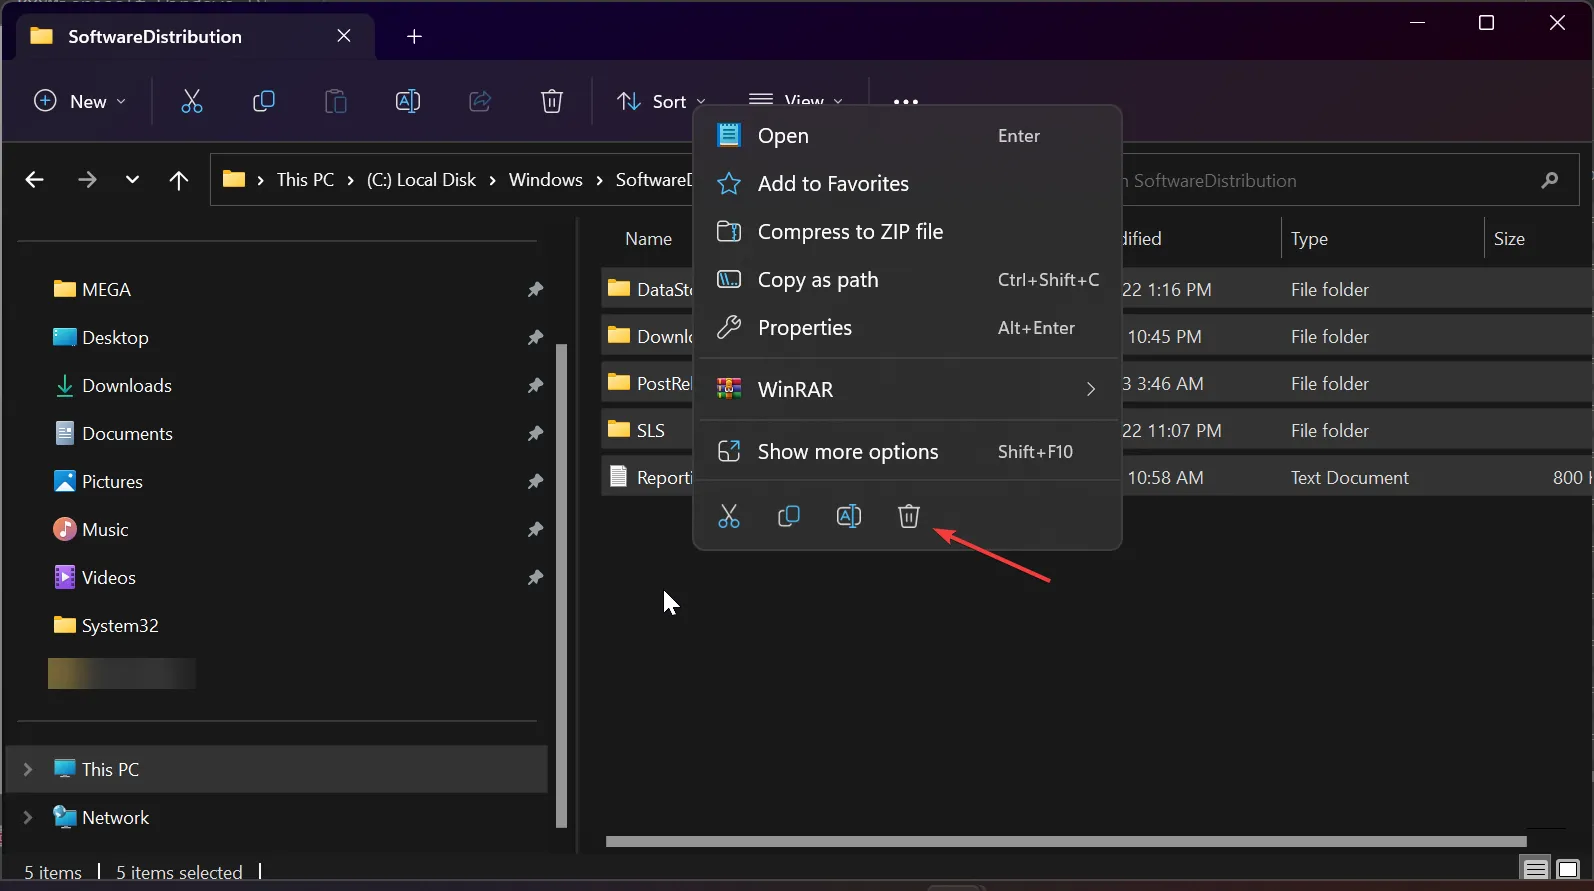
- Next, navigate to the following folder:
C:\Windows\System32\catroot2 - Select all the contents within the folder and hit the Delete key.
- Go back to the Command Prompt window, paste the following command, and press Enter :
net start wuauserv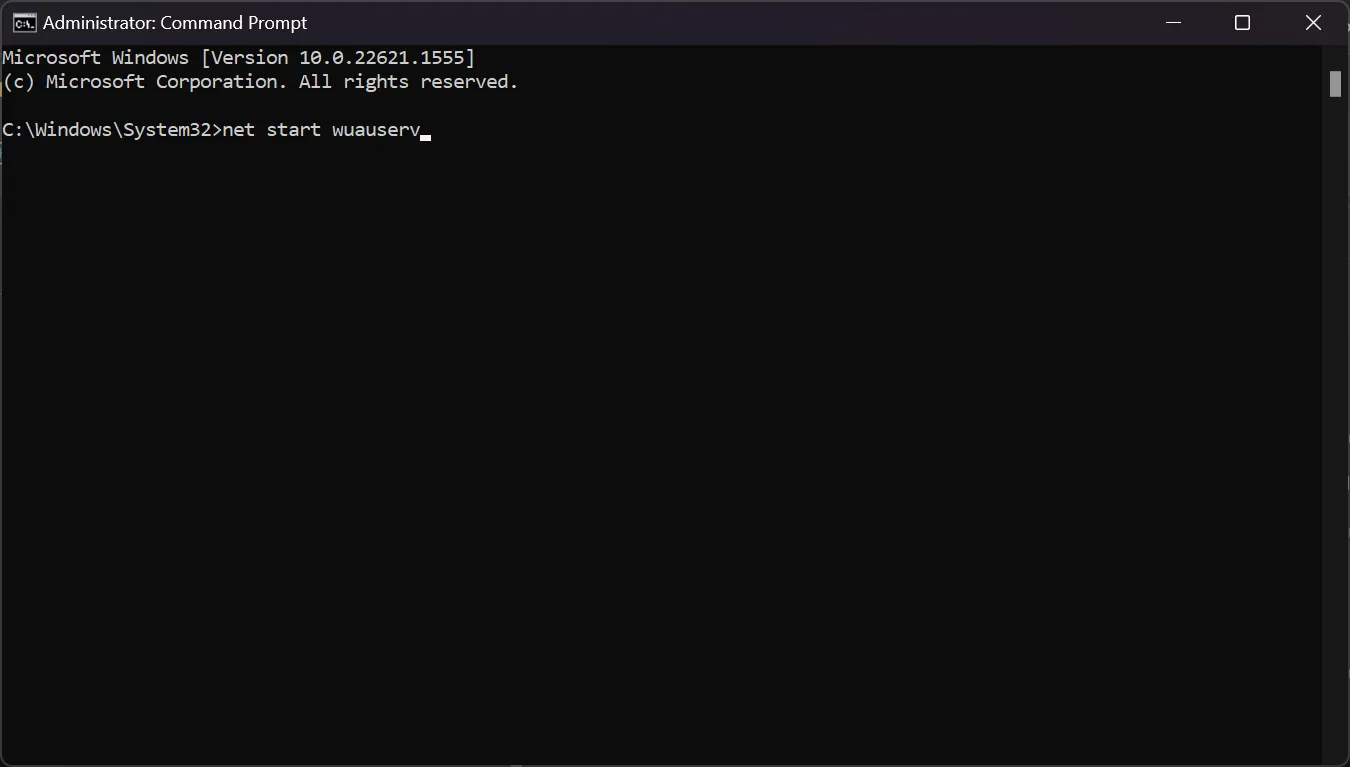
- Paste the following command and press Enter as well:
net start bits - Restart your PC and see if now you can update Windows.
2. Run the Windows Update troubleshooter
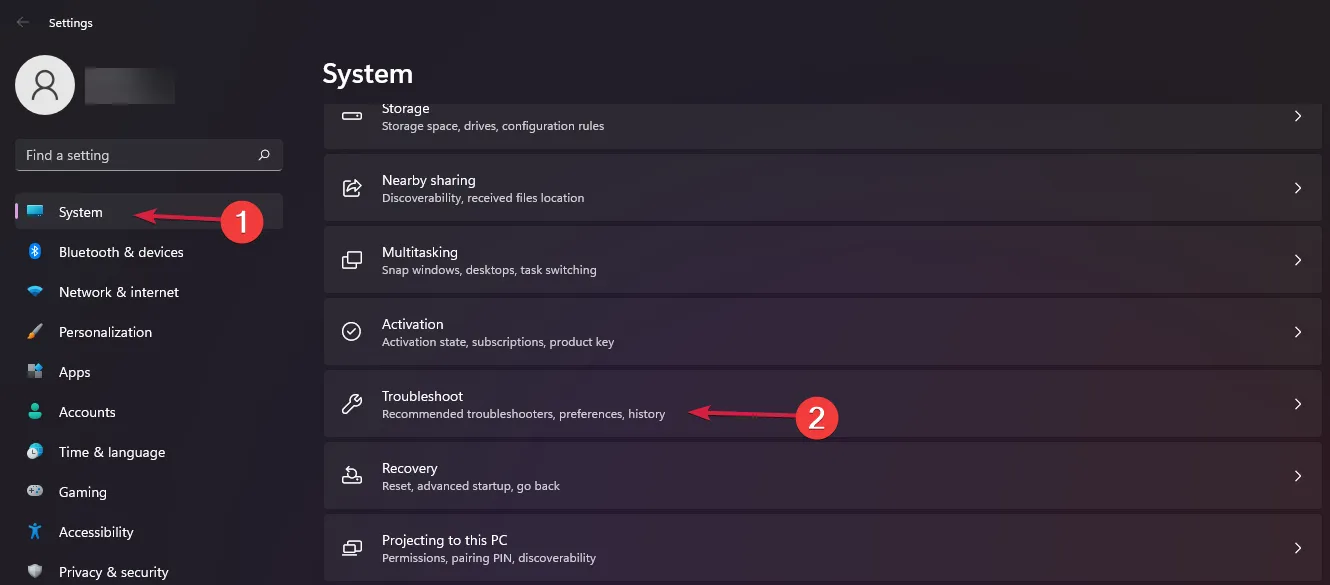
- Click the Start button and select Settings.
- In the System category, click on Troubleshoot from the right.
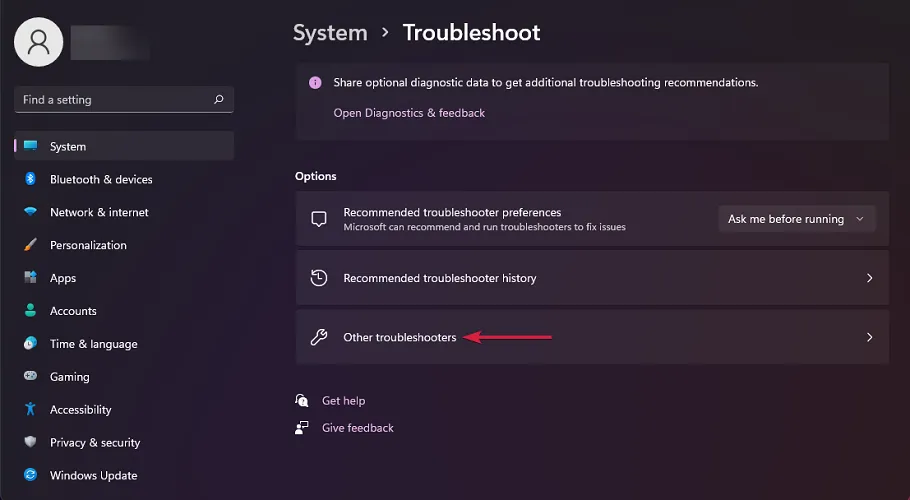
- Now, select Other troubleshooters from the list of options.
- Finally, click the Run button to the right from the Windows Update troubleshooter.
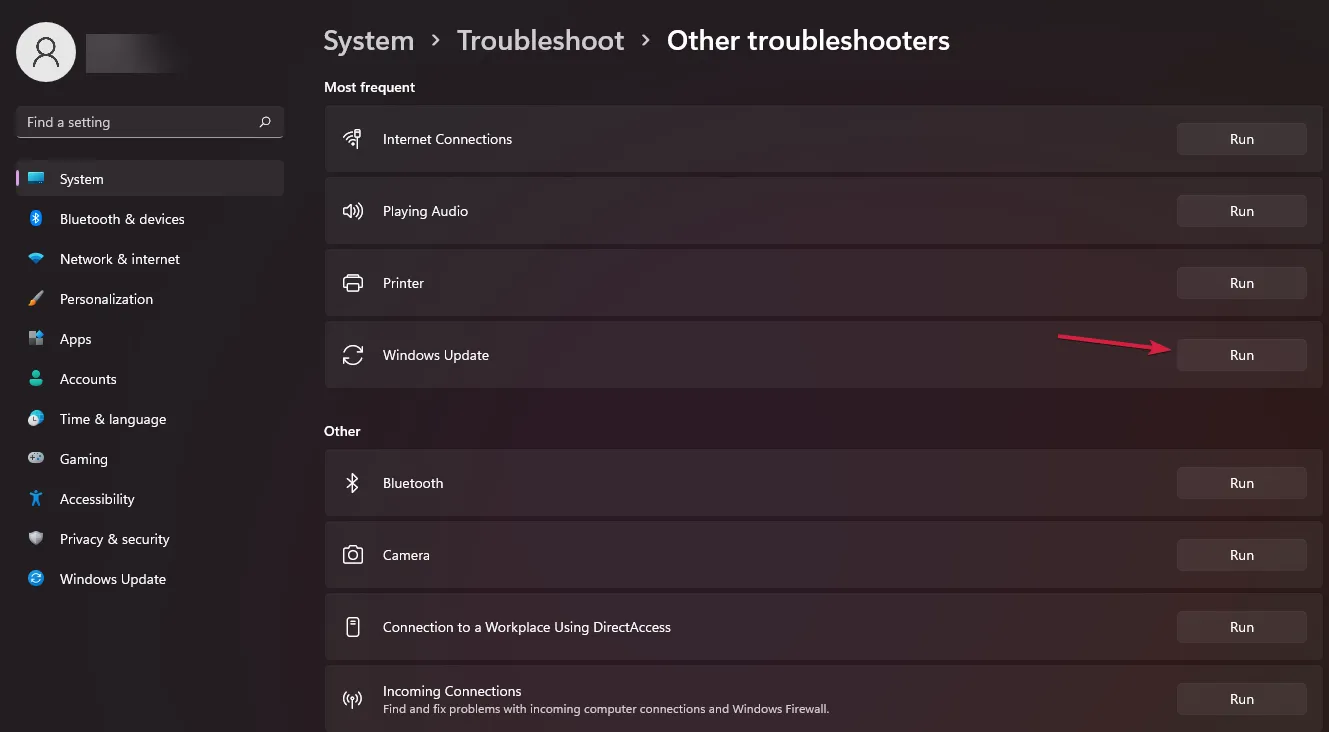
- The troubleshooter will find and fix any problems concerning the updates.
3. Download the update manually
- First, verify which is the failed update by checking the Windows Update section from Settings.
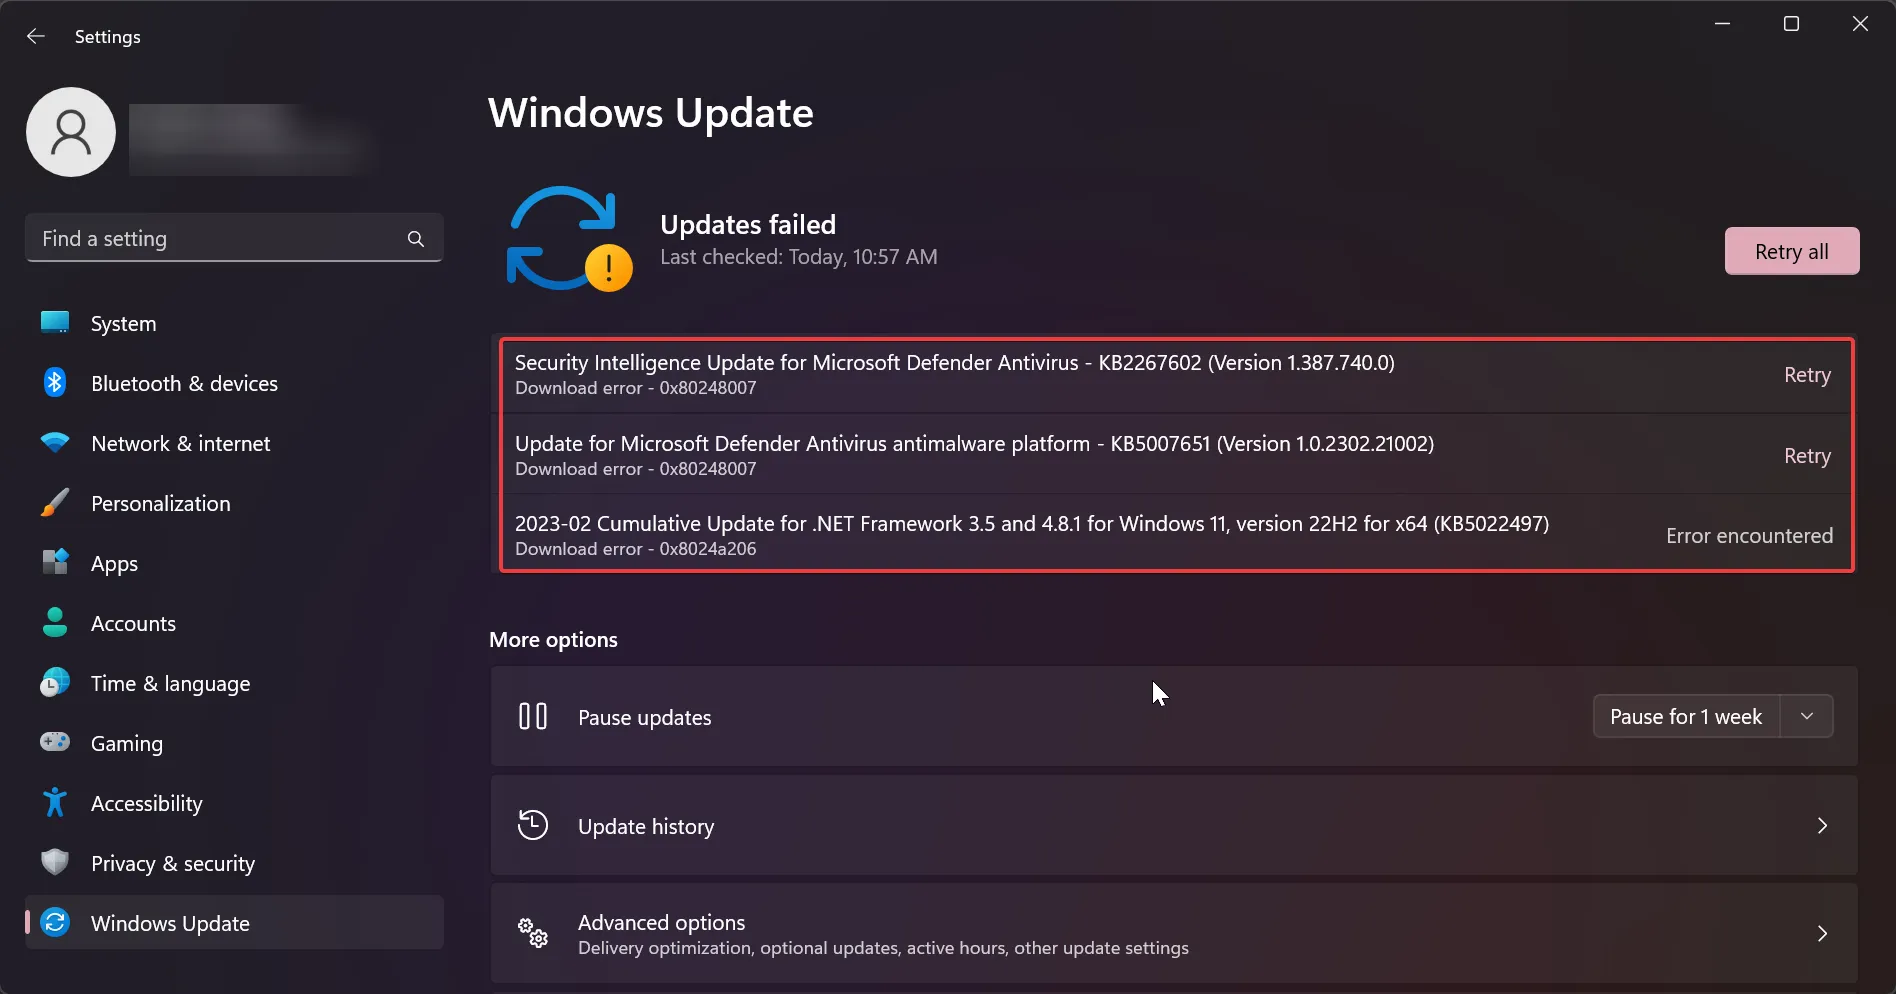
- Now, visit the Microsoft Update Catalog website and look for that particular update or search for Windows 11 and see if you can find it on the list.
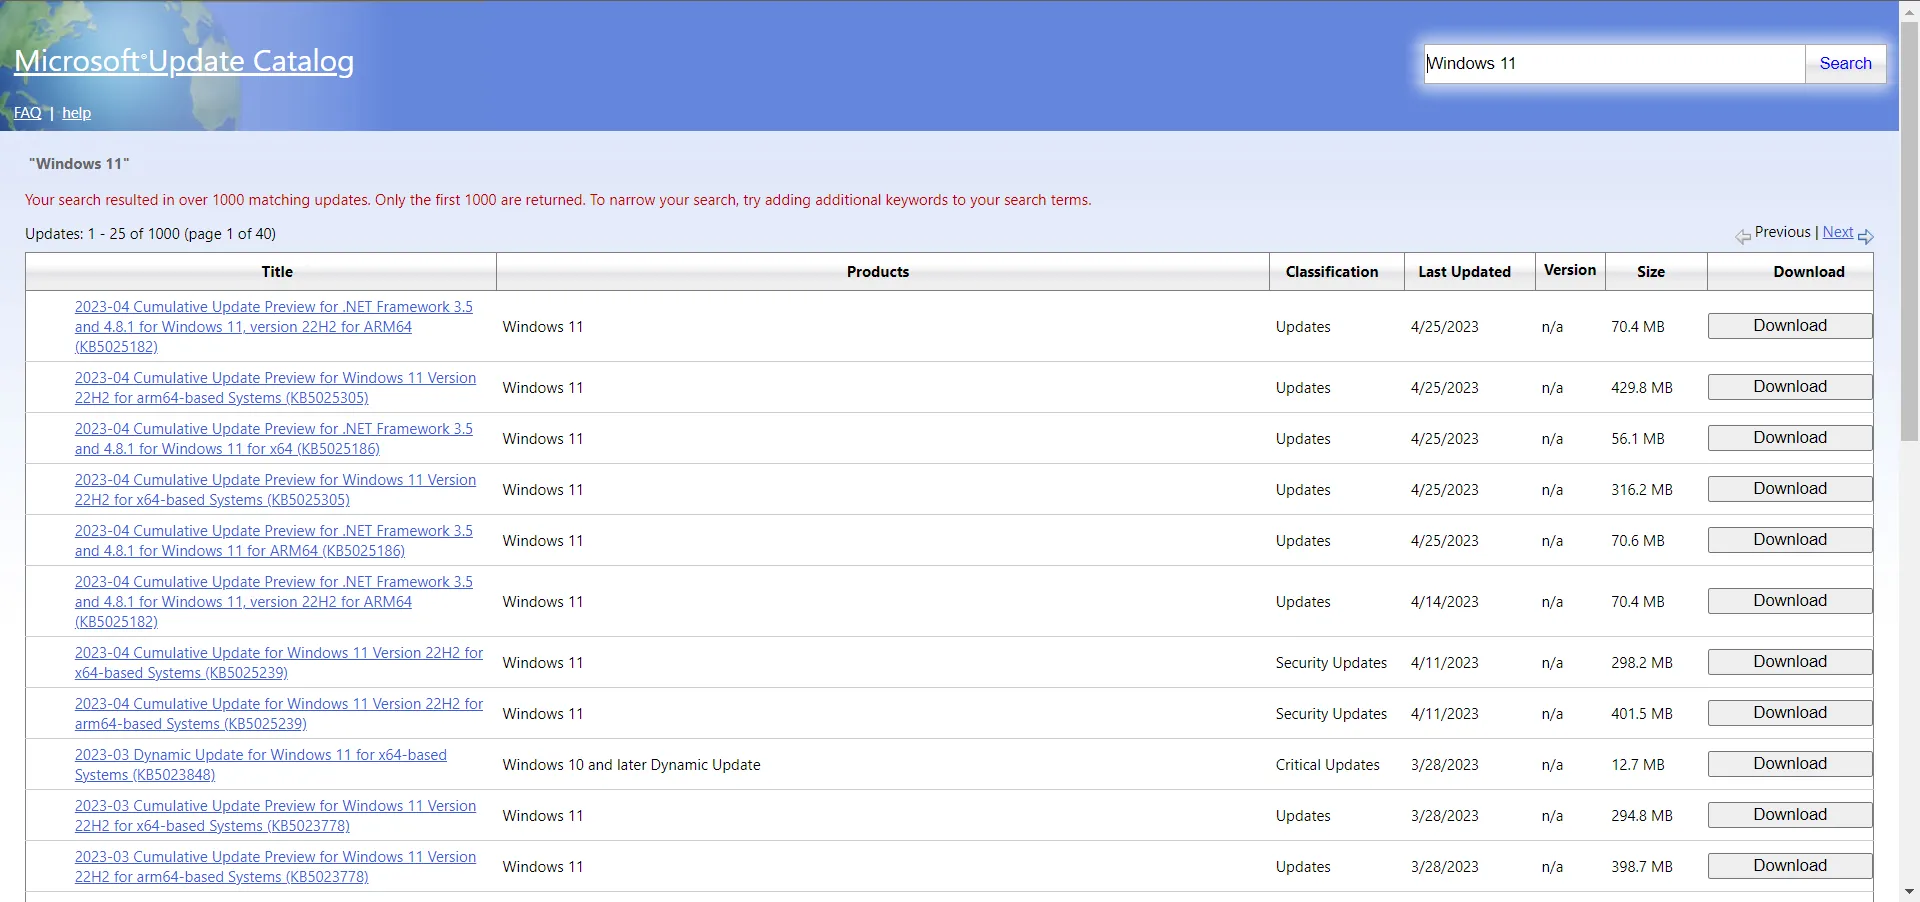
- Then, hit the Download button to its right and double-click on it when it finishes downloading.
4. Disable the firewall temporarily
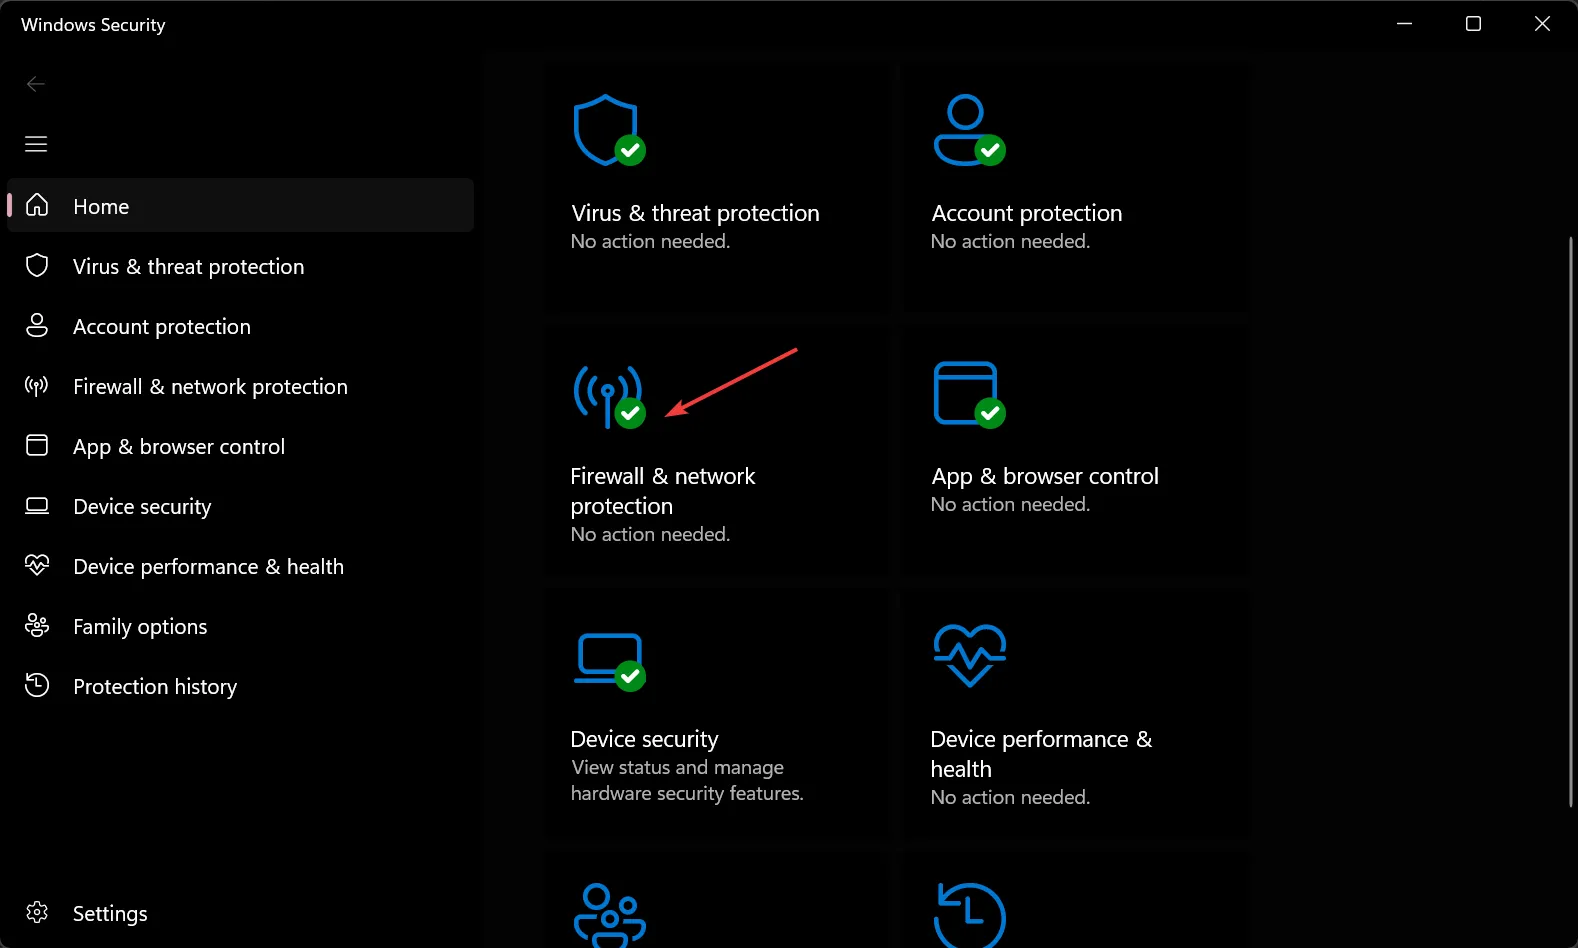
- Click the Search button from the taskbar, type windows security, and click on the app from the results.
- Now, choose Firewall & network protection.
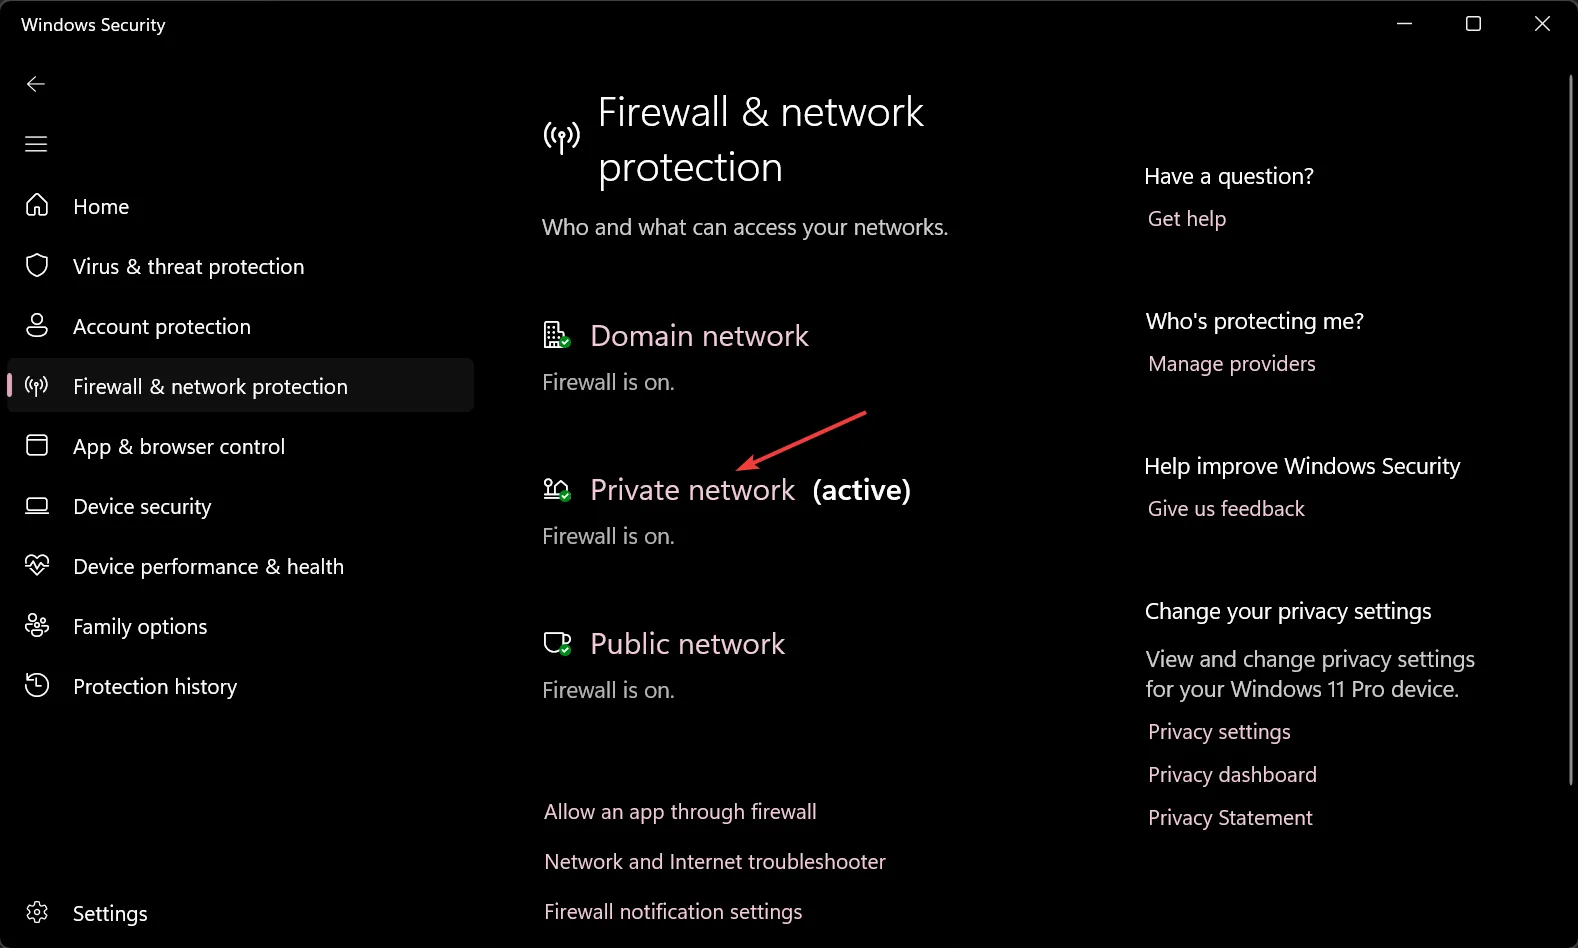
- Select the active firewall.
- Finally, toggle Off the firewall protection.
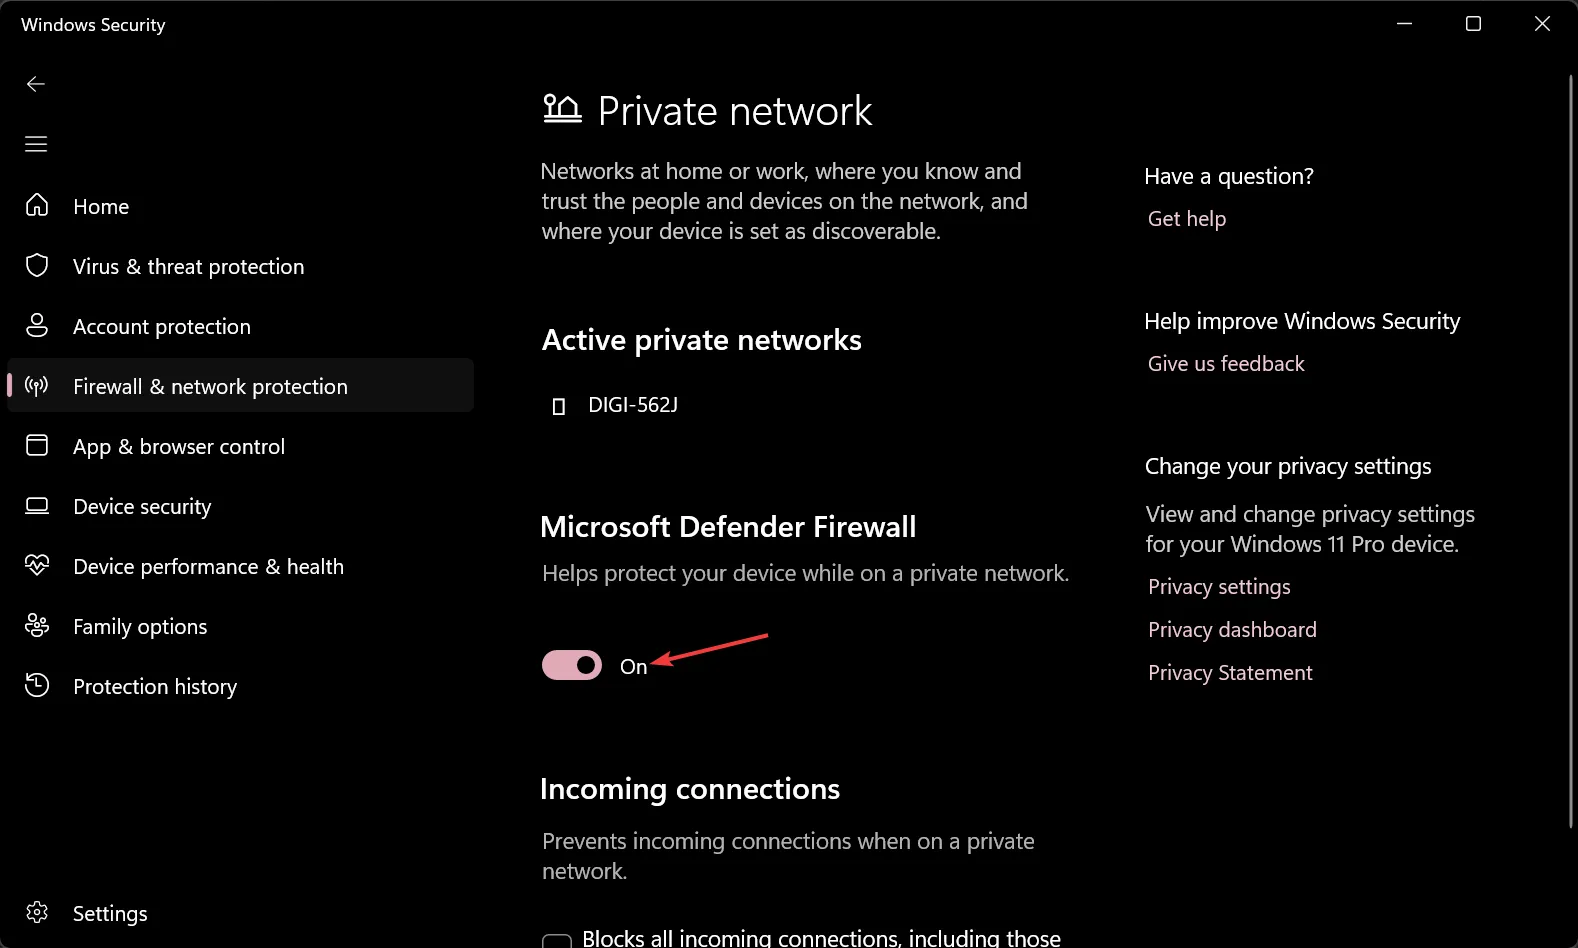
- Try to update Windows now.
Antiviruses may block the Windows Update download, so it’s recommended to turn off the firewall temporarily.
5. Run an SFC scan
- Click the Search icon, type cmd, and select Run as administrator from the results.
- Type or paste the following command and press Enter to run it:
sfc /scannow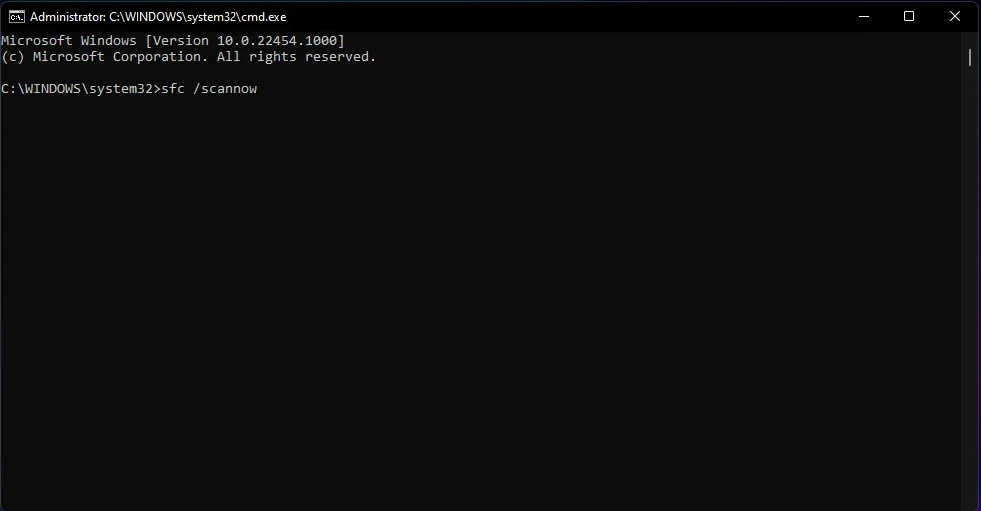
- Wait for the scan to finish, then restart your PC and try updating Windows.
These are the best solutions to fix the Windows Update error 0x80070008 on Windows. You should also know that all the solutions above can be applied on Windows 11 and 10.
If you have any questions or suggestions, don’t hesitate to address them in the comments section below.
Leave a Reply