0x000000C5: How to Fix This BSoD Error in 8 Ways
The 0x000000C5 BSoD error, or DRIVER_CORRUPTED_EXPOOL error, is a type of Blue Screen of Death (BSOD) that can occur when a driver tries to access a memory location that it is not authorized to access or when there is corruption in the system pool memory.
Many users have reported that they encountered this BSoD error when running a resource-intensive program, such as a video editor or a game. It can also occur during startup, shutdown, and while using specific applications.
Why am I getting a 0x000000C5 BSoD error?
This error occurs when a driver attempts to access an invalid memory location, which can happen for a variety of reasons, such as:
- Outdated or incompatible drivers: If your computer’s drivers are outdated or incompatible with your operating system, they can cause this error.
- Corrupted system files: If important system files are corrupted or missing, it can cause errors like this.
- Malware or virus infections: Malware or virus infections can damage system files or drivers, leading to the BSoD error.
- Hardware issues: Problems with your computer’s hardware, such as faulty RAM or a failing hard drive, can also cause the 0x000000C5 error.
How do I fix the 0x000000C5 BSoD error?
Here are some simple steps you can take to troubleshoot and resolve this error before diving into more complex solutions:
- Restart your computer: Sometimes, a simple restart can fix the issue.
- Uninstall the third-party antivirus or recently installed programs: You can try turning off the real-time protection of the antivirus program (such as SUPERAntiSpyware, Avira Antivirus, and Security Essentials), or uninstalling it completely if that doesn’t work.
If none of the above steps worked, you can try the solutions below one by one.
1. Repair the hard drive
- Press Windows + R to open the Run dialog box, type cmd, hold the Ctrl + Shift key, and click OK to launch Command Prompt as Administrator.
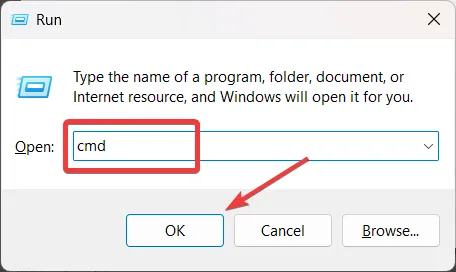
- Click Yes on the User Account Control (UAC) prompt window.
- In the Command Prompt window, type the following command and press Enter :
chkdsk /f/r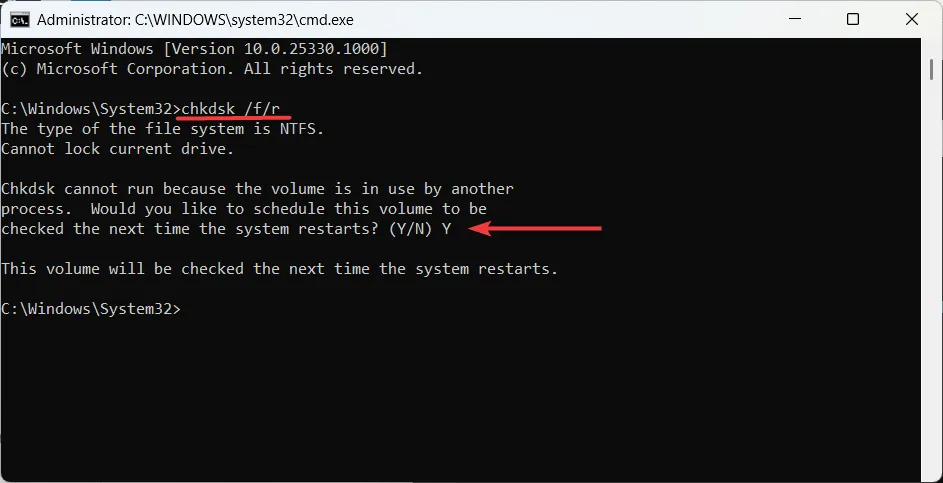
- In case you are prompted to schedule the scan on the next restart, type Y and press Enter.
- After that, restart your device to run the hard disk checkup.
2. Update the device drivers
- Press the Windows key, type device manager, and click on Device Manager from the search result.
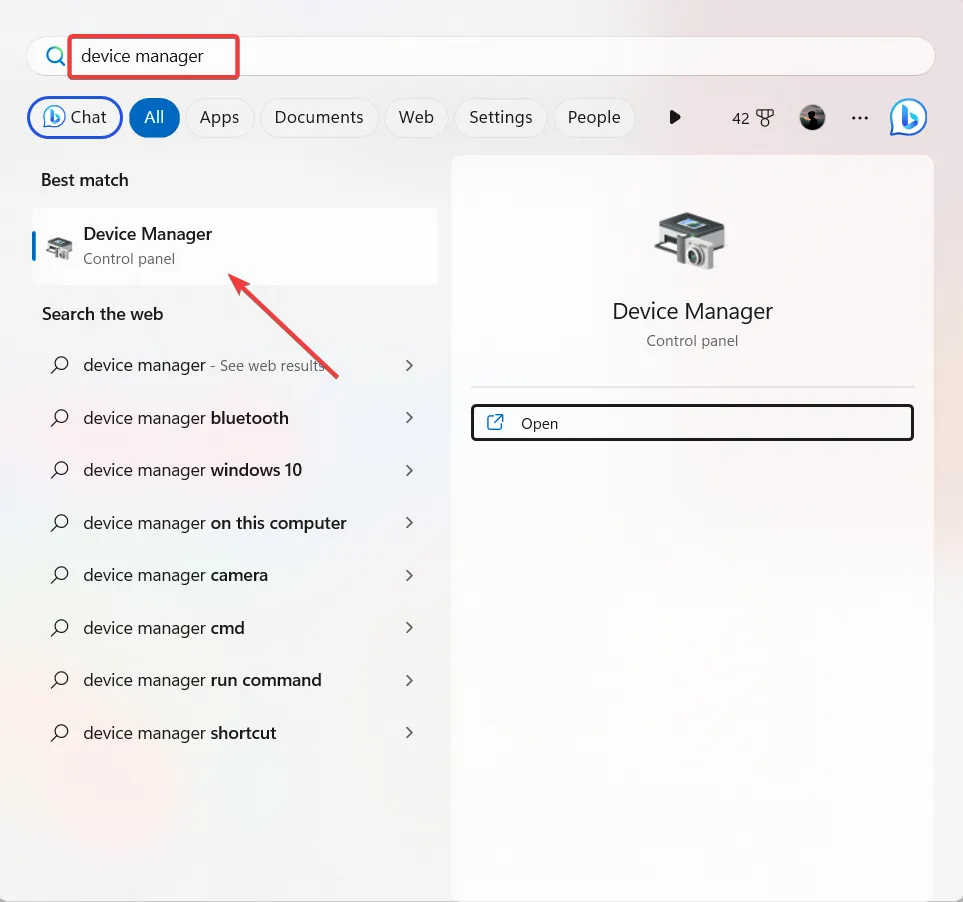
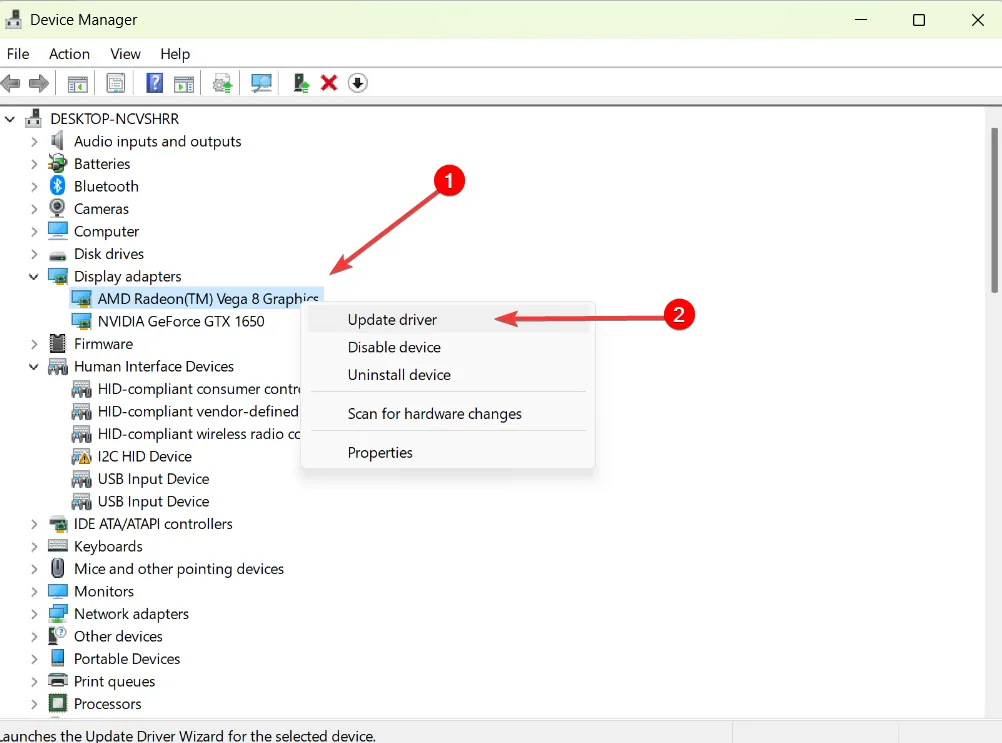
- To update a driver, search for any driver that is outdated or faulty in the Device Manager window and has a yellow exclamation mark beside it. Then, right-click on the driver and choose the Update driver option.
- On the next window, select Search automatically for drivers.
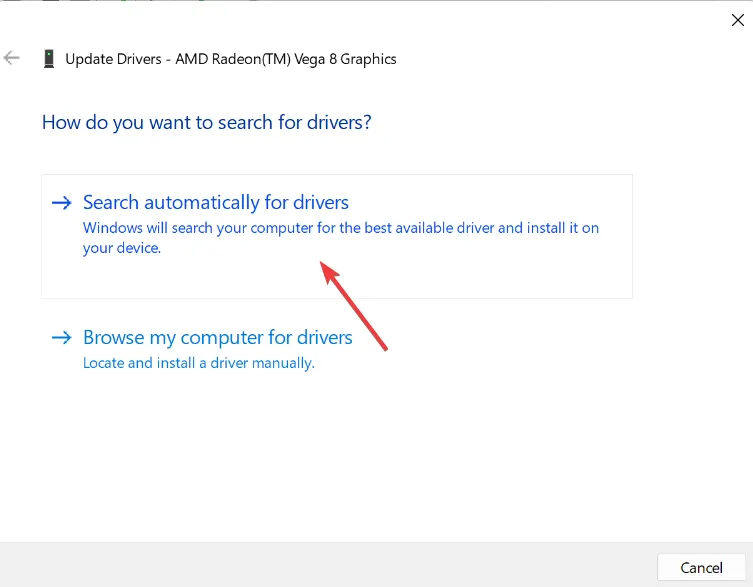
- In case a newer driver is available, the system will notify you. Simply follow the on-screen instructions to install it.
- Then, restart your device and check if the problem is resolved.
- If the Device Manager fails to update the driver, you may need to visit the manufacturer’s website and manually download the most recent driver.
- Then, install the driver and restart the computer.
3. Roll back the recently updated driver
- Open Device Manager and locate the recently updated or problematic driver.
- Right-click on the driver and select Properties.
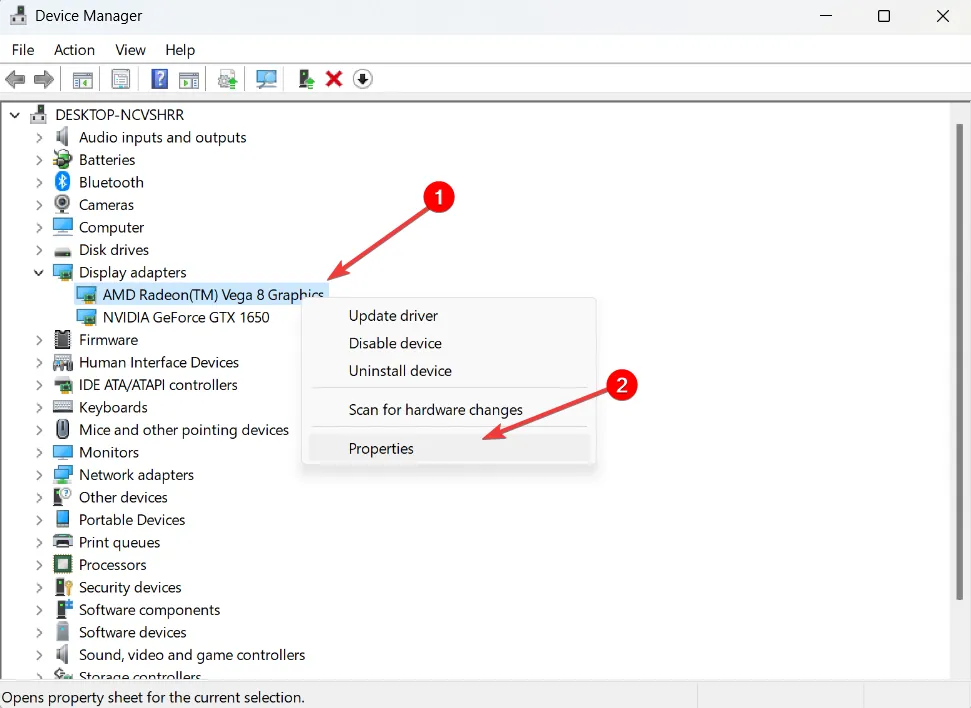
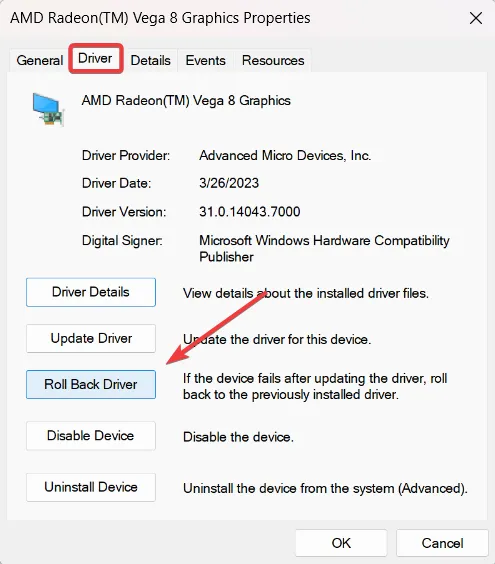
- In the driver Properties window, switch to the Driver tab, and click the Roll Back Driver button.
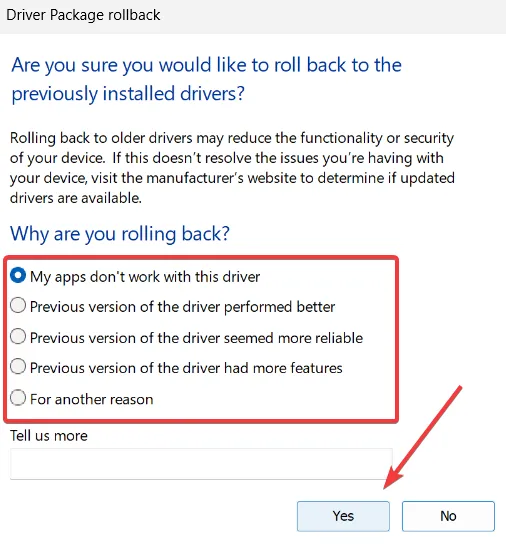
- Select an appropriate reason and click Yes to roll back the driver.
- After that, restart your computer and check if the error has been resolved.
4. Check the CPU temperature
- Go to the CoreTemp website on your browser and download the latest version of the Core Temp tool.
- After downloading the tool, run the installer, click Yes at the User Account Control dialog and follow the on-screen to complete the installation.
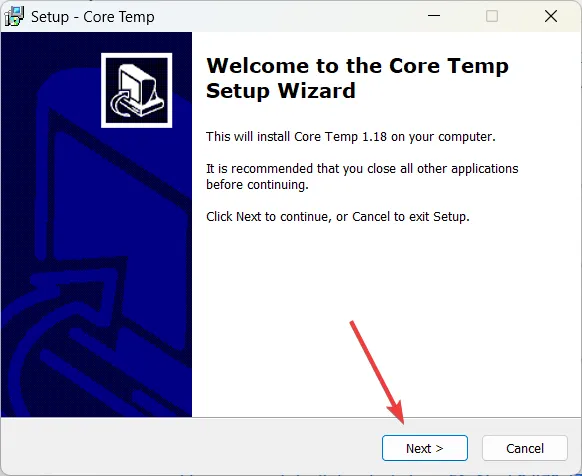
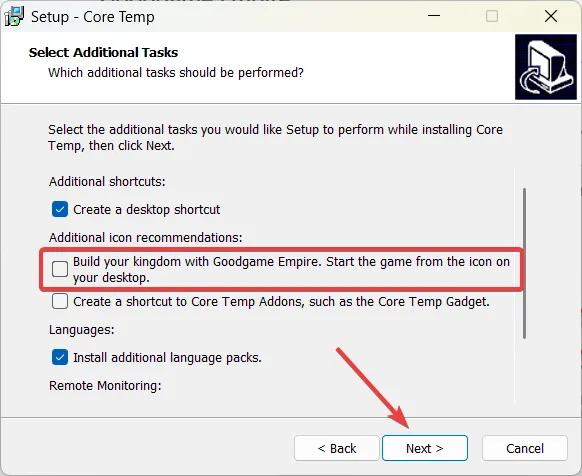
- While installing, uncheck the Build your Kingdom With Goodgame Empire option and click Next on the Select Additional Tasks screen to prevent bloatware installation.
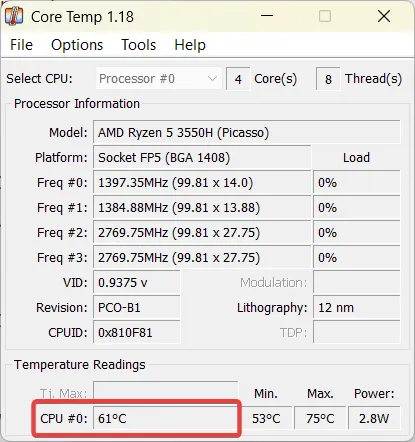
- Once the tool is installed, launch the Core Temp tool.
- Now, take a look at the Temperature Readings for the CPU temperature.
- Next, close all unnecessary programs, background processes, and non-critical services that might consume CPU resources.
- If the computer crashes while running a particular application or game, try rerunning them and check the temperature readings.
- If your CPU frequencies are overclocked or the temperature is too high, try to bring them back to the standard temperature and see if the 0x000000C5 error persists.
Laptops, notebooks, and ultrabooks have higher temperature readings than desktop computers. Therefore, it’s crucial to research the standard temperature for your CPU model online to know what temperature range to expect.
A typical temperature range for idle PCs is between 30 and 40 Celsius. If you’re performing a resource-demanding activity like gaming, the ideal temperature range should be between 65 and 80 degrees Celsius to prevent overheating issues.
You could also apply or reapply thermal paste (if it has dried up), clean your CPU cooler, or even install extra cooling options to prevent your system from overheating.
5. Perform a Clean Boot
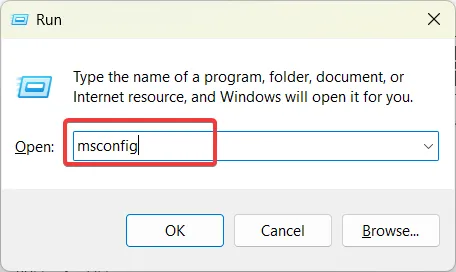
- Open the Run command box by pressing Windows + R , type msconfig and press Enter .
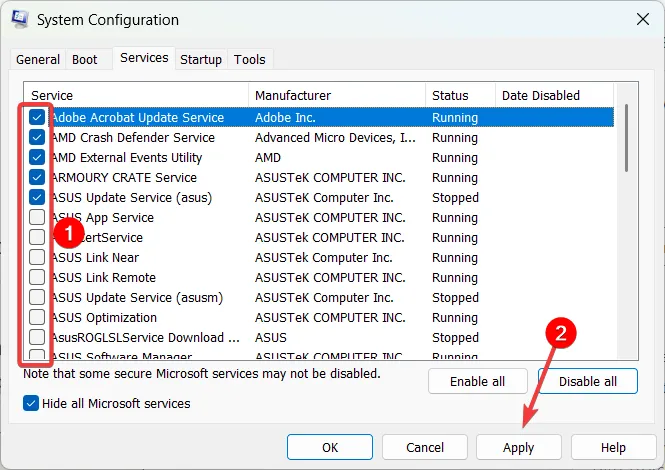
- Go to the Services tab, check the Hide all Microsoft services box, and click Disable all.
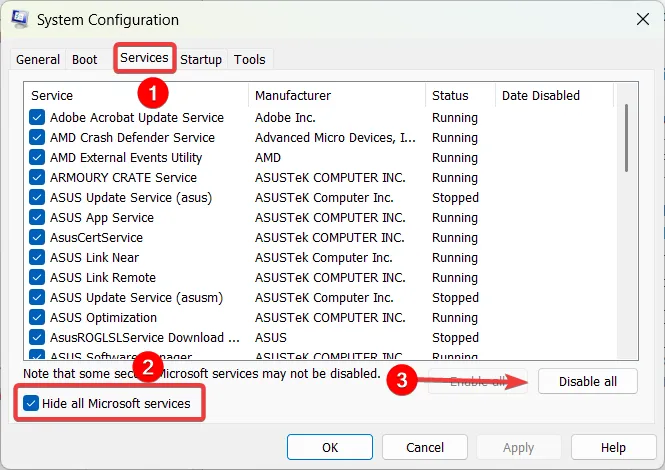
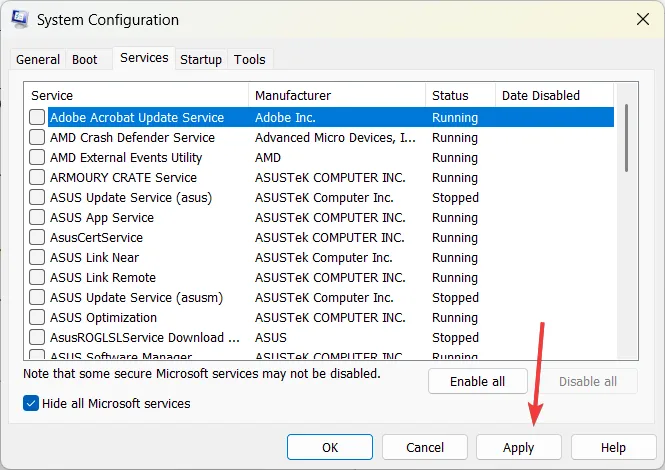
- Then, click Apply to save the changes.
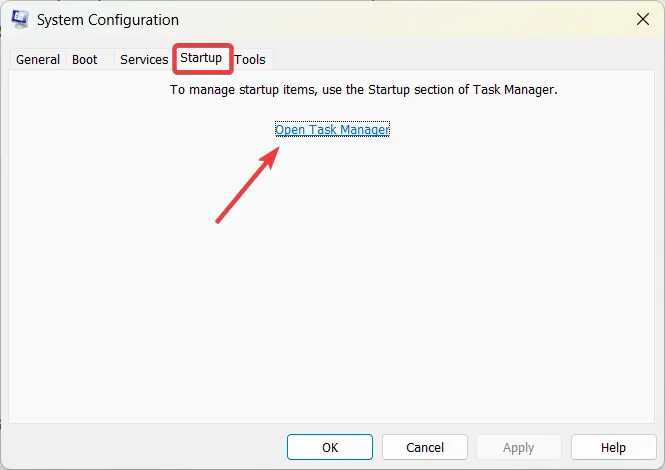
- Next, switch to the Startup tab and click on Open Task Manager.
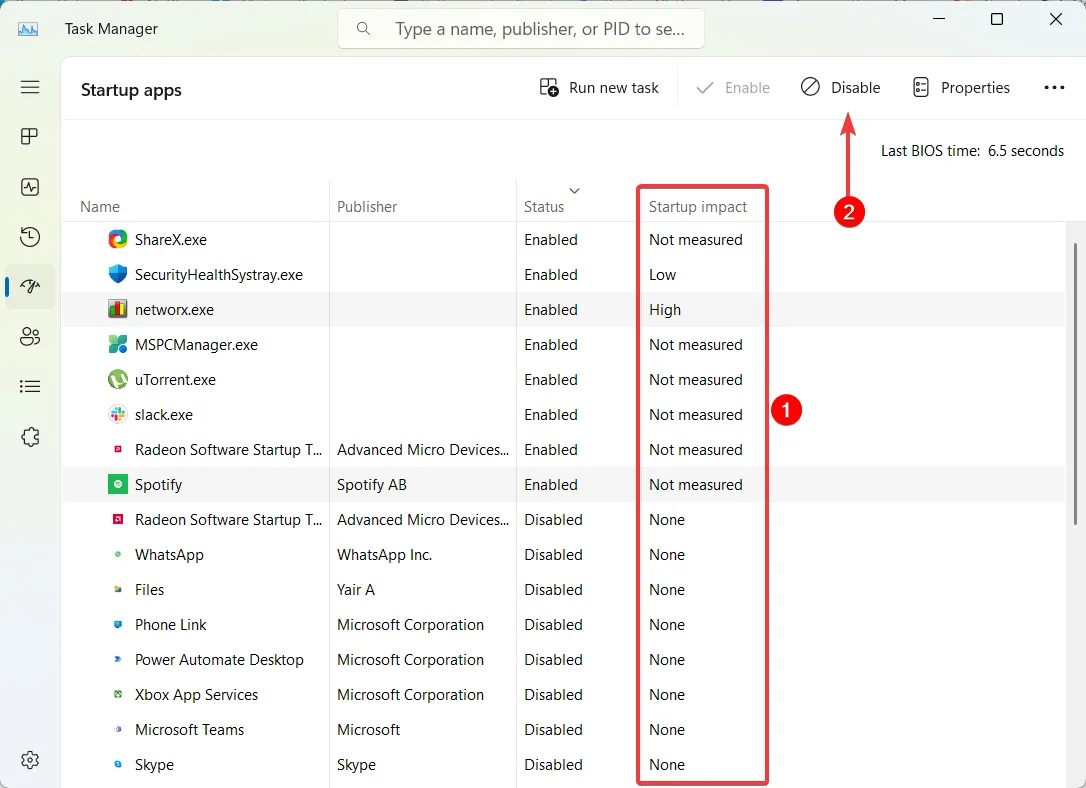
- Now, check the Start-up impact section and disable the apps of high impact. Select the app and click the Disable button.
- After that, restart your computer. When the computer restarts, it will only run the necessary services.
- If the 0X000000C5 error no longer appears during clean booting, it means that the third-party program or service is the cause of the problem.
- If this is the case, open the System Configuration console again, re-enable a few of the disabled services at a time, and then reboot the computer to see if the BSoD appears. Repeat the process until every previously disabled service is enabled.
- After identifying the exact culprit, you can permanently disable the service or remove the associated app from your system.
6. Disable Overclocking
- To check if your CPU is overclocked, download and install CPU-Z Software.
- Then, launch the CPU-Z application and check Core Speed and Multiplier under the CPU tab. Alternatively, you can access the BIOS/UEFI settings and look for Core Ratio, Voltage, and FSB Frequency values.
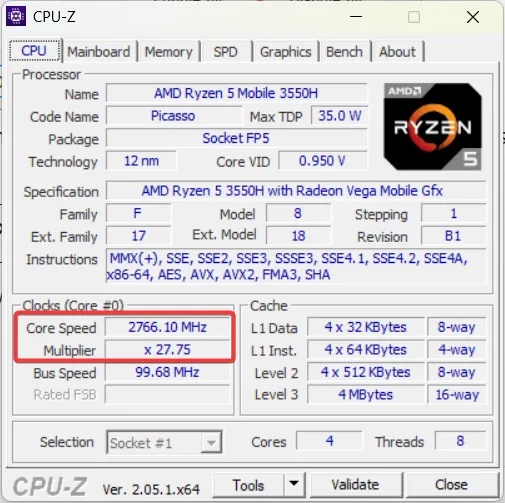
- If the Core Speed and Multiplier values exceed their original ones, your CPU is overclocked.
- If your computer is overclocked, enter the BIOS / UEFI settings by pressing the appropriate key (usually F2 or Delete).
- Once in the BIOS / UEFI settings, locate the Overclocking option, OC, or options related to frequency and voltage settings for your CPU, GPU, and RAM.
- Then, disable overclocking or reset the frequency and voltage settings to their default values.
- Restart your PC and check if the 0x000000C5 error stops happening.
Depending on your specific machine and motherboard, overclocking settings may be located in different sections of the BIOS / UEFI settings.
7. Manually install KB4012598 Windows update
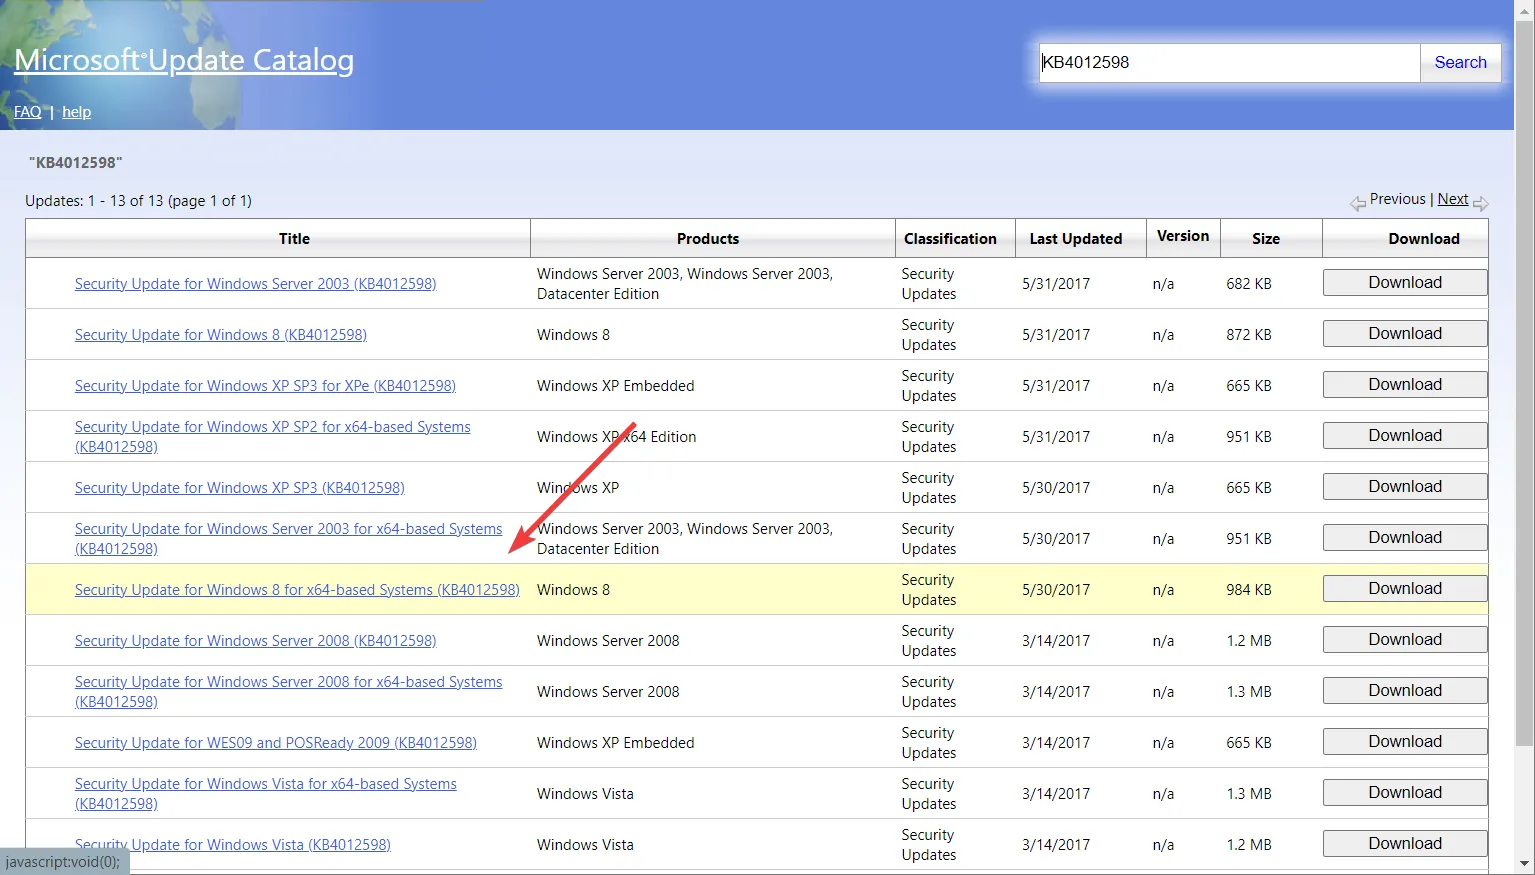
- Go to the Microsoft Update catalog and find the update patch compatible with your operating system.
- Click the Download button next to the update you want to download.
- On the pop-up window, click the hyperlink to download the update.
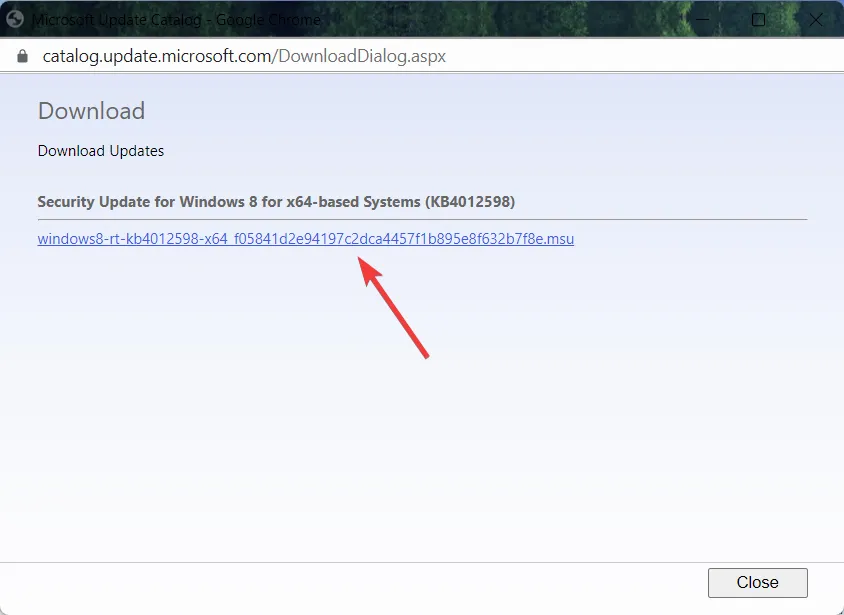
- After the. msu file is downloaded, double-click on the file, and follow the on-screen instructions to install the KB4012598 patch.
- Once the patch is installed, restart your device and check if the 0x000000C5 BSoD error has disappeared.
If the previous solutions don’t work, you can go back to a previous point when your computer was working fine using System Restore or completely start fresh by reinstalling Windows with the Windows reset feature.
If you happen to fix this BSoD error in another way, please let us know in the comment section below.
Leave a Reply