
How to do a Firmware Update on Your Virgin Hub 3
How do I update my Virgin Media Hub 3 firmware?
1. Heset Virgin Media Hub 3 to factory settings
- Turn on the Hub.
- Locate the Reset button on the back of the device and use a pen or a sharp object to press it for 10 seconds.
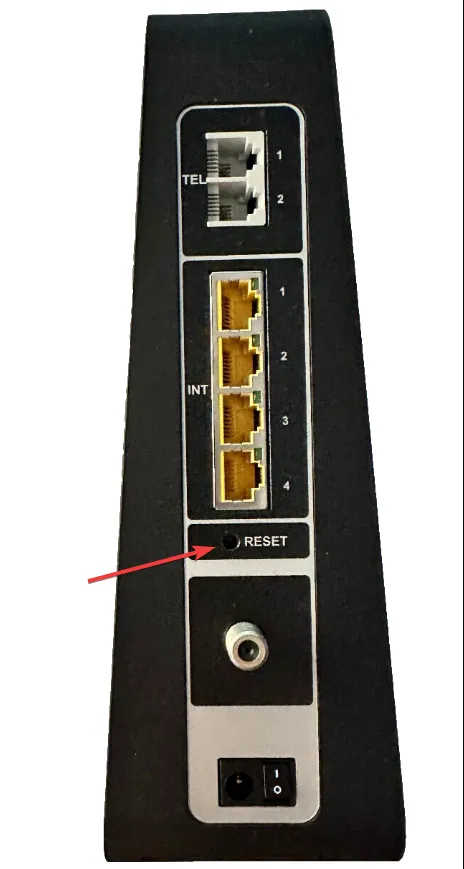
- Now wait for about 5-10 minutes for the Virgin Media’s Hub 3 to reboot and come back online.
- It will be ready when the white power light from the front of the device is lit continuously.
If there are any new software updates from Virgin Media, they are likely to be installed after this reset. However, there is no guarantee that it will happen. As we’ve mentioned above, the firmware update is pushed automatically by Virgin Media and there are no known criteria on how they prioritize this action.
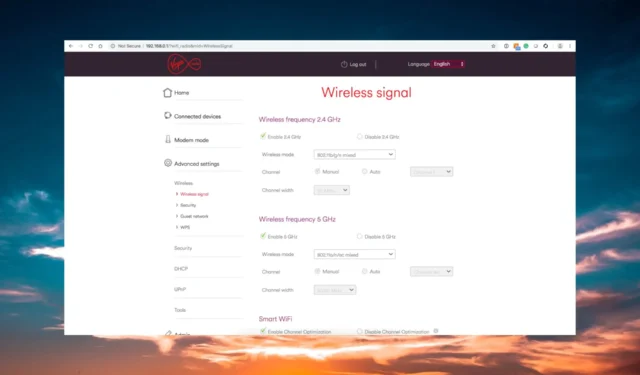
2. Set the Virgin Media hub in Modem Mode
- Make sure that your PC is connected with an Ethernet cable or Wi-Fi to the hub.
- Open a browser of your choice, enter the following IP ((this is the default Virgin Media Hub IP address) into the address bar and press Enter: 192.168.0.1
- Log into the hub with your credentials. Check the manual of the device to get them.
- Go to Modem Mode, check the Enable Modem Mode option, and select Apply Changes.
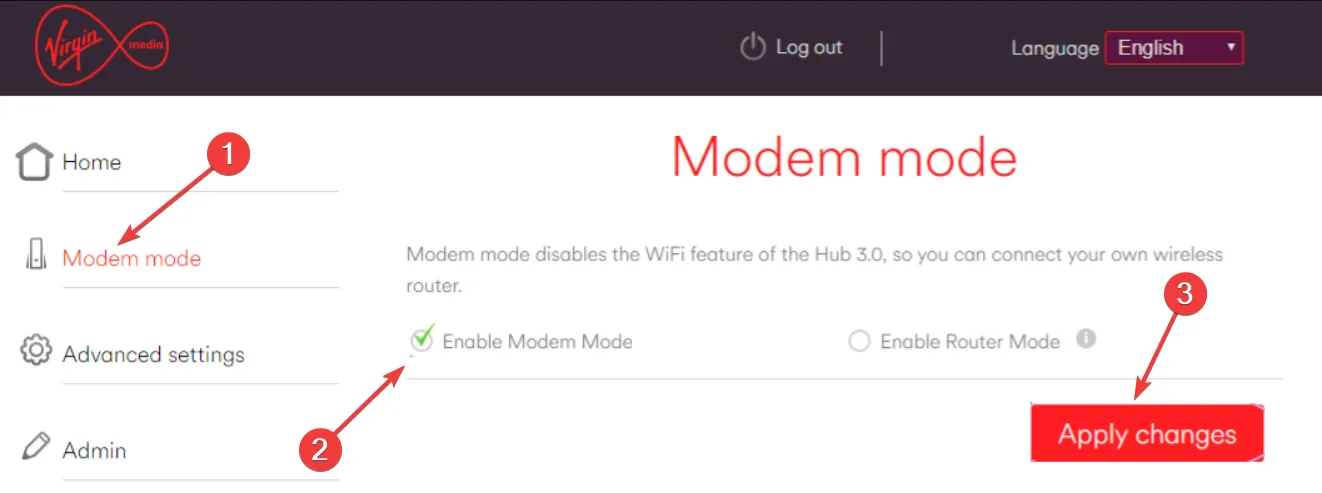
Although it’s not guaranteed, from our tests in the WR lab, it’s more likely to get a firmware update for the Virgin Media’s device if you set the device in Modem mode.
How do I know if Virgin Media Hub 3 is updating the firmware?
Troubleshooting issues with a failed or aborted firmware update on your Virgin Hub 3
- Remove all connected devices from the Ethernet ports and the wireless network.
- Reset the Virgin Media Hub 3 to factory settings, as shown in the first solution from this guide.
You should also note that not all the subscribers are eligible to get all the SuperHub 3 firmware. Some of them may introduce new features that require extra cost.
If you have any further questions or suggestions on this topic, access the comments section below to leave us a note.


Schreibe einen Kommentar