
PC で Auto GPT を設定して使用する方法

AI テクノロジーの世界は、過去 2 か月で大幅な台頭を見せており、多くの企業がこの最新トレンドに乗じようと躍起になっています。本格的な言語モデルから、ワークフローを支援するコンテキスト アシスタントまで、さまざまなAI アシスタントが多数あります。したがって、1 回のクリックですべてを実行できる AI が出現するのは時間の問題でした。Auto GPT はまさにそれです。
人気のある GPT LLM に基づいた Auto GPT は、GPT 4 ベースの AI であり、さまざまな LLM の考えを連鎖させて、設定した目標を達成します。したがって、すべてを一度に実行できる AI を探している場合は、Auto GPT を試してみてください。Windows PC でセットアップして使用する方法は次のとおりです。
Auto GPT の設定方法と使用方法
Auto GPT は、GitHub リポジトリのクローンを作成することで PC にセットアップできます。そのためには、PC に Python と Git をダウンロードしてインストールする必要があります。以下の手順に従って、PC で Auto GPT をセットアップして使用してください。
ステップ 1: Python をダウンロードしてインストールする
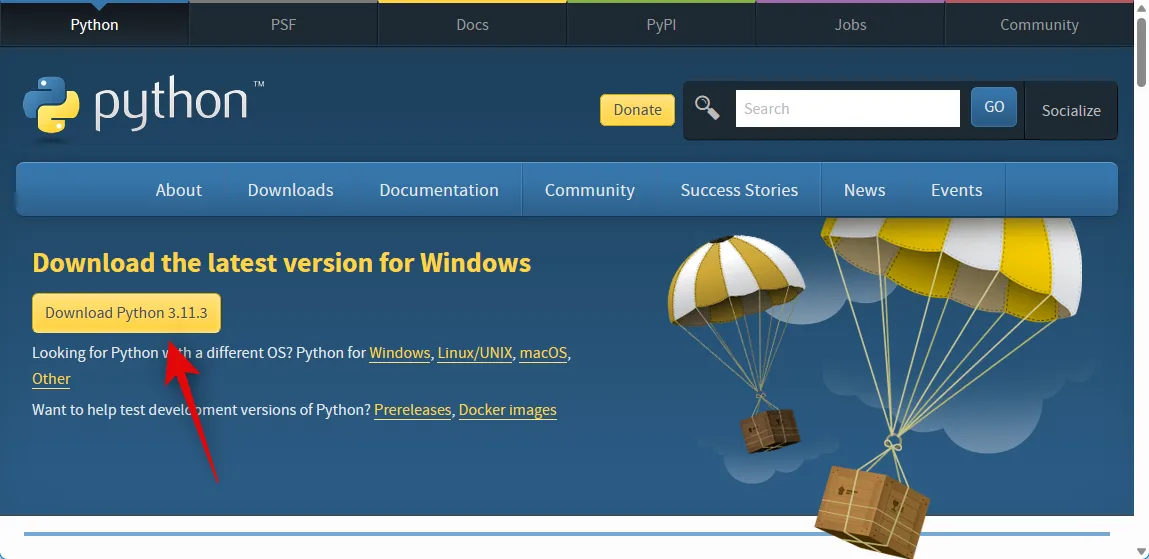
まず、https://www.python.org/downloads/ から最新バージョンの Python をダウンロードします。リンクにアクセスしたら、[Python (バージョン番号) をダウンロード] をクリックします。
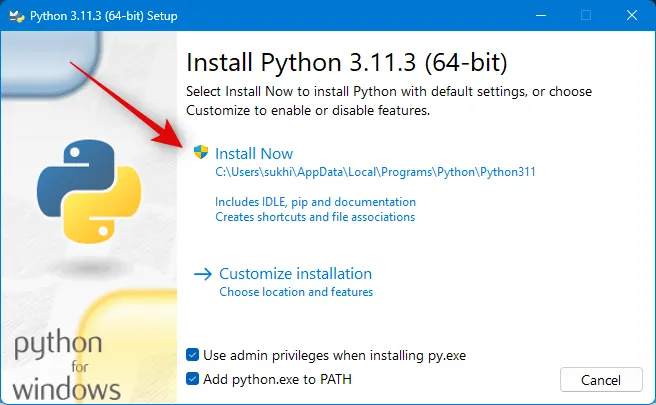
セットアップがダウンロードされたら、ダブルクリックして PC で起動します。下部にあるAdd python.exe to PATHのボックスをクリックしてチェックします。

完了したら、[今すぐインストール]をクリックします。
注:古いバージョンの Python が既に PC にインストールされている場合は、このガイドを使用して最新バージョンをインストールする前にそれを削除することをお勧めします。
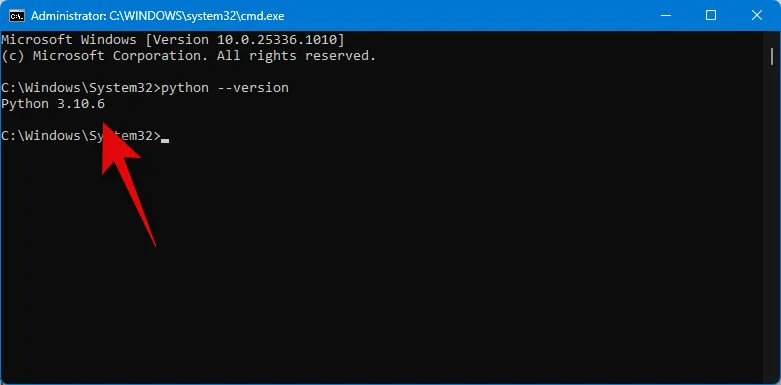
Python が PC にインストールされます。正しくインストールされているかテストしてみましょう。Windows + Rキーボードの を押して Run を開きます。
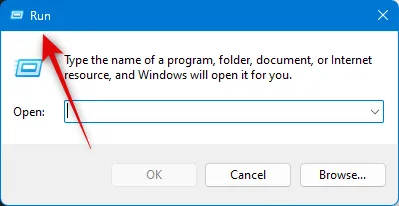
次のように入力して を押しますCtrl + Shift + Enter。
cmd

PC でコマンド プロンプトが開いたら、次のように入力して Enter キーを押します。
python --version
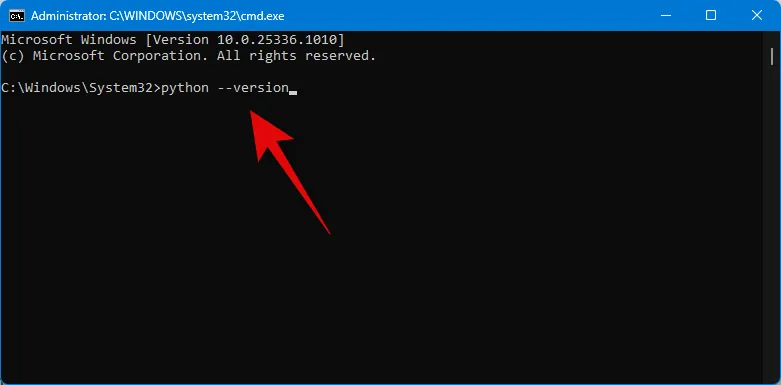
現在インストールされている Python のバージョンが画面に表示されるはずです。
これは、インストールが意図したとおりに行われたことを意味し、Git を PC にダウンロードしてインストールできるようになりました。
ステップ 2: Git をダウンロードしてインストールする
Windows PC に Git をダウンロードしてインストールする方法は次のとおりです。
ブラウザーでhttps://git-scm.com/download/winにアクセスし、 64-bit Git for Windows Setupをクリックします。

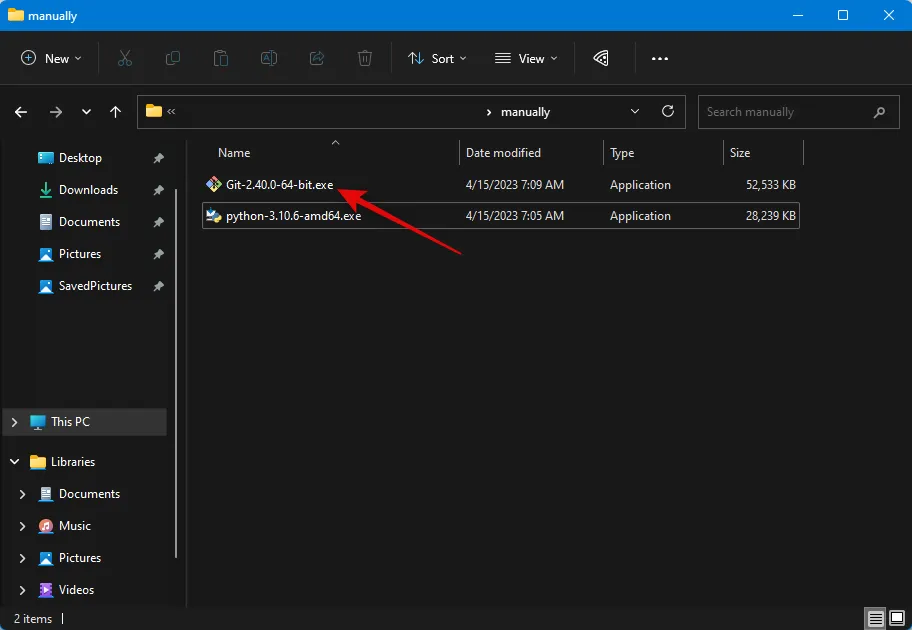
セットアップ ファイルのダウンロードが開始されます。ファイルを PC の便利な場所に保存します。ダウンロードしたら、ファイルをダブルクリックして起動します。
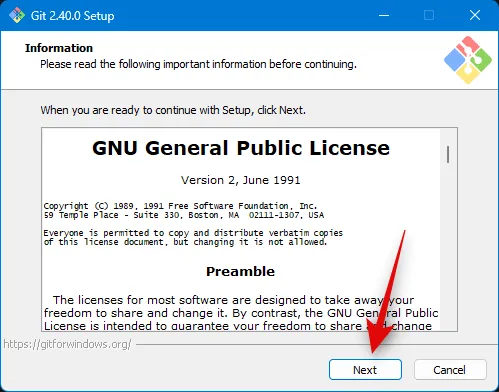
使用許諾契約を確認し、[次へ]をクリックします。
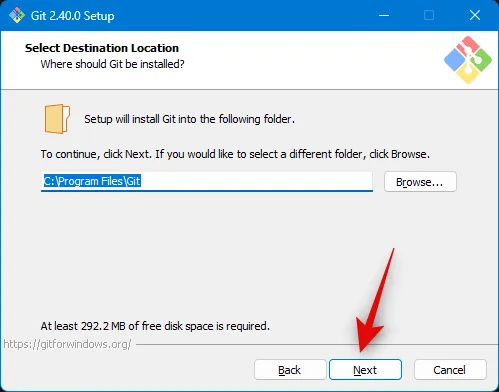
[Browse…]をクリックして、Git をインストールする場所を選択します。
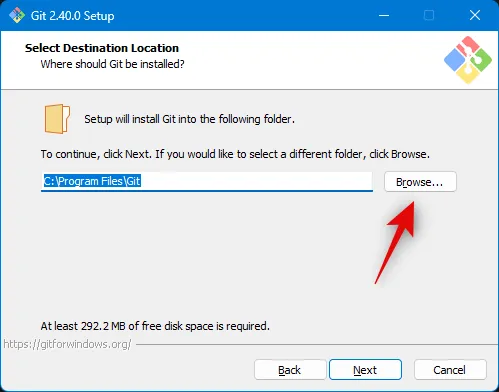
完了したら、[次へ]をもう一度クリックします。
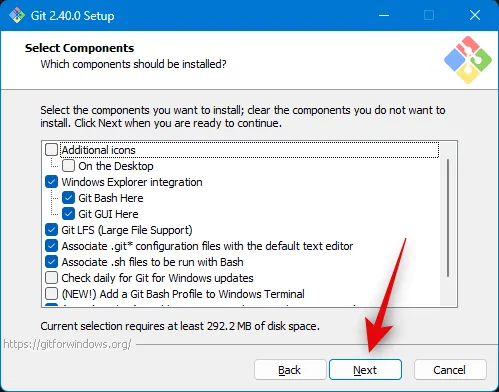
コンポーネントの選択をデフォルト値のままにして、[次へ]をクリックします。
[次へ]をもう一度クリックします。
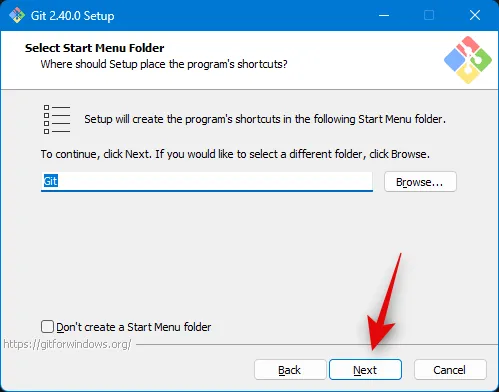
次のステップで[次へ]をクリックします。
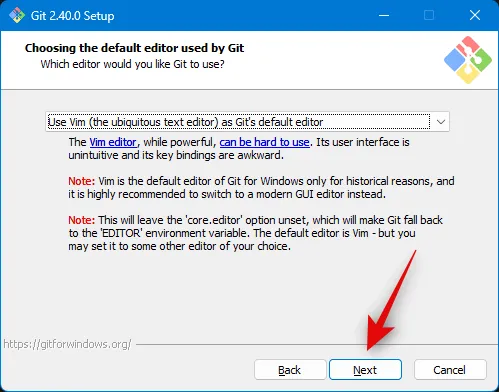
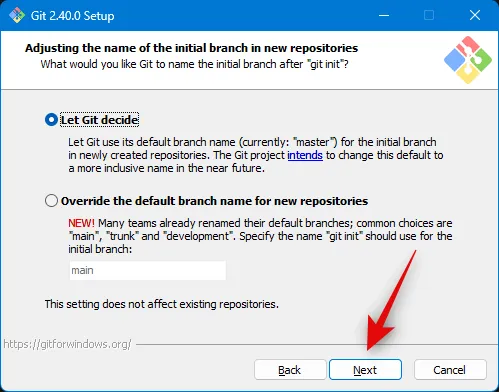
次のステップで[Git に決定させる] が選択されていることを確認し、 [次へ]を再度クリックします。
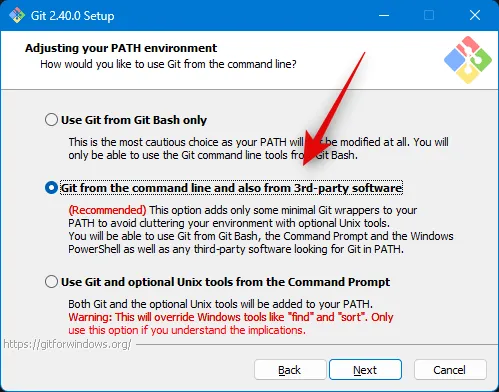
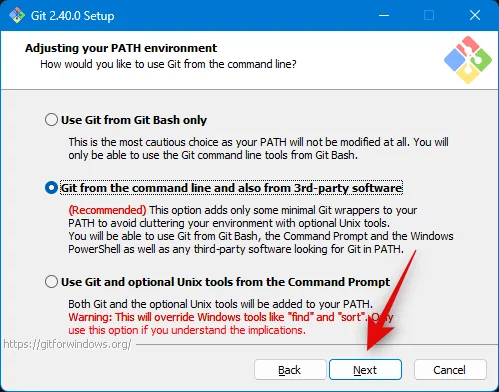
コマンド ラインとサードパーティ ソフトウェアから Git を選択します。
[次へ]をクリックします。
[次へ]をもう一度クリックします。
HTTPS トランスポート バックエンドの選択をデフォルト値のままにして、[次へ]をクリックします。

[次へ]をもう一度クリックします。
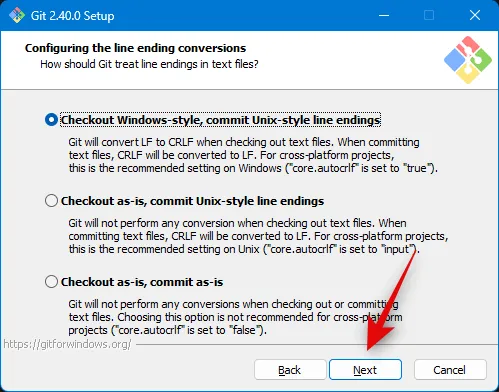
ターミナル エミュレータの選択をデフォルト値のままにして、[Next]をクリックします。
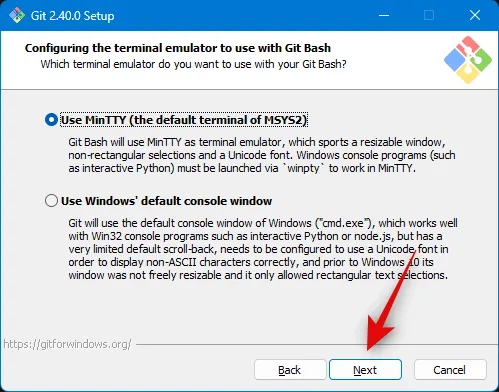
[次へ]をもう一度クリックします。
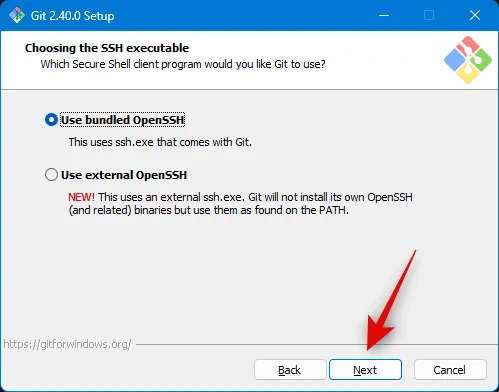
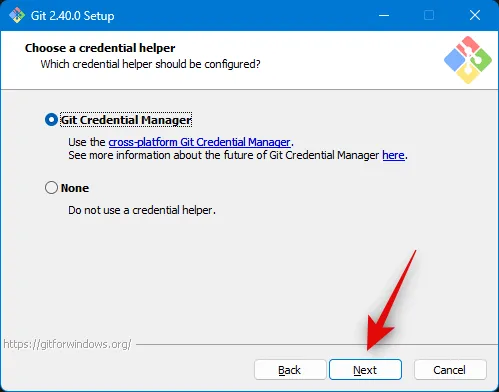
をクリックして[Git Credential Manager]を選択し、[Next]をクリックします。
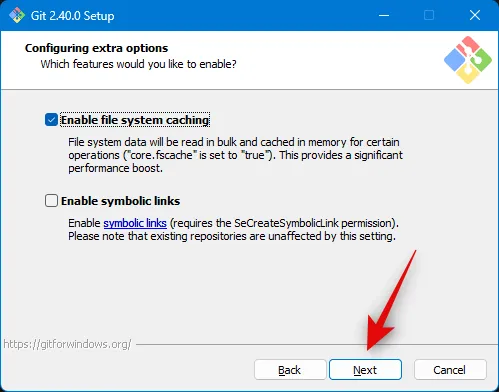
[ファイル システム キャッシュを有効にする]のボックスがオンになっていることを確認し、[次へ]をクリックします。
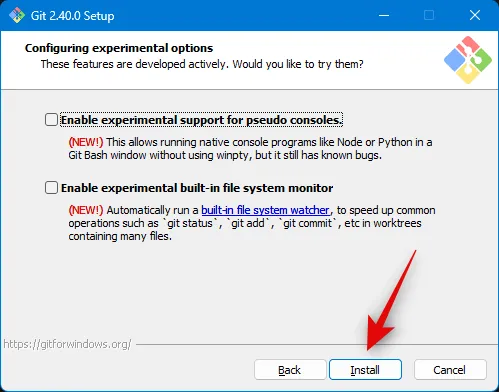
実験的な機能を選択せずに、[インストール]をクリックします。
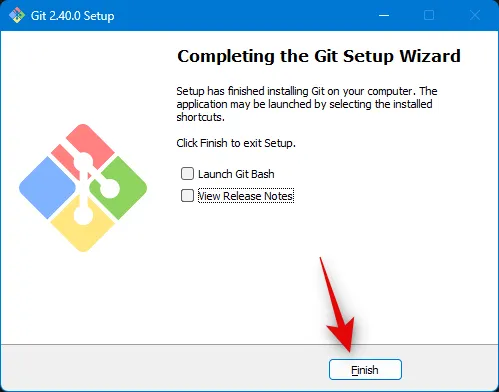
Git が PC にインストールされます。インストールしたら、[完了]をクリックします。
Git が PC にインストールされます。これを使用して、Auto-GPT リポジトリのクローンを作成できます。
ステップ 3: Auto-GPT リポジトリのクローンを作成する
PC にインストールされた Auto-GPT リポジトリのクローンを作成する方法は次のとおりです。
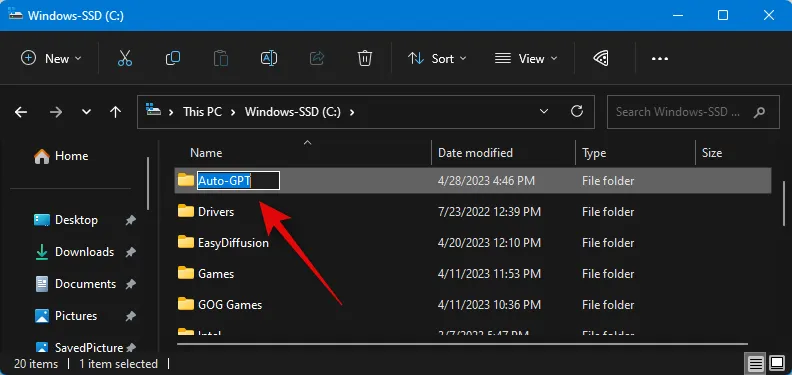
を押してファイル エクスプローラーを開きWindows + E、ブート ドライブを開きます。
キーボードの を押して、Ctrl + Shift + N新しいフォルダーを作成します。新しいフォルダーにAuto-GPTという名前を付けて、Enter キーを押します。
Windows + R完了したら、 を押して[実行] を開きます。

次のように入力して を押しますCtrl + Shift + Enter。
cmd

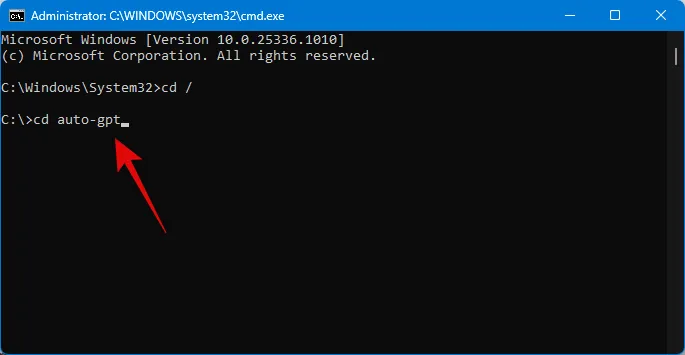
次のコマンドを使用して、ブート ドライブのルートに移動します。
cd /

次に、このコマンドを使用して、新しく作成された Auto-GPT フォルダーに移動します。
cd Auto-GPT
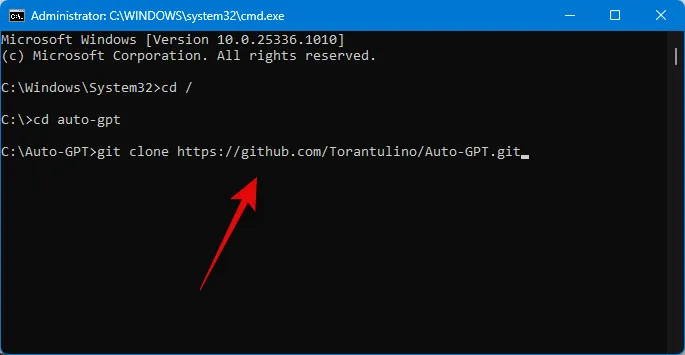
次のコマンドを使用して、リポジトリをクローンします。
git clone https://github.com/Torantulino/Auto-GPT.git
クローンが作成されたら、次のコマンドを使用してコマンド プロンプトを閉じます。
exit

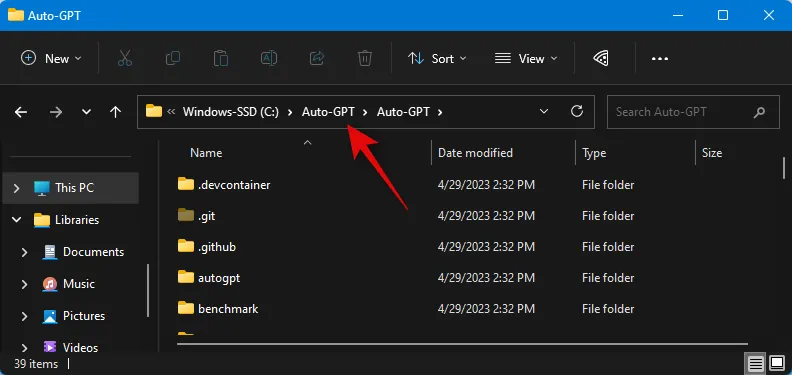
次に、ブート ドライブの次のパスに移動します。
C:\Auto-GPT\Auto-GPT
.env.templateという名前のファイルを右クリックします。

で開くを選択します。
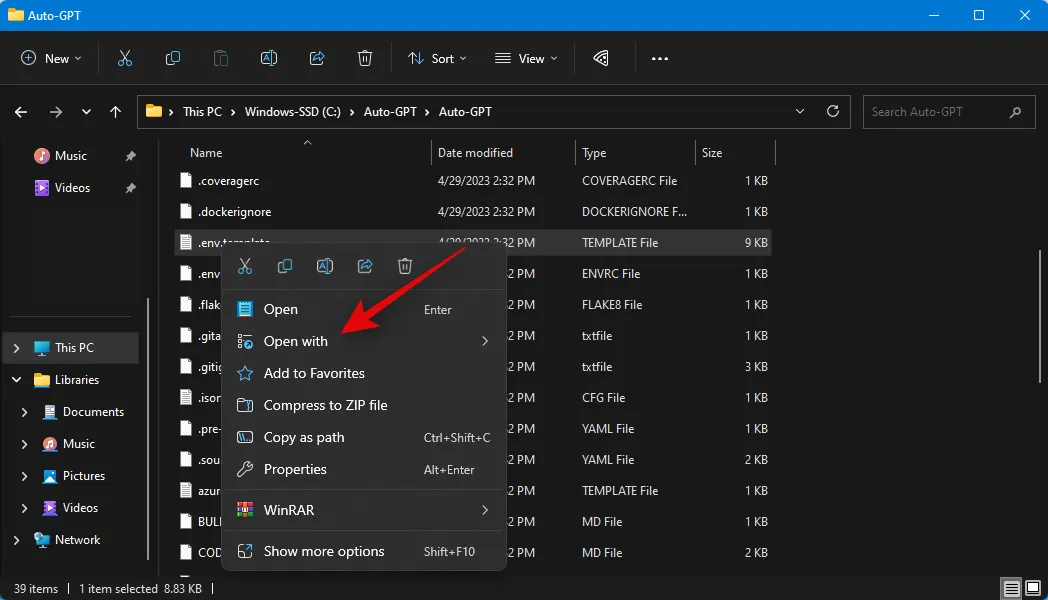
[その他のアプリ] または [別のアプリを選択]をクリックします。
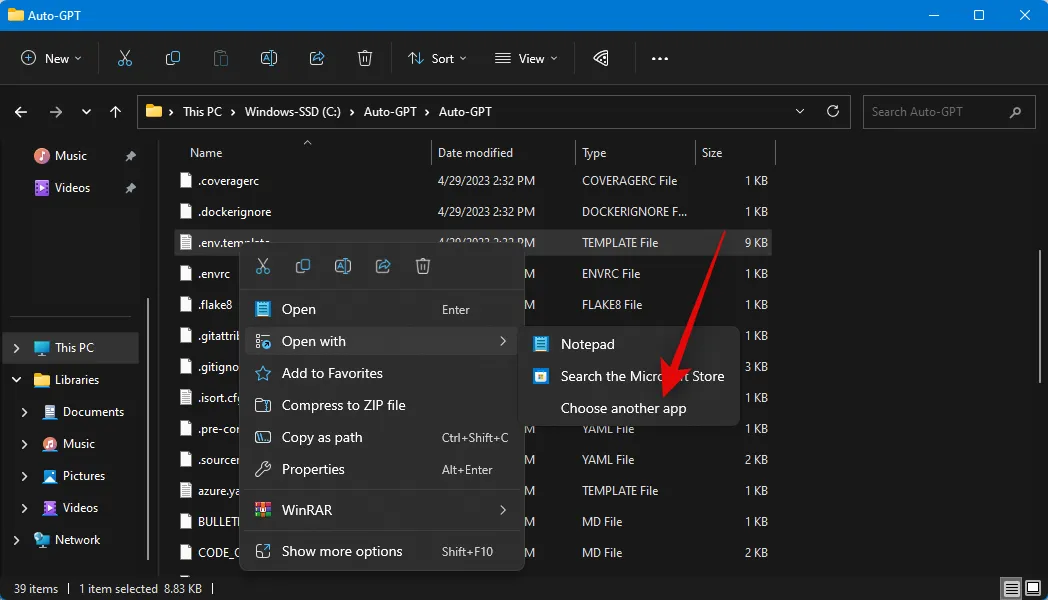
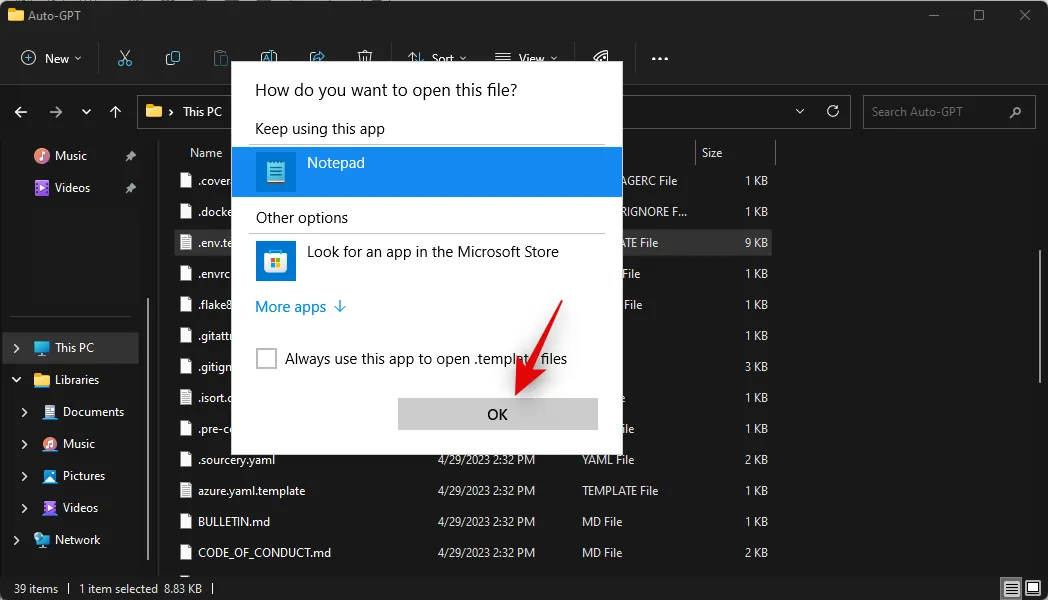
をクリックして[メモ帳]を選択します。
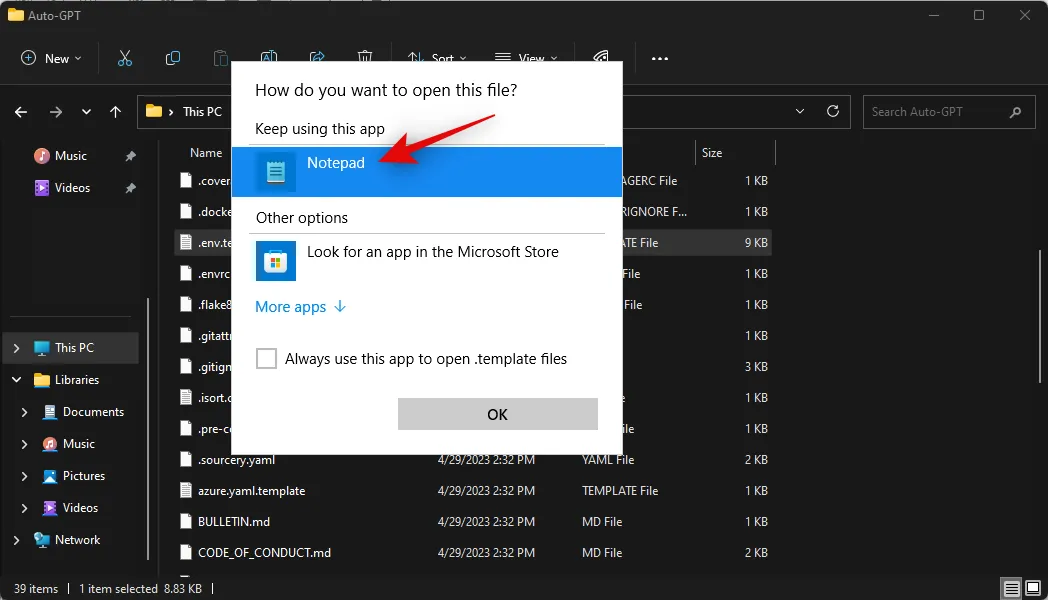
[OK]をクリックします。
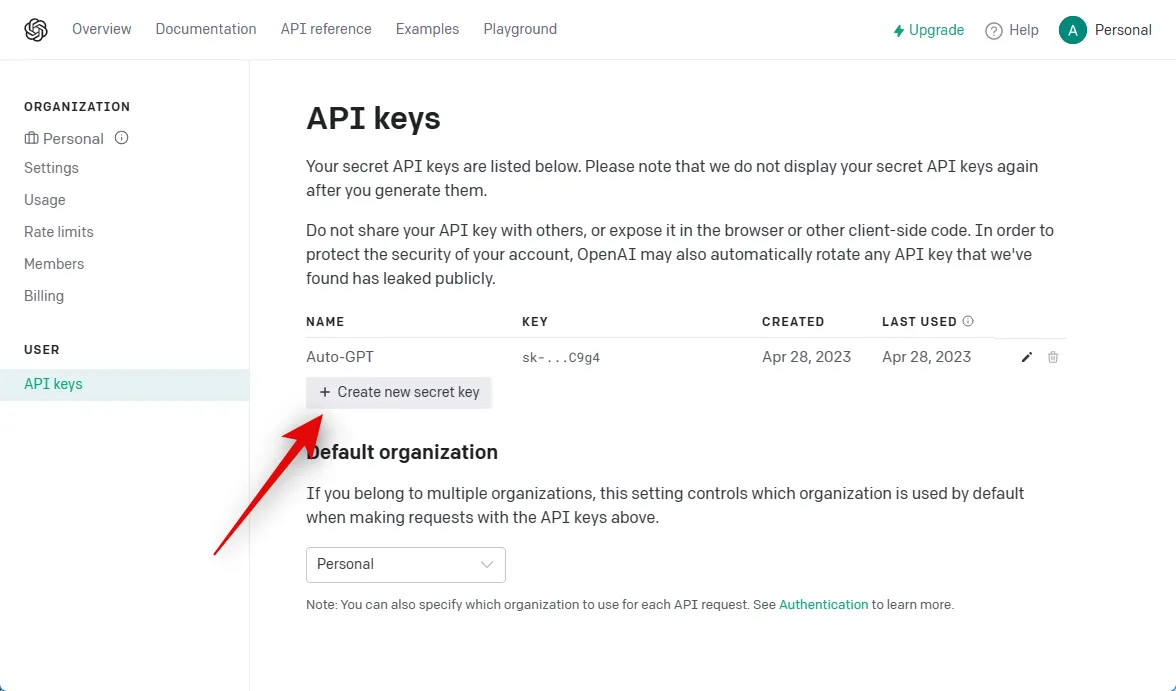
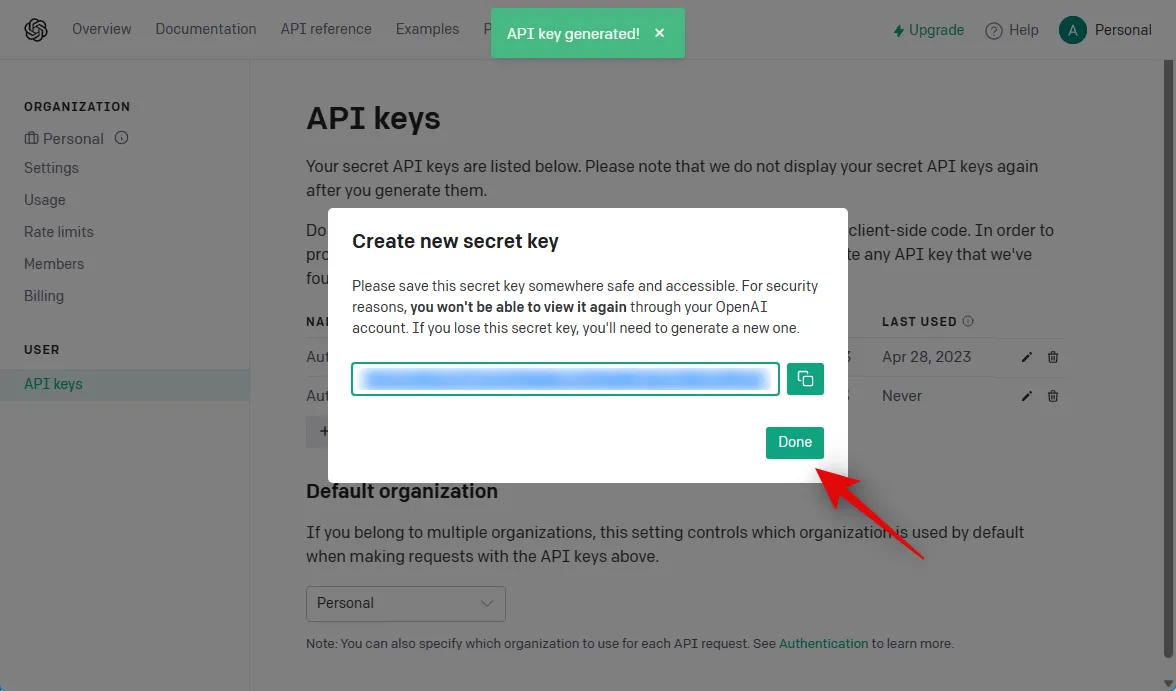
デフォルトのブラウザーに切り替えて、https://platform.openai.com/account/api-keysにアクセスします。必要に応じて OpenAI アカウントにログインし、+ Create new secret keyをクリックします。
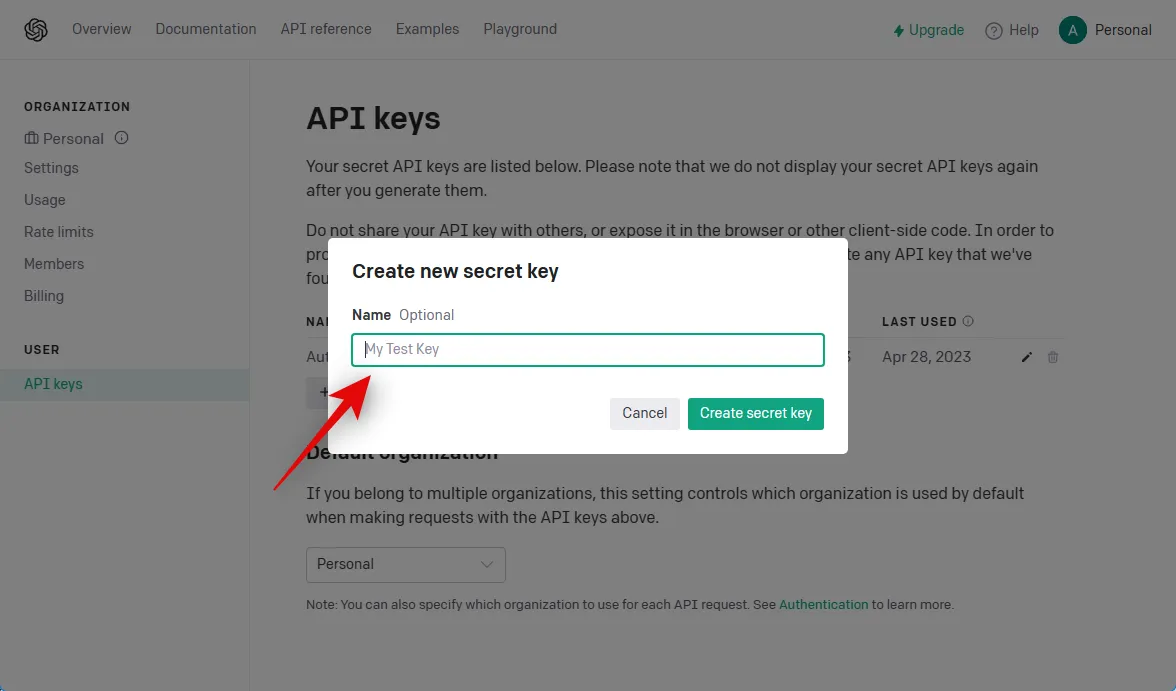
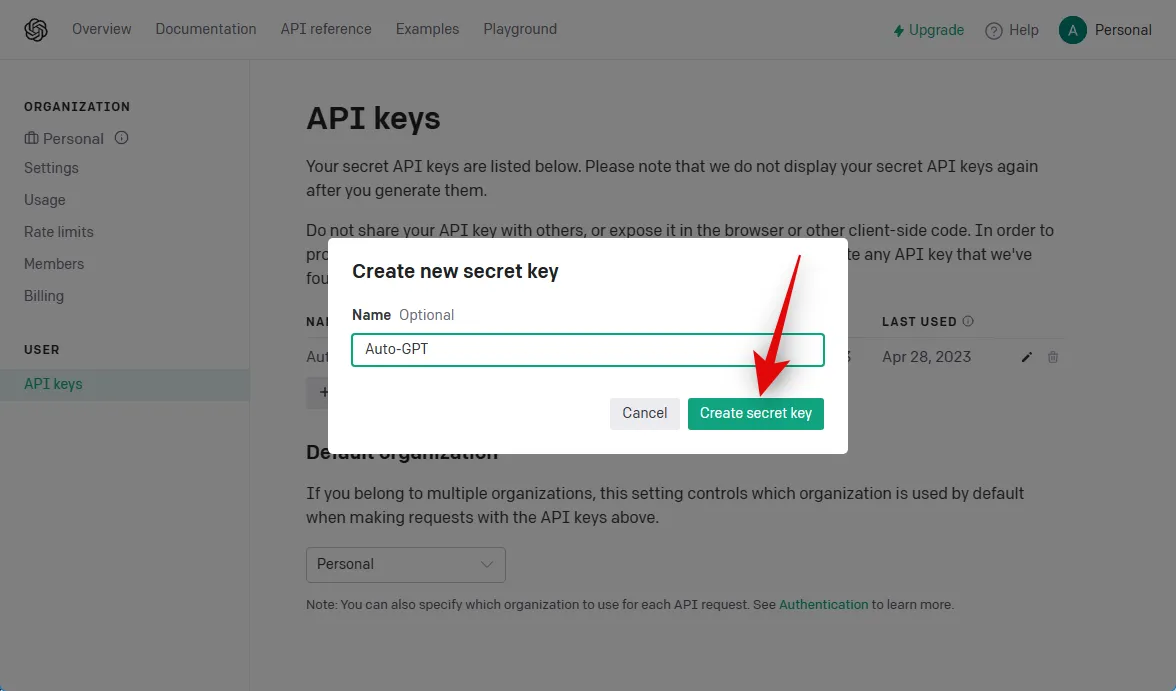
後で簡単に識別できるように、API キーに名前を付けます。このガイドでは、Auto-GPT と名付けましょう。
[秘密鍵の作成]をクリックします。
[コピー]アイコンをクリックして、キーをクリップボードにコピーします。このキーは二度と表示されず、使用することもできません。将来再び使用する場合に備えて、新しいキーを生成する必要があります。したがって、このガイドで後で必要になったときに簡単に入手できるように、一時的に安全な場所に保管しておくことをお勧めします。
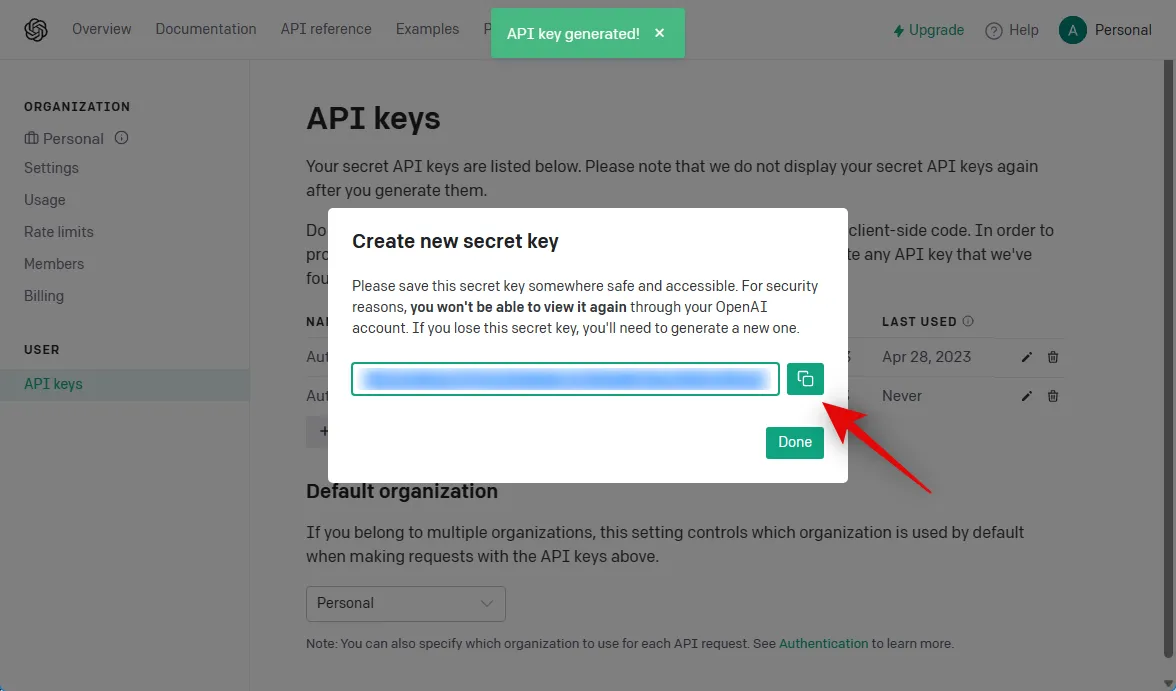
[完了]をクリックします。
メモ帳ファイルに戻り、コピーした API キーをOPENAI_API_KEYの横に貼り付けます。
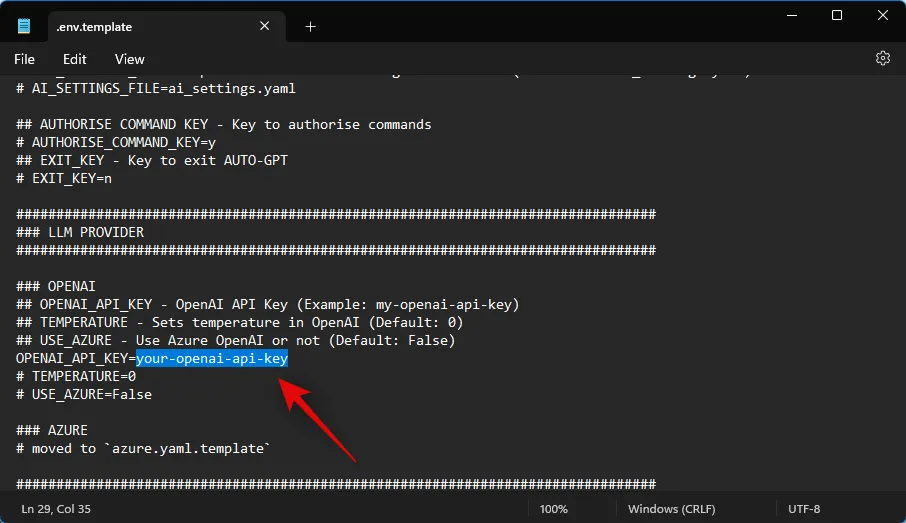
注: your-openai-api-key を置き換えて、値の横に#を付けずにキーを貼り付けます。
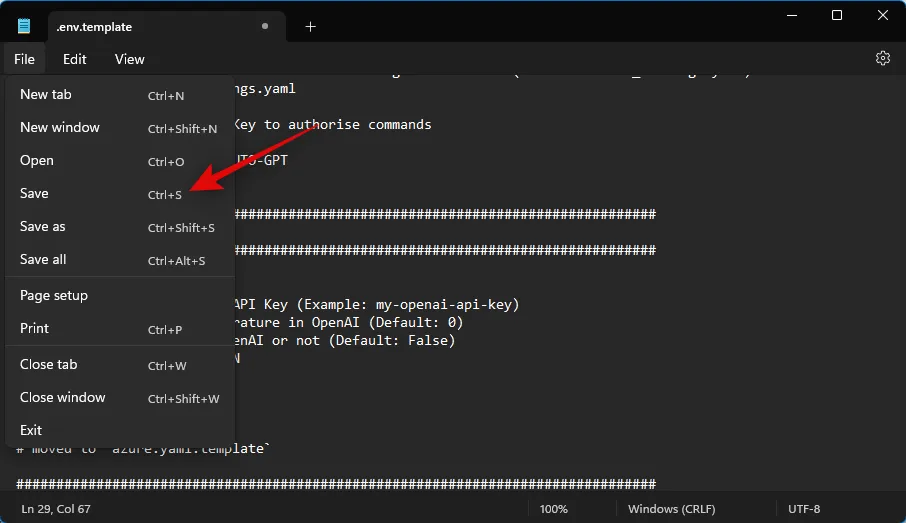
キーボードの を押してCtrl + S、ファイルを保存します。
メモ帳を閉じ、.env.templateファイルをクリックして選択します。F2選択したら、キーボードの を押します。
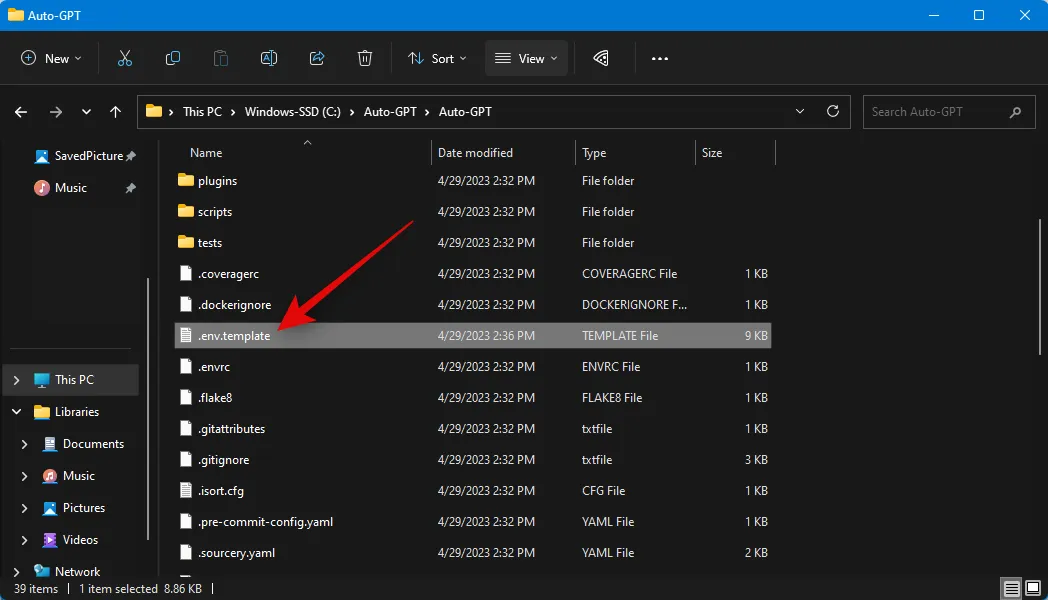
ファイルの名前を.envに変更し、Enter キーを押して変更を保存します。

次のステップを使用して、PC で Auto-GPT を実行するために必要な要件をインストールできます。
ステップ 4: 要件をインストールする
Auto-GPT に必要なコンポーネントを PC にインストールする方法は次のとおりです。
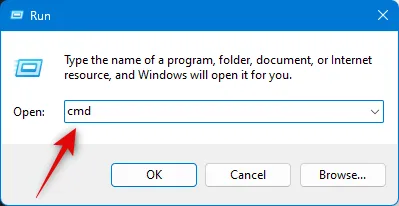
キーボード ショートカットを使用して、PC で [ファイル名を指定して実行] を開きますWindows + R。

次のように入力して を押しますCtrl + Shift + Enter。
cmd

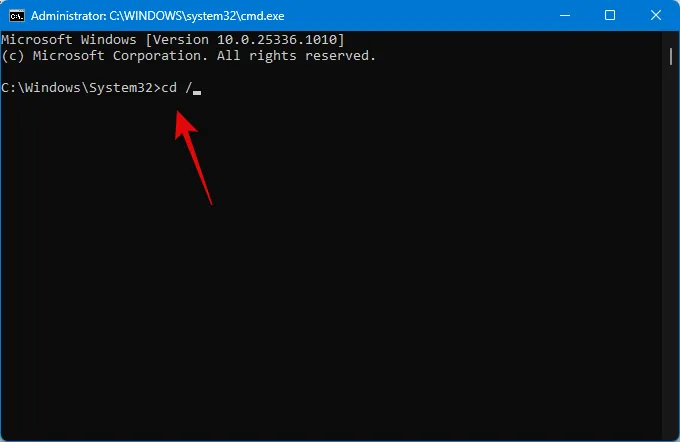
次のコマンドを入力して、Enter キーを押します。
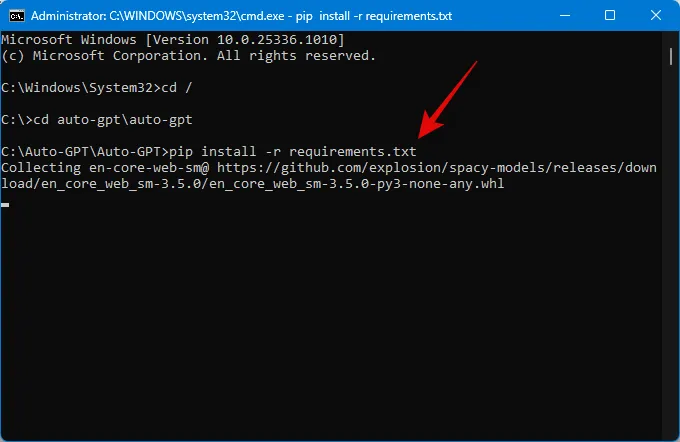
cd /

次のコマンドを実行します。
cd auto-gpt\auto-gpt

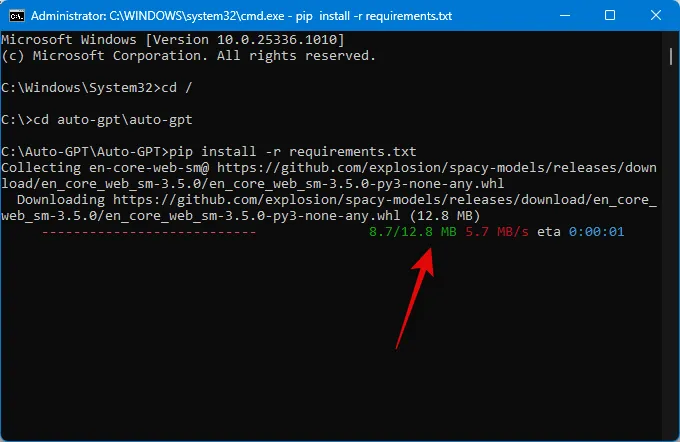
次のコマンドを使用して、必要なコンポーネントを PC にインストールします。
pip install -r requirements.txt
必要なコンポーネントがダウンロードされ、PC にインストールされます。
コマンド プロンプトを閉じないでください。次のステップで、同じウィンドウを使用して PC で Auto-GPT を実行します。
ステップ 5: Auto-GPT を実行する
すべての設定が完了したので、Auto-GPT を実行して使用する方法は次のとおりです。前の手順でコマンド プロンプト ウィンドウを開いたままにしている場合は、以下のガイドの最初のいくつかの手順をスキップできます。以下の手順に従って、プロセスに役立ててください。
キーボード ショートカットを使用して [ファイル名を指定して実行] を開きますWindows + R。次に、以下のコマンドを入力して、Ctrl + Shift + Enterキーボードの を押します。
cmd
次のコマンドを使用して、ブート ドライブのルートに移動します。
cd /
次に、このコマンドを使用して、PC の Auto-GPT インストール ディレクトリに移動します。
cd auto-gpt\auto-gpt

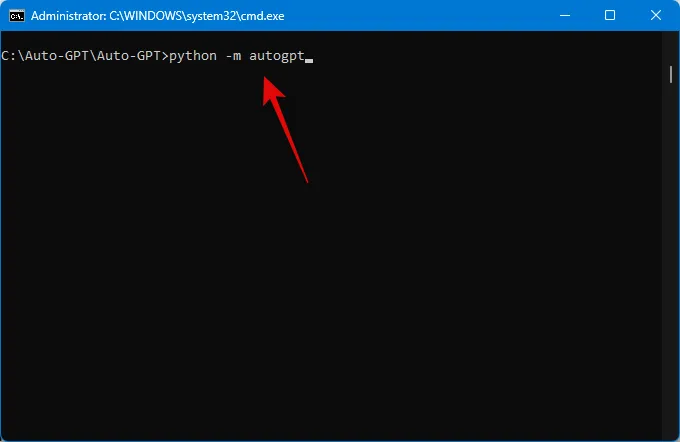
このコマンドを使用して Auto-GPT を実行します。
python -m autogpt
ここで、AI に何をしてもらいたいかを尋ねられます。考えている目標を入力します。目標を入力したら、Enter キーを押します。
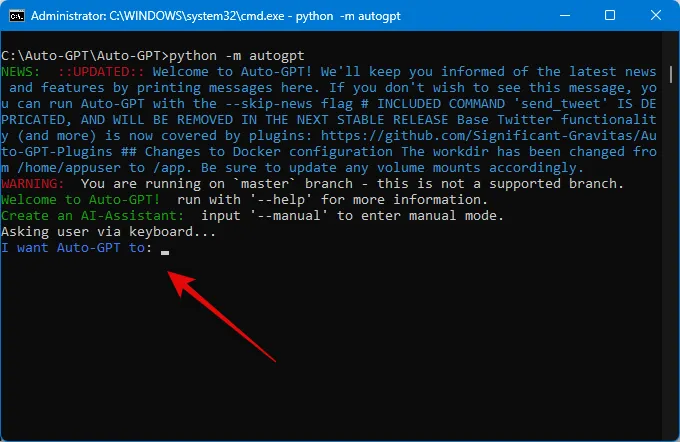
以上です!Auto GPT は割り当てられたタスクを実行するようになり、進行状況をリアルタイムで追跡できるようになります。
Auto-GPT 手動モードに入るには?
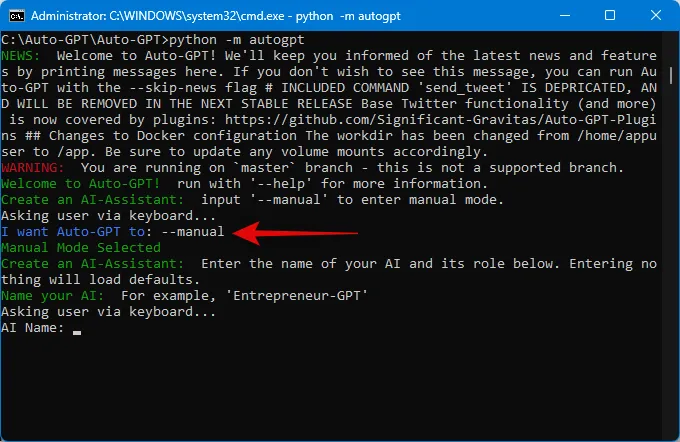
AI に名前を付けて独自の目標を設定できる手動モードに入るには、AI の目標を設定するよう求められたときに–manualと入力します。これにより手動モードに入り、AI の名前を設定したり、ニーズや要件に応じて目標を設定したりできます。
この投稿が、PC で Auto GPT を簡単にセットアップして使用するのに役立つことを願っています。さらに質問がある場合、または問題が発生した場合は、以下のコメントを使用してお気軽にお問い合わせください。


コメントを残す